Precision is everything when you’re working in miniature. Whether you’re crafting a Victorian ball gown for an 18-inch doll or pressing tiny quilt blocks for a dollhouse masterpiece, your tools can make or break the final result. Standard-sized irons, with their bulky soleplates and unwieldy cords, quickly become the enemy of detail work—scorching delicate fabrics, flattening crucial seam allowances, and turning crisp corners into rounded disappointments.
Enter the mini iron: a game-changing tool that transforms frustrating miniature fabric projects into joyful acts of creation. These compact powerhouses deliver targeted heat exactly where you need it, allowing you to press ¼-inch hems, set sharp pleats, and create professional finishes that elevate your doll clothes from homemade to haute couture. But not all mini irons are created equal, and choosing the right one requires understanding the nuanced demands of small-scale sewing.
Top 10 Mini Irons for Doll Clothes
Detailed Product Reviews
1. Dritz 29500 Petite Press Portable Mini Iron,White

Overview: The Dritz 29500 Petite Press is a specialized mini iron designed specifically for crafting, quilting, and sewing applications. Its lightweight construction and ergonomic handle make it comfortable for extended use during detailed projects. The iron features a unique four-position adjustable head and four temperature settings, providing versatility for various materials.
What Makes It Stand Out: The adjustable head sets this mini iron apart, allowing users to position it at different angles for optimal access to tricky spots and detailed work. This feature is particularly valuable for quilters working on intricate patterns or crafters manipulating small fabric pieces. The rapid heating capability means you spend less time waiting and more time creating.
Value for Money: At $32.99, this iron sits in the mid-range price point for crafting irons. While not the cheapest option, the specialized features like the adjustable head and reliable temperature control justify the cost for serious hobbyists. It’s comparable to other craft-specific irons but offers unique positioning flexibility that budget models lack.
Strengths and Weaknesses: Strengths: Four-position adjustable head; ergonomic lightweight design; quick heating; four temperature settings; reputable brand in sewing community Weaknesses: Higher price point than basic models; no digital display; limited to dry ironing only; may be overkill for casual users
Bottom Line: The Dritz Petite Press is an excellent investment for dedicated quilters and crafters who need precision and flexibility. If you frequently work on detailed projects requiring varied angles, the adjustable head feature alone makes it worth the premium price.
2. Clover Mini Iron II -The Adapter (9100)

Overview: The Clover Mini Iron II is a versatile crafting tool that emphasizes adaptability and precision. Weighing exactly one pound, this compact iron is designed for detailed work in sewing, quilting, and various craft projects. It comes with multiple accessories including a small tip, screwdriver, and dedicated iron stand.
What Makes It Stand Out: This iron’s standout feature is its comprehensive accessory package that transforms it into a multi-functional tool. The inclusion of interchangeable tips and a screwdriver for maintenance shows Clover understands the needs of serious crafters. The easy-glide soleplate ensures smooth movement over delicate fabrics and intricate projects.
Value for Money: Priced at $29.10, this mini iron offers solid value for craft enthusiasts who need more than just basic ironing capability. The included accessories and build quality make it competitive with higher-priced alternatives. While it lacks digital features, the mechanical reliability and brand reputation in the sewing community add significant value.
Strengths and Weaknesses: Strengths: Includes multiple tips and accessories; easy-glide soleplate; lightweight at 1 lb; reliable temperature settings; dedicated stand included; trusted brand Weaknesses: No digital temperature display; limited temperature range information; no steam function; accessories may be overwhelming for beginners
Bottom Line: The Clover Mini Iron II is perfect for experienced crafters who appreciate having specialized tips for different techniques. The accessory bundle makes it a versatile workshop addition, though beginners might prefer a simpler model.
3. K KERNOWO Mini Iron for Crafts, 120W Small Tiny Iron for Crafts, Digital Display Adjustable Temperature Mini Patch Clothes Shoes Sewing and Hats, Portable and Lightweight (Orange)

Overview: The K KERNOWO Mini Iron brings modern digital technology to the crafting world with its LED display and precise temperature control. This 120W orange iron offers an impressive temperature range from 100-400°C (212-752°F), making it suitable for everything from delicate fabrics to heat transfer vinyl applications. It includes two interchangeable heads and a stand.
What Makes It Stand Out: The digital display with real-time temperature monitoring is the star feature, giving users unprecedented control over their work. The temperature lock function prevents accidental adjustments mid-project, while the °C/°F switching accommodates international users. The temperature compensation feature ensures accuracy even with calibration drift.
Value for Money: At just $19.99, this is one of the most feature-rich mini irons available at this price point. The digital display alone typically commands a $10-15 premium from competitors. Combined with dual heads and advanced temperature features, it represents exceptional value for both hobbyists and professionals.
Strengths and Weaknesses: Strengths: Digital LED display; wide temperature range (100-400°C); temperature lock and compensation; dual ironing heads; °C/°F switching; 1.4m cable; excellent price Weaknesses: Lesser-known brand; orange color may not appeal to everyone; no dual voltage for travel; no steam function
Bottom Line: The K KERNOWO mini iron is a technological bargain that outperforms many pricier competitors. If you value precise temperature control and digital feedback for heat-sensitive projects, this is the best value option available.
4. BEAUTURAL Mini Travel Steam Iron for Clothes with Dual Voltage, Temperature Control, Non-Stick Soleplate and Cord Storage, Ideal for Sewing, Quilting and Handcraft

Overview: The BEAUTURAL Mini Travel Steam Iron combines portability with versatility, offering both dry and steam ironing capabilities in a compact package. With 420W power and dual voltage compatibility (110-127V/220-240V), it’s designed for globetrotting crafters and sewers. It heats up in just 40 seconds and features three temperature settings.
What Makes It Stand Out: The dual voltage capability makes this iron uniquely suitable for international travel, a feature rarely found in crafting irons. The rapid 40-second heat-up time is impressive for its power class. The ability to switch between dry and steam ironing adds versatility for different fabric types and crafting techniques.
Value for Money: At $21.97, this iron offers tremendous value for travelers and international users. The dual voltage feature alone justifies the price premium over basic mini irons. With steam capability, quick heating, and a 6-foot cord, it punches well above its weight class in features per dollar.
Strengths and Weaknesses: Strengths: Dual voltage for worldwide use; steam and dry ironing modes; heats in 40 seconds; 6-foot power cord; nonstick soleplate; three temperature settings; compact travel design Weaknesses: No digital display; water tank may be small for extended steam use; slightly heavier than non-steam models; no temperature lock feature
Bottom Line: This BEAUTURAL model is the ideal choice for traveling crafters or those who need steam capability. The dual voltage feature and rapid heating make it a versatile tool that justifies every penny of its price.
5. BEAUTURAL Mini Travel Steam Iron for Clothes with Dual Voltage, Non-Stick Soleplate, One Temperature Technology, Detachable Water Tank, Ideal for Sewing, Quilting and Handcraft

Overview: This BEAUTURAL Mini Travel Steam Iron offers simplified operation with its innovative One Temperature Technology, maintaining a consistent 320°F for safe use on all ironable fabrics. Weighing just one pound with dual voltage capability, it’s designed for effortless travel and crafting applications.
What Makes It Stand Out: The One Temperature Technology eliminates guesswork and prevents fabric damage from excessive heat, making it perfect for beginners or those working with mixed materials. The detachable water tank is a convenient feature not found in many competitors, allowing for easy filling and cleaning.
Value for Money: At $18.97, this is the most affordable BEAUTURAL model and one of the best values in travel steam irons. The simplified operation reduces the learning curve while the dual voltage maintains international utility. It’s competitively priced against basic irons while offering steam capability and smart temperature management.
Strengths and Weaknesses: Strengths: One Temperature Technology prevents scorching; dual voltage for travel; lightweight at 1 lb; detachable water tank; steam and dry modes; nonstick soleplate; very affordable Weaknesses: No temperature adjustment limits versatility; no digital display; single temperature may be too low for some applications; smaller water capacity
Bottom Line: This simplified steam iron is perfect for beginners, travelers, or anyone who values safety over customization. The one-temp design takes the stress out of ironing, though advanced users may miss precise control.
6. Mini Iron for Crafts and Travel - Electric Heat Press Machine for Quilting and Sewing (White) - 6.49 x 3.74 x 2.6 Inches

Overview: This ultra-compact mini iron targets crafters and occasional travelers seeking basic functionality. Measuring just 6.5 inches—roughly smartphone length—it prioritizes portability above all else. Operating at 110V only, it delivers dry ironing capability with multiple temperature settings for various fabrics and craft materials.
What Makes It Stand Out: The iron’s standout feature is its diminutive footprint, making it ideal for intricate craft projects like bead fusing and diamond painting. It preheats in just 90 seconds and features a comfortable resin handle with a ceramic heating element. The manufacturer explicitly states it won’t overheat during extended use, addressing a common concern with budget irons.
Value for Money: At $14.99, this is the most budget-friendly option in the mini iron category. It sacrifices advanced features like steam and dual voltage, but delivers essential ironing capability for craft applications and light clothing touch-ups. For beginners or those with minimal needs, it represents solid entry-level value.
Strengths and Weaknesses: Strengths include exceptional portability, rapid heating, craft-specific design, and an unbeatable price point. The ceramic heating element and overheating protection add durability. Weaknesses are significant: no steam function, 110V-only operation limits travel utility, basic build quality may affect longevity, and the small size reduces efficiency on larger garments.
Bottom Line: Best suited for hobbyists working on small projects rather than serious travelers or quilters. If you need a dedicated craft iron for occasional use and prioritize savings over features, this delivers adequate performance. For regular travel or heavy use, invest in a more robust model.
7. PIOMATIC Travel Iron Mini with Steam for Clothes with Dual Voltage, Portable Mini Ironing Machine with Non-Stick Soleplate, Small Iron for Sewing, Quilting and Handcraft

Overview: The PIOMATIC mini iron bridges the gap between basic craft irons and full-featured travel models. Weighing exactly one pound, it combines dry and steam ironing in a dual-voltage package designed for global travelers and DIY enthusiasts who refuse to compromise on functionality.
What Makes It Stand Out: True worldwide compatibility sets this apart, with a manual voltage selector for 100-240V operation. Five steam outlets provide effective wrinkle removal despite the compact size, while the non-stick soleplate glides smoothly. The single-temperature design (320°F) simplifies operation—no guesswork required.
Value for Money: Priced at $18.98, this iron offers excellent mid-range value. You’re paying a modest premium over basic models for steam capability and dual voltage—features essential for travelers. While not as powerful as the IRONDAY, it costs less and weighs significantly less, making it ideal for carry-on luggage.
Strengths and Weaknesses: Major strengths include global voltage compatibility, lightweight portability, versatile steam/dry modes, and user-friendly single-temperature operation. The non-stick soleplate performs reliably on both fabrics and craft materials. Weaknesses include a fixed temperature that may not suit all fabrics, likely smaller water tank capacity (not specified), and less power than premium alternatives.
Bottom Line: An ideal choice for frequent travelers who need steam capability without bulk. Quilters and crafters working abroad will appreciate its versatility. If you prioritize lightweight design and global usability over adjustable temperature control, this iron delivers outstanding convenience and performance for the price.
8. Clover MCI-900 Mini Iron , White

Overview: The Clover MCI-900 represents the premium tier of mini irons, engineered specifically for quilting and sewing precision. Unlike multi-purpose travel irons, this specialized tool focuses exclusively on dry ironing for fabric arts, eschewing steam and dual-voltage features in favor of professional-grade control and build quality.
What Makes It Stand Out: Clover’s reputation for quilting excellence shines through in the precision-machined mini head that navigates tight spots and executes perfect bias techniques. The included stand features rubber-soled feet and a metal holder, providing safe, stable parking during project work—a detail absent in cheaper models. Weighing just 204 grams, it offers exceptional maneuverability.
Value for Money: At $43.98, this is the most expensive option but justifies its price through specialization. You’re investing in a precision instrument, not a multi-tool. For serious quilters, the time saved and quality gained outweigh the cost. Casual users will find better value elsewhere, but professionals recognize the worth of purpose-built equipment.
Strengths and Weaknesses: Strengths include pinpoint accuracy, lightweight design, stable integrated stand, reputable brand quality, and dedicated crafting performance. The resin construction provides durability without weight. Weaknesses: no steam function, 110V-only operation, premium pricing limits accessibility, and it’s over-engineered for simple travel ironing or basic crafts.
Bottom Line: Essential for dedicated quilters and seamstresses who demand precision. If your primary need is detailed appliqué work and bias tape application, this is worth every penny. For general travel or occasional crafting, choose a more versatile and affordable alternative.
9. IRONDAY 1100W Mini Travel Iron with Steam for Clothes with Dual Voltage, 2.7oz Water Tank,Temperature Control, Non-Stick Soleplate, Folding Handle,Portable Small Iron for Sewing,Quilting and Handcraft
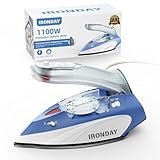
Overview: The IRONDAY 1100W mini iron packs full-size features into a travel-friendly package. This powerhouse delivers professional steam performance with dual-voltage flexibility, targeting serious travelers and crafters who refuse to compromise. The foldable handle and included pouch maximize portability without sacrificing capability.
What Makes It Stand Out: Remarkable 1100W power drives both continuous and burst steam modes, outperforming all competitors. The 2.7oz transparent water tank is class-leading, while vertical steaming transforms it into a garment steamer. Dual voltage with selector switch, 5.9ft cord, and factory water-testing demonstrate attention to detail. The foldable handle is genuinely innovative.
Value for Money: At $22.99, it commands a premium over basic models but undercuts the Clover while offering more features. The power and versatility justify the cost for frequent travelers and serious crafters. You get steam, dual voltage, and high wattage typically found in larger irons—exceptional value for feature-conscious buyers.
Strengths and Weaknesses: Strengths: powerful 1100W heating, large water tank, dual voltage, vertical steaming, transparent tank, long cord, foldable handle, and quality assurance. Weaknesses: heavier than PIOMATIC (1.5 lbs), bulkier design may challenge tight luggage, and more complex operation than single-temperature models.
Bottom Line: The best all-around mini iron for those wanting maximum versatility. International travelers and steam-reliant crafters will appreciate its comprehensive feature set. If you can accommodate the slightly larger size, this delivers the performance of a full-size iron in a remarkably compact form.
Why Mini Irons Are Essential for Doll Clothes & Miniature Fabric Projects
Working at 1:6, 1:12, or even 1:48 scale demands tools that respect the proportions of your project. A standard iron’s soleplate might measure 6-8 inches long—larger than an entire doll’s dress bodice. This size mismatch leads to constant battles: trying to press a ⅛-inch seam allowance without flattening the surrounding fabric, or attempting to maneuver around tiny armholes without creating unwanted creases.
Mini irons typically feature soleplates between 1-3 inches, giving you surgical precision for pressing darts on Barbie-scale garments or flattening seams in miniature quilt blocks. Their lightweight design reduces hand fatigue during marathon crafting sessions, while lower wattage options prevent scorching delicate fabrics like silk chiffon or vintage cottons. The real magic lies in their ability to apply heat with intention, transforming wrinkled fabric swatches into crisp, professional-looking components that assemble into garments worthy of a collector’s display case.
Understanding Different Types of Mini Irons
Mini Steam Irons
Mini steam irons combine dry heat with controlled moisture bursts, making them versatile workhorses for most miniature projects. The steam function proves invaluable when pressing stubborn creases from tightly woven fabrics or setting permanent press in doll clothes that will undergo frequent handling. Look for models with variable steam control—full blast for heavy cottons, gentle mist for delicate silks. The water reservoirs are intentionally small (often 1-2 ounces), preventing the unit from becoming top-heavy while providing enough steam for several garments.
Mini Dry Irons
Purists often prefer dry irons for ultimate control, especially when working with heat-sensitive synthetic fabrics used in modern fashion dolls. Without steam holes creating texture on the soleplate, these irons glide smoothly over the tiniest surfaces. They’re ideal for fusible interfacing application, where excess moisture can interfere with adhesive activation. Many experienced doll dressmakers keep a dry iron dedicated solely to interfacing work, ensuring no mineral buildup or water spots transfer to precious fabrics.
Cordless Mini Irons
Freedom from cords revolutionizes detailed work. Cordless models heat on a base station and retain temperature for 3-5 minutes of uninterrupted pressing. This mobility shines when pressing complex historical costumes with multiple layers, allowing you to rotate the garment freely without fighting cord tangling. The trade-off includes slightly longer heat-up times and the need to return to the base frequently, but for many miniature enthusiasts, the maneuverability outweighs these minor inconveniences.
Mini Iron Presses
These clamshell-style presses operate like tiny heat presses, delivering uniform pressure and temperature across the entire plate. While less nimble for curved areas, they excel at flattening quilt blocks, pressing multiple small pattern pieces simultaneously, and creating perfectly crisp hems on straight edges. Their hands-free operation reduces the risk of burns when pressing dozens of identical components for a dollhouse linen collection.
Specialty Detail Irons
The most specialized category includes irons with shaped soleplates—pointed tips for corners, narrow chisel edges for seams, or even interchangeable heads. These tools cater to specific challenges like pressing the points of a doll’s collar, creating knife-pleats in 1:12 scale skirts, or working inside tiny sleeves. While not always necessary for beginners, they become indispensable as your skills advance into museum-quality reproductions.
Key Features to Consider When Choosing a Mini Iron
Temperature Control & Fabric Settings
Variable temperature control isn’t just a luxury—it’s essential for preserving your fabric investments. Doll clothes often combine materials: a cotton bodice lined with polyester, or a silk skirt with a fusible interfacing. Precise temperature dials or digital displays allow you to select exact heat levels for each fabric type. Seek irons with clearly marked settings for nylon, silk, wool, cotton, and linen, plus a dedicated “interfacing” setting that activates adhesive without scorching.
Soleplate Material & Size
Ceramic soleplates distribute heat evenly and glide effortlessly, but can chip if dropped on a metal work surface. Stainless steel offers durability and easy cleaning, though it may develop hot spots in lower-quality models. Non-stick coatings prevent adhesive residue buildup but require gentle handling to avoid scratches. For soleplate size, 1-inch tips handle ultra-fine detail, while 2-3 inch plates balance precision with efficiency for larger miniature quilts.
Wattage & Heating Speed
Mini irons typically range from 150-800 watts. Lower wattage (150-300W) suits delicate vintage fabrics and prevents overheating in tight spaces. Mid-range (400-600W) offers the best versatility, heating quickly while remaining manageable. Higher wattage (700W+) powers through heavy fabrics but demands careful temperature monitoring. Consider your primary projects: historical costume reproductions with heavy brocades need more power than modern t-shirt dresses for fashion dolls.
Weight & Ergonomics
A mini iron should feel like an extension of your hand, not a workout weight. Ideal units weigh between 8-16 ounces, with well-balanced weight distribution preventing tip-heaviness. Ergonomic handles with textured grips prevent slipping during intricate maneuvers. Test the button placement—steam triggers should be accessible without requiring thumb contortions that compromise control.
Steam vs. Dry Functionality
Dual-function irons offer the most flexibility, but examine how steam is delivered. Vertical steam capability lets you steam hanging doll clothes directly on their hangers, refreshing garments without removing them from displays. Check whether the steam vents are positioned to avoid spitting water onto your work—a common flaw in budget models that can stain delicate fabrics.
Cord Length & Swivel Design
A 6-8 foot cord provides adequate reach across most crafting tables, but cord quality matters more than length. 360-degree swivel bases prevent the cord from twisting and pulling the iron off your pressing surface—a disaster when working with heat-sensitive materials. Retractable cords keep your workspace tidy, while detachable cords offer storage convenience.
Safety Features & Auto-Shutoff
Auto-shutoff features typically activate after 8-15 minutes of inactivity, a crucial safeguard in crafting spaces where distractions abound. However, some models allow you to disable this for continuous use during long pressing sessions. Cool-touch handles and heat-resistant stands protect your work surface and fingers. LED indicator lights that clearly show “heating” versus “ready” status prevent accidental burns.
Price vs. Quality Considerations
Budget mini irons ($15-25) work for occasional projects but often suffer from inaccurate temperature control and short lifespans. Mid-range options ($30-60) provide reliable performance for serious hobbyists. Professional-grade mini irons ($70-150) offer precision engineering, replaceable parts, and warranties that justify the investment if you’re selling your creations or entering competitions. Consider cost-per-use: a $80 iron that lasts five years costs pennies per project.
The Importance of Precision in Miniature Ironing
Working with Tiny Seams and Hems
A ¼-inch seam allowance in doll clothes is standard, but pressing it open requires tools that won’t crush the surrounding fabric. Mini irons allow you to press one side of the seam at a time, using the narrow tip to get right up to the stitching line without distorting the garment shape. For ⅛-inch hems on doll skirts, the precision tip creates a crisp fold line that stays put during hand-stitching, eliminating the need for pins that can leave permanent holes in delicate fabrics.
Pressing Curves and Contours
Doll bodies are cylindrical, not flat, making curved pressing essential. The pointed tip of a mini iron lets you “walk” along curved seams, pressing small sections while the rest of the garment hangs naturally. For sleeve caps and bodice princess seams, this prevents the flattening that occurs when you force curved pieces onto a flat pressing board. Some advanced techniques involve pressing over a tailor’s ham shrunk to doll scale, using the mini iron’s light weight to avoid compressing the ham’s shape.
Handling Delicate Fabrics
Silk taffeta, fine batiste, and vintage lace require gentle heat and minimal pressure. Mini irons excel here because their small mass naturally applies less force than full-sized irons. You can hover the iron ⅛-inch above fabric to steam without contact, or use a silk organza pressing cloth that lets you see exactly where you’re pressing. The reduced steam output prevents water spots on fabrics that show every droplet, while the quick cool-down time lets you switch from silk to velvet without waiting ages between temperature changes.
Safety Considerations for Mini Iron Use
Burn Prevention in Detailed Work
When your fingers are inches from a 400°F surface, protection becomes paramount. Silicone finger guards allow you to hold tiny hems in place while pressing, though they reduce tactile feedback. Many experienced miniaturists prefer to use tweezers or hemostats to manipulate fabric, keeping fingers completely clear. Always press on a stable, heat-resistant surface at a comfortable height—reaching across a cluttered table leads to accidents. Establish a “no-talk zone” during critical pressing moments to maintain focus.
Proper Storage and Cooling
Mini irons cool faster than standard irons, but still require 15-20 minutes to reach room temperature. Invest in a heat-resistant silicone mat where the iron can rest safely immediately after use. Wall-mounted holders keep the iron accessible but out of harm’s way, while drawer inserts with heat-proof compartments organize multiple irons if you collect different types. Never wrap the cord around a hot iron—this degrades the insulation and creates fire hazards.
Electrical Safety in Crafting Spaces
Craft rooms often host multiple heat tools simultaneously: glue guns, embossing tools, and irons. Use a dedicated surge protector with a 15-amp rating for your mini iron, preventing voltage fluctuations that can damage heating elements. Check cords monthly for fraying, especially near the plug and iron connection points. Unplug when filling water reservoirs to avoid electrical shocks from spills, and never leave a heating iron unattended, even for “just a minute.”
Techniques for Perfectly Pressed Miniature Garments
Pressing vs. Ironing: The Critical Difference
Ironing involves sliding the iron across fabric to remove wrinkles—disastrous for doll clothes where distortion ruins fit. Pressing means lifting and lowering the iron, applying heat and pressure without stretching. For miniature work, always press: place the iron down for 2-3 seconds, lift straight up, move to the next spot, and repeat. This technique preserves grainlines and prevents bias stretching that can turn a perfectly fitted sleeve into a twisted mess.
Building Crisp Corners and Points
Doll collars, cuffs, and pocket flaps demand military-sharp points. Start by pressing the seam allowances open before turning right-side out. Use a point turner (or a blunt tapestry needle) to gently push out the corner, then press with the mini iron’s tip, sliding it exactly into the point for 2 seconds. For extra crispness, apply a tiny dab of spray starch to the seam allowance before pressing—this creates a memory in the fabric that holds the point shape through multiple handlings.
Creating Professional-Looking Hems
Double-fold hems on doll clothes hide raw edges and prevent fraying. Press the first ⅛-inch fold using the mini iron’s edge, then fold again and press the final hem. For curved hems (like circle skirts), clip the seam allowance every ¼-inch before pressing to allow the fabric to curve smoothly. Press over a piece of card stock cut to the hem’s curve to maintain a consistent shape. This technique eliminates the puckering that screams “amateur” in competition-level work.
Pressing Darts and Pleats in Doll Clothes
Darts shape flat fabric to three-dimensional doll bodies. Press darts from the wrong side, using a pressing ham or rolled towel to support the dart’s shape. Always press from the widest part toward the point, stopping ⅛-inch before the tip to prevent a pucker. For knife pleats, press each fold individually with the mini iron’s edge, then slip a piece of freezer paper between pleats to hold them while pressing the next. This creates crisp, uniform pleats that maintain their shape during construction.
Maintaining Your Mini Iron for Longevity
Cleaning the Soleplate
Fusible interfacing residue, spray starch buildup, and melted synthetic fibers can ruin a mini iron’s performance. For light cleaning, iron over a damp cloth while the iron is warm (not hot). For stubborn residue, make a paste of baking soda and water, apply to the cool soleplate, let sit for 10 minutes, then scrub gently with a soft toothbrush. Never use metal scrapers or abrasive pads—they scratch the surface and create snagging points for delicate fabrics. Commercial iron cleaners work but test them first; some contain harsh chemicals that emit fumes when heated.
Descaling Steam Functions
Mineral deposits clog steam vents, reducing output and potentially spitting brown water onto white doll dresses. If you use tap water, descale monthly by filling the reservoir with equal parts distilled water and white vinegar. Heat the iron, let it steam for 2 minutes, then unplug and cool completely. Empty and rinse with distilled water. For heavy buildup, use a commercial descaler, but run several steam cycles with distilled water afterward to flush all residue. Consider using only distilled water to prevent scale entirely.
Proper Storage Practices
Store mini irons horizontally in a dedicated drawer or hanging rack—upright storage can cause water to leak into internal components. Wrap cords loosely with Velcro ties, never tightly with rubber bands that stress the wires. Include a silica gel packet in the storage container to absorb moisture and prevent rust on metal parts. If storing long-term, run the iron dry to empty the water reservoir completely, preventing mold and mineral crust inside the tank.
Common Mistakes to Avoid
Overheating Delicate Miniature Fabrics
That vintage silk from your grandmother’s attic might be labeled “silk setting,” but mini irons heat more intensely per square inch than standard irons. Always test temperature on a fabric scrap, starting 50°F lower than recommended. For unknown fabrics, use the “cotton ball test”: press a dry cotton ball with the iron. If it scorches or melts, the iron is too hot for delicate work. Remember, you can always press longer, but you cannot un-scorch fabric.
Using the Wrong Ironing Surface
Your dining room table covered with a towel is not a pressing surface. The uneven padding creates distorted seams, while inadequate heat protection damages furniture. Invest in a proper pressing board or create a DIY version with multiple layers: plywood base, wool batting, cotton canvas cover. The firm surface transfers heat effectively, while the wool retains moisture from steam, preventing water spots on your work.
Neglecting Temperature Settings
Leaving your mini iron on a single setting for all fabrics is a recipe for disaster. Develop a habit of checking and adjusting temperature between every fabric change. Keep a reference chart taped near your work area: organza (230°F), silk (300°F), cotton (400°F), etc. When switching from high to low heat, press a scrap piece of muslin to absorb excess heat faster—this prevents accidentally melting the next delicate piece while waiting for cooldown.
DIY Ironing Surfaces for Miniature Projects
Creating a Custom Pressing Board
For doll clothes, a 12x18 inch board often suffices. Cut ½-inch MDF to size, wrap with two layers of wool felt, then cover with 100% cotton muslin. Pull the muslin taut and staple to the underside. For extra firmness, add a layer of heat-resistant ironing board fabric between the felt and muslin. Create a smaller 6x6 inch “ham” version by wrapping wool around a tennis ball, covering with cotton, for pressing sleeve caps and curved seams.
Using Heat-Resistant Mats
Silicone heat-resistant mats (rated to 600°F) protect your work surface while providing a slightly grippy texture that prevents fabric from sliding. Place the mat on a thick magazine or catalog—the glossy pages reflect heat back into the fabric, effectively pressing both sides simultaneously. For travel crafting, these mats roll up easily, letting you press doll clothes in hotel rooms or at crafting retreats without damaging furniture.
The Role of Pressing Cloths
Never press directly on right-side fabric when working with delicate materials or dark colors that might shine. Silk organza pressing cloths are superior to cotton because they’re transparent, letting you see exactly where you’re pressing. For high-heat applications like cotton voile, use a dry piece of scrap muslin. When applying fusible interfacing, use a Teflon pressing sheet—not only does it prevent sticking, but it also allows you to reuse interfacing scraps, pressing multiple small pieces at once without waste.
Advanced Tips for Professional Results
Using a Tailor’s Ham for Curves
Standard tailor’s hams are too large for doll clothes, but you can create scaled versions. Fill a child’s sock with sawdust, shape it into a ham, and stitch closed. Cover with cotton fabric. Use the mini iron to press curved seams over this ham, rotating the garment as you work. The firm yet yielding surface supports the fabric’s natural curve, preventing the flat spots that occur when pressing on a board.
Employing a Seam Roll for Tiny Seams
Seam rolls prevent seam impressions from showing through to the right side of the fabric. For miniature work, roll a magazine tightly and wrap with cotton fabric. Press seams open over this roll—the iron contacts only the seam allowance, leaving the garment body untouched. This technique is crucial for sheer fabrics where seam allowances would shadow through, and for lined garments where you don’t want the lining to show impressions.
Working with Interfacing in Small Scale
Fusible interfacing adds body to doll clothes but can stiffen small areas excessively. Cut interfacing 1/16-inch smaller than the pattern piece to prevent it from fusing to your pressing surface. Use the mini iron’s tip to press from the center outward, eliminating air bubbles that cause puckering. For very lightweight fabrics, fuse the interfacing to the fabric before cutting the pattern piece—this prevents distortion and ensures perfect alignment.
Project Ideas to Master Your Mini Iron Skills
Historical Costume Replicas
Recreate a 1770s Robe à la Polonaise in 1:6 scale, mastering the art of pressing voluminous pleats and intricate trim applications. The mini iron’s precision lets you press tiny cartridge pleats into silk taffeta and set the perfect point on a lace fichu. Document each pressing step with photos—judges at doll conventions scrutinize pressing quality as a mark of authenticity.
Modern Fashion Doll Wardrobes
Design a capsule wardrobe for a Blythe doll, focusing on contemporary fabrics like stretch denim and jersey knits. Use the mini iron to press perfect topstitching on miniature jeans and set seamless hems on knit dresses without stretching. The steam function helps block acrylic yarn sweaters to size, while the dry setting prevents melting spandex blends.
Miniature Quilting Projects
Create a 1:12 scale quilt with ½-inch finished squares. Press each seam after sewing, using the mini iron’s tip to nest seams perfectly. The small soleplate lets you press individual blocks without disturbing adjacent pieces. For paper-piecing, press directly on the paper foundation—the mini iron’s lower heat won’t scorch the paper while setting fabric folds crisply.
Dollhouse Linens and Textiles
Furnish an entire dollhouse with pressed linens: tiny pillowcases with crisp cuffs, tablecloths with mitered corners, and curtains with perfect pleats. Use the mini iron to create hospital corners on 1:12 scale bedsheets and press lace trim onto dollhouse bedding. The precision tip lets you press hems on curtains while they’re still attached to the dollhouse windows, working around miniature hardware.
Troubleshooting Common Issues
Uneven Heating Problems
If your mini iron develops hot spots, test by pressing a piece of white cotton fabric sprinkled with water. Dry spots indicate heating element failure. For minor unevenness, try using a heat diffuser—a piece of aluminum foil placed between the iron and fabric distributes heat more uniformly. Persistent problems require professional repair or replacement; uneven heat will scorch projects and cannot be compensated for with technique.
Sticky Residue on Soleplates
Melted synthetic fibers create stubborn gunk. While the iron is warm, press it onto a piece of brown paper bag to lift off fresh residue. For cured-on mess, use a soleplate cleaning stick (essentially solid detergent) following manufacturer instructions. If residue remains, it may have etched into the soleplate material—time for professional resurfacing or replacement. Never use sandpaper or steel wool; you’ll destroy the soleplate’s finish.
Inadequate Steam Production
Weak steam often stems from mineral buildup, but can also indicate a failing heating element that can’t reach steam-generating temperature. First, descale thoroughly. If steam remains weak, check the water intake valve for clogs—use a pin to clear any visible blockages. Still no improvement? The thermostat may be failing to reach the 212°F needed for steam. This repair typically costs more than a new mini iron unless it’s a high-end model.
Frequently Asked Questions
What’s the difference between a mini iron and a travel iron?
Travel irons prioritize compact storage and dual-voltage for international use, often sacrificing temperature precision and soleplate quality. Mini irons designed for crafting feature finer temperature control, smaller soleplates (1-2 inches vs. 3-4 inches), and often include specialty tips for detail work. While you can use a travel iron in a pinch, it won’t provide the precision that miniature sewing demands.
Can I use regular tap water in my mini iron’s steam function?
You can, but you shouldn’t. Tap water contains minerals that clog steam vents and leave brown residue on white doll clothes. Distilled water prevents scale buildup and extends your iron’s lifespan. If you must use tap water, descale monthly with vinegar solution. Never use bottled “spring water”—it contains as many minerals as tap water.
How do I press tiny doll sleeves without creating creases?
Turn the sleeve right-side out and press the seam allowances open first. Then, create a pressing template by rolling a piece of cardstock into a cylinder slightly smaller than the sleeve. Slip this inside the sleeve and press around it with the mini iron’s tip, rotating as you go. This supports the fabric’s curve while preventing creases from the iron’s edge.
What’s the ideal temperature for pressing cotton doll clothes?
Pure cotton typically presses best at 400°F (the “cotton” setting). However, many “cotton” doll fabrics are actually cotton-polyester blends that scorch at that temperature. Start at 350°F (the “wool” setting) and test on a scrap. For lightweight cottons like voile, reduce to 300°F. Remember: you can always increase heat, but you can’t un-scorch fabric.
Should I press seams open or to one side for doll clothes?
Press open for most garment construction—it reduces bulk in miniature scale. However, press to the side when sewing quilts or when a pattern specifically calls for it. For very sheer fabrics, pressing open can cause seam allowances to shadow through; in these cases, press to one side and trim the under-seam to half width.
How often should I clean my mini iron?
Clean the soleplate after every project involving fusible materials or starch. Descale steam functions monthly if using distilled water, bi-weekly if using tap water. A quick wipe with a damp cloth while the iron is still warm (but unplugged) after each use prevents buildup. Think of it like brushing your teeth—regular maintenance prevents major problems.
Can I press over pins when making doll clothes?
Never press over pins—the heat transfers through metal pins and creates permanent holes or melt spots in delicate fabrics. Use fine silk pins and remove them as you approach with the iron. For holding power during pressing, use wonder clips or baste with hand-stitching that can be easily removed. If you must pin, place pins perpendicular to the seam, beyond where the iron will reach.
What’s the best way to press velvet for doll clothes?
Velvet requires special handling to avoid crushing the pile. Use a needle board or piece of scrap velvet (pile side up) as a pressing surface. Place your velvet garment face-down on this, and press from the wrong side using only steam—don’t let the iron touch the fabric. For stubborn areas, hover the iron ½-inch above and blast with steam, then finger-press while damp.
How long should a quality mini iron last?
With proper maintenance, a mid-range mini iron should last 3-5 years of regular use. Professional models can last a decade or more with occasional part replacement. Signs it’s time to replace: inconsistent heating that cleaning doesn’t fix, steam function failure, or a damaged cord. If repairs cost more than half the iron’s replacement value, invest in a new one.
Can I use my mini iron for other crafts besides doll clothes?
Absolutely. Mini irons excel at paper crafting (setting adhesive on cards), embossing, appliqué work, and even small woodworking projects (veneer application). They’re perfect for pressing seams in cosplay armor made from EVA foam, and indispensable for miniature quilting. Just dedicate one iron to fabric-only use to avoid transferring adhesives or finishes that could ruin doll clothes.