There’s something deeply satisfying about diagnosing that mysterious thump from your laundry room and realizing it’s a $15 belt—not a $400 service call. Belts and pulleys are the unsung heroes of washers and dryers, translating electric motor power into the drum rotation that cleans and dries your clothes. While they’re designed to last years, these components face constant heat, moisture, tension, and friction, making them prime candidates for DIY replacement.
This year, with supply chain disruptions stabilizing and appliance repair information more accessible than ever, tackling laundry machine repairs yourself isn’t just economical—it’s empowering. Whether you’re dealing with a squealing dryer, a washer that won’t spin, or simply want to stock your garage with the right parts before disaster strikes, understanding belt and pulley fundamentals separates the weekend warriors from the folks who actually fix things right the first time.
Top 10 Belts & Pulleys for DIY Laundry Repairs
Detailed Product Reviews
1. UPGRADED BlueStars 4392067 Dryer Repair Kit & W10837240 Idler Pulley - For Whirlpool, Maytag, Kenmore Dryer MEDB835DW4 MGDB835DW4 MEDB855DC4 MEDB835DC4 GEW9250PW1 GEW9250PW0 GGW9250PW3 GGW9200LW1
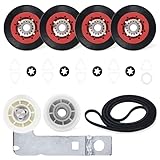
Overview: The BlueStars 4392067 Dryer Repair Kit offers a comprehensive solution for homeowners tackling common dryer malfunctions across major brands. Designed for 27-inch and 29-inch Whirlpool, Maytag, and Kenmore models built after 2007, this all-in-one package includes drum rollers, idler pulley components, and a drive belt. At $23.99, it addresses the most frequent failure points in modern dryers, from squealing bearings to snapped belts that prevent tumbling. The kit’s compatibility spans dozens of specific models, though careful verification is essential before purchase.
What Makes It Stand Out: This kit’s standout feature is its complete approach to dryer rehabilitation rather than piecemeal fixes. Instead of troubleshooting individual components, you replace the entire wear-prone system simultaneously. The included W10837240 idler pulley and 279640 tensioner work in tandem with four W10314173 drum rollers and a 661570V belt, ensuring all moving parts share the same lifespan. The manufacturer offers direct compatibility assistance, inviting customers to submit model numbers for verification—a rare level of pre-purchase support in the aftermarket parts space.
Value for Money: At under $24, this kit delivers exceptional value compared to OEM parts that could cost $60-80 individually or professional service calls exceeding $150. The DIY-friendly design eliminates labor costs entirely, while the comprehensive replacement strategy prevents future breakdowns. Considering most dryer failures involve multiple worn components, replacing everything at once is more economical than sequential repairs. The one-year warranty adds further financial protection.
Strengths and Weaknesses: Strengths include complete parts coverage, broad brand compatibility, detailed installation guidance, and proactive customer support. The high-quality rollers feature durable tri-rings and washers for stable drum operation. However, the kit requires careful model verification—not universal for all 27" or 29" dryers. The belt’s specific dimensions (93.5" x 0.25" with 4 ribs) must match exactly, and some users may find the installation process intimidating despite DIY claims.
Bottom Line: For mechanically-inclined homeowners with compatible dryers, this BlueStars kit is an outstanding investment that restores full functionality at a fraction of professional repair costs. The comprehensive approach and manufacturer support make it a smart choice for addressing multiple wear issues simultaneously.
2. Lunarlipes Upgraded Dryer Rollers Kit Compatible with LG Kenmore Dryers Parts Includes Drum Roller 4581EL2002C Dryer Belt 4400EL2001A and Idler Pulley 4561EL3002A, Figures 6 and 7 are Fit Models
Overview: The Lunarlipes Upgraded Dryer Rollers Kit targets LG and Kenmore dryer owners experiencing performance degradation. This $29.99 package includes four 4581EL2002C drum rollers, a 4400EL2001A drive belt, 4561EL3002A idler pulley, and installation spring. Compatible with numerous models like DLE2301R and DLEX7177RM, the kit addresses the three most common dryer failures: noise, startup issues, and drum rotation problems. The manufacturer emphasizes upgraded materials that exceed original specifications, particularly the belt’s doubled thickness.
What Makes It Stand Out: This kit distinguishes itself through material upgrades rather than just replacement. The 4581EL2002C rollers feature high-quality rubber construction for quieter, more stable operation, while the 4400EL2001A belt boasts twice the thickness of standard belts for exceptional durability. The inclusion of a replacement spring ensures proper idler tension—a detail often overlooked in competitor kits. Lunarlipes provides extensive model cross-reference charts (Figures 5-7) and actively encourages customers to verify compatibility before purchase, reducing ordering errors.
Value for Money: Priced at $30, this kit positions itself as a premium alternative to basic replacement sets. While $5-10 more than budget options, the enhanced durability and thicker belt design potentially double the service interval. Professional LG dryer repairs typically cost $180-250, making this DIY solution highly economical. The one-year return/exchange policy provides unusual flexibility for aftermarket parts, effectively reducing purchase risk. For LG/Kenmore owners planning long-term appliance retention, the upgraded components justify the modest price premium.
Strengths and Weaknesses: Major strengths include superior material quality, comprehensive parts inclusion, proactive customer support with 12-hour response guarantee, and extensive compatibility documentation. The thicker belt design significantly reduces future failure risk. However, the kit is brand-specific to LG/Kenmore, limiting versatility. Some users report installation challenges despite YouTube guidance, and the price point is slightly higher than universal kits. The spring component requires careful tension adjustment during installation.
Bottom Line: For LG and Kenmore dryer owners prioritizing longevity over upfront cost, this upgraded kit delivers premium components that justify its price. The manufacturer support and enhanced durability make it a wise choice for those wanting to extend appliance life significantly.
3. KAKUPPA 2 Pack WH01X27538 Washer Drive Belt, WH01X27538 Replacement Belt for GE Hotpoint Washing Machine, Drive Belts Compatible with AP6328256 PS12299369 4587903, Laundry Repair Parts
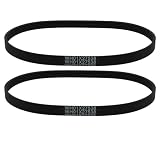
Overview: The KAKUPPA 2 Pack WH01X27538 Washer Drive Belt offers a cost-effective solution for GE and Hotpoint top-loading washing machines suffering from drive system failures. At $8.99 for two belts, this replacement part addresses common symptoms including agitation loss, excessive noise, and burning smells. Compatible with popular models like GTW220ACK4WW and GTW460ASJ8WW, the belt features a precise 21.2-inch inner circumference with a five-rib, four-groove design that ensures proper pulley engagement and power transmission from motor to drum.
What Makes It Stand Out: The dual-pack configuration provides exceptional value and preparedness—having a spare belt eliminates future downtime when the primary belt eventually wears. The construction uses high-quality rubber reinforced with embedded nylon cord, specifically engineered to withstand high-torque washing cycles and resist stretching, cracking, and heat degradation. This reinforcement directly addresses the root cause of most belt failures in modern washers. The precise dimensional specifications and ribbed design ensure OEM-equivalent performance without the premium brand markup.
Value for Money: Two belts for $9 represents outstanding value, working out to just $4.50 per belt. OEM GE belts typically cost $12-18 each, making this aftermarket option 60-75% cheaper while maintaining comparable durability. The inclusion of a spare effectively halves your cost-per-use over the appliance’s remaining lifespan. DIY installation eliminates $80-120 service call fees, and the robust construction extends replacement intervals. For budget-conscious homeowners, this pack delivers professional-grade performance at a fraction of dealer prices.
Strengths and Weaknesses: Strengths include the two-for-one pricing, reinforced nylon cord construction, precise OEM-matching dimensions, and straightforward DIY installation process. The belt effectively resolves multiple failure symptoms and reduces operating noise. However, as a brand-specific part, it’s limited to GE/Hotpoint applications. Some users may struggle with belt tensioning during installation despite the simple design. The product description’s performance claims about “reducing energy consumption” lack independent verification. No warranty information is explicitly stated.
Bottom Line: This KAKUPPA belt twin-pack is an unbeatable value for GE/Hotpoint owners comfortable with basic DIY repairs. The reinforced design and spare inclusion make it a smart, economical choice for maintaining washing machine performance.
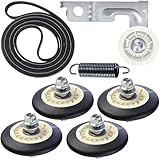
4. 959P3 Washer Idler Lever and Belt kit Replacement for ALLIANCE Laundry Systems Speed Queen SWNYC2HP115TW02 LWN432SP113TW01,Washing Machine Idler Lever and Belt Tensioner Kit Replace 2020782
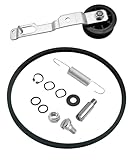
Overview: The 959P3 Washer Idler Lever and Belt Kit provides a comprehensive solution for commercial-grade ALLIANCE laundry systems experiencing drive system noise or failure. Designed for Speed Queen, Huebsch, Ipso, and other commercial washers, this $19.99 kit includes every component needed to rebuild the idler assembly: lever, spring, pulley, belt, washers, retaining ring, and nut. It replaces part number 2020782 and addresses the root cause of noisy operation by replacing all wear-prone parts simultaneously rather than troubleshooting individual components.
What Makes It Stand Out: This kit’s completeness eliminates diagnostic guesswork—instead of identifying whether the lever, spring, or pulley is causing noise, you replace the entire system. This approach is particularly valuable for commercial laundry environments where downtime means lost revenue. The package includes multiple washers (81392, 504082, 52549) and even the retaining ring (23748) and nut (52566, 28803)—details often sold separately. The compatibility list is extensive, covering dozens of specific commercial model numbers across multiple brands, making it easier to verify fit for professional technicians.
Value for Money: At $20, this kit delivers professional-grade value. Individual OEM components would cost $35-50, and commercial service calls start at $150. For laundromat owners or property managers, the ability to perform a complete rebuild in under an hour represents significant ROI. The kit’s design assumes some mechanical aptitude, which aligns with its target market of facility maintenance staff. While not the cheapest option, its completeness justifies the price by ensuring one-and-done repairs that last.
Strengths and Weaknesses: Strengths include complete parts inclusion, extensive commercial compatibility, elimination of diagnostic time, and robust components built for high-cycle environments. The kit addresses the most common failure points in ALLIANCE idler systems. However, installation videos are “recommended” rather than provided, requiring users to source guidance externally. The product is highly specialized—not suitable for residential washers. Some users note the belt may require initial tension adjustment. The packaging could better organize small hardware to prevent loss during installation.
Bottom Line: For commercial laundry operators and maintenance professionals working on ALLIANCE systems, this complete idler kit is an essential inventory item that minimizes downtime and maximizes repair efficiency. Its comprehensive approach justifies the moderate investment.
5. 46PCS Belt Pulley Set Plastic Belt Pulley with Rubber Band for RC Car Truck Robot DIY Model Toy Accessories

Overview: This 46PCS Belt Pulley Set serves hobbyists and DIY enthusiasts needing versatile power transmission components for small-scale projects. At $5.99, the assortment includes 24 plastic pulleys ranging from 5mm to 48mm diameter and 22 rubber band belts approximately 1.5 inches across. Designed for 1.5mm, 2mm, and 3mm shafts, this kit supports RC cars, robots, model airplanes, and custom mechanical creations where precise speed reduction or motion transfer is needed on a budget.
What Makes It Stand Out: The sheer variety of pulley sizes in one package distinguishes this from single-component purchases that limit design flexibility. Hobbyists can experiment with different gear ratios without buying individual parts. The random-color rubber bands add an element of surprise, though functionality remains consistent. The nested size range (5mm-48mm) accommodates both micro-scale mechanisms and larger model applications. At this price point, it’s treated as a consumable resource rather than a precision investment, encouraging creative experimentation.
Value for Money: Six dollars for 46 components yields a per-item cost of just $0.13, making this exceptionally economical for prototyping and educational purposes. Comparable individual pulleys cost $0.50-$2 each at hobby shops. While not suitable for high-torque or precision applications, the value lies in quantity and variety for trial-and-error design. The rubber bands, though simple, function adequately for light-duty power transmission in models. For STEM education, robotics clubs, or casual hobbyists, this set provides enough material for multiple projects at nearly disposable pricing.
Strengths and Weaknesses: Strengths include incredible affordability, wide size variety, multi-shaft compatibility, and suitability for educational use. The plastic construction is lightweight for model applications. However, durability is limited—plastic pulleys can crack under stress, and rubber bands stretch permanently over time. Precision is modest; expect some wobble in rotation. The random rubber band colors may disappoint those wanting aesthetic consistency. No technical specifications (material grade, temperature limits) are provided. This is strictly for low-load, intermittent-use scenarios.
Bottom Line: For hobbyists, students, and DIY experimenters seeking an affordable mechanical component assortment, this pulley set delivers exceptional quantity-driven value. Just don’t expect industrial-grade precision or longevity.
6. 84PCS Belt Pulley Set 2MM Hole Plastic Belt Pulley with Rubber Band for DIY Model Toy RC Car Robot Airplane Accessories

Overview: This comprehensive 84-piece kit provides hobbyists with essential components for small-scale mechanical projects. The set includes 40 plastic pulleys in eight diameters (6mm to 24mm) and 44 rubber bands across four sizes, plus two white transmission belts. Designed for 2mm shafts, it’s tailored for DIY model toys, RC vehicles, robots, and miniature aircraft.
What Makes It Stand Out: The sheer variety in one package distinguishes this set. Eight pulley sizes offer precise ratio options for torque and speed adjustments, while the assortment of rubber bands ensures proper tension matching. Unlike single-size packs, this kit eliminates repeated trips to specialty stores. The inclusion of both pulleys and belts creates a complete solution for experimentation and prototyping.
Value for Money: At $7.99 for 84 components, the per-piece cost is under ten cents. Purchasing these items individually would easily exceed $20 plus shipping. For tinkerers and students exploring mechanical principles, this represents exceptional educational value. The ability to test multiple configurations without additional investment makes it ideal for iterative design.
Strengths and Weaknesses:
- Strengths: Unmatched variety in one kit; extremely affordable; covers wide size range; perfect for learning and prototyping; convenient storage solution.
- Weaknesses: Plastic construction limits load capacity; rubber bands may degrade with UV exposure; restricted to 2mm shafts only; not suitable for heavy-duty applications.
Bottom Line: This set is a must-have for hobbyists and educators needing versatile pulley options for light-duty projects. While not built for industrial strength, its comprehensive selection and unbeatable price make it invaluable for DIY experimentation and model building.
7. Set of 30-40pcs Pulley Belts Engine Drive Belts Black Rubber Transmission Belts for DIY Toy Module Car
Overview: This practical assortment delivers 30 to 40 black rubber transmission belts specifically sized for DIY toy module cars. With diameters ranging from 3cm to 8cm, these belts serve as direct replacements or custom components for small-scale automotive projects. The rubber construction provides necessary flexibility and grip for effective power transmission in miniature applications.
What Makes It Stand Out: The focused approach on belts-only distinguishes this product. Rather than bundling unnecessary components, it provides a generous quantity of the most commonly needed consumable part. The size gradient from 3cm to 8cm covers typical small toy car configurations, making it a targeted solution rather than a generalist kit.
Value for Money: Priced at $7.99 for 30-40 pieces, each belt costs roughly 20-27 cents. While not as cheap per-unit as bulk industrial belts, this specialized sizing for hobby applications justifies the premium. For enthusiasts who frequently rebuild or modify toy cars, having this variety pack prevents project delays and saves shipping costs from multiple orders.
Strengths and Weaknesses:
- Strengths: Good quantity for the price; size variety covers common needs; specialized for toy cars; simple, no-frills packaging; immediate availability for repairs.
- Weaknesses: No pulleys included; quantity varies per packet (30-40pcs); limited to 3-8cm range; rubber-only material may stretch over time; lacks specification precision.
Bottom Line: Ideal for hobbyists who already own pulleys and need replacement belts for toy cars. The assortment offers practical value, though its narrow focus means it’s less versatile than complete kits. Verify your size requirements before purchasing.
8. 1Pcs WE12X27300 Washing Machine Belt Fit for GE Clothes Washer Belt, Laundry Center Combo Drive Belt Replace 4587578 AP6328196 PS12342956 EAP12342956, Washer Dryer Drive Belt

Overview: This replacement drive belt restores power transmission between the motor and drum in GE laundry center combos. Designed as a direct OEM alternative, it fits over a dozen specific GE models including GUD24ESSM0WW and GUD27GSSM1WW. The belt ensures stable drum rotation, directly impacting washing efficiency and machine performance.
What Makes It Stand Out: The precise compatibility list eliminates guesswork for GE owners. Unlike universal belts requiring modification, this model-specific design promises exact fitment. The manufacturer emphasizes silent operation through optimized design that reduces pulley friction and absorbs motor vibration—a notable upgrade from standard replacements.
Value for Money: At $8.99, this belt costs 60-70% less than OEM parts while delivering comparable performance. Professional installation typically runs $100-$150, making DIY replacement financially compelling. The durable construction resists stretching and high temperatures, ensuring longevity that justifies the investment over cheaper, less durable alternatives.
Strengths and Weaknesses:
- Strengths: Exact fit for listed GE models; easy installation without specialized tools; noise reduction design; high-temperature resistance; comprehensive model compatibility chart.
- Weaknesses: Limited to specific GE laundry centers; not suitable for other brands; DIY installation may challenge inexperienced users; requires proper tension adjustment.
Bottom Line: An excellent cost-saving solution for GE laundry center owners comfortable with basic appliance repair. Verify your model number matches the compatibility list. For the price, it delivers OEM-quality performance with straightforward installation, making it a smart maintenance investment.
9. Supplying Demand 131862900 5303311337 Clothes Washer Belt Tension Idler Pulley Replacement

Overview: This idler pulley maintains optimal tension on washing machine drive belts during operation. Compatible with various top-load washer models, it replaces multiple part numbers including AP2107757, 131312800, and 780774. The component ensures smooth belt performance, preventing slippage that can disrupt wash cycles and reduce cleaning effectiveness.
What Makes It Stand Out: Supplying Demand emphasizes compatibility across major brands while explicitly warning users to verify specific model fitment. This honest approach prevents costly returns. The extensive alternate part number list—covering AH418897, EA418897, and PS418897—demonstrates broad replacement potential for hard-to-find components.
Value for Money: At $25.99, this pulley sits between budget generics and premium OEM parts. While pricier than a simple belt replacement, a faulty idler pulley can cause belt damage and motor strain, making this preventative investment worthwhile. The alternative—professional service—typically exceeds $200, establishing strong value for DIY-capable homeowners.
Strengths and Weaknesses:
- Strengths: Replaces numerous part numbers; maintains critical belt tension; compatible with multiple brands; includes safety guidance; manufacturer support available.
- Weaknesses: Higher cost than basic belts; requires mechanical skill to install; colors/materials may vary; potential fitment issues without proper verification; no installation hardware included.
Bottom Line: A reliable replacement for failed washer idler pulleys, provided you confirm compatibility. The price reflects its specialized function. DIYers with appliance repair experience will find it a cost-effective alternative to service calls, but novices should proceed cautiously and consult the provided resources.
10. Seentech 691366 Idler Pulley - Exact fit Whirlpool Kenmore Sears Dryer - Replace W10612905 WP691366VP WP691366 AP6010582 239477 3394332 347034 347226 347277 4319391 688166 PS11743765

Overview: This idler pulley keeps dryer belts properly tensioned for Whirlpool, Kenmore, and Sears models. Replacing over two dozen part numbers including W10612905 and WP691366VP, it fits numerous dryers from brands like Maytag, Admiral, and Roper. The component prevents belt slippage, ensuring consistent drum rotation and drying performance.
What Makes It Stand Out: The exhaustive compatibility list spanning multiple major brands makes this a universal replacement solution. Seentech provides a detailed tool list (Phillips screwdriver, pliers, etc.) and estimates 30-60 minute repair time, empowering DIYers with realistic expectations. The 30-day return window demonstrates manufacturer confidence.
Value for Money: At $8.87, this pulley offers exceptional savings compared to OEM parts costing $25-40. Professional dryer repair typically runs $150-$200, making this DIY option financially attractive. The durable construction and manufacturer testing ensure reliability without the brand-name premium.
Strengths and Weaknesses:
- Strengths: Extremely affordable; vast brand/model compatibility; well-tested durability; clear DIY guidance; generous return policy; replaces many part numbers.
- Weaknesses: Dryer-specific (not for washers); requires specific tools; installation time commitment; no video instructions included; potential compatibility confusion without model verification.
Bottom Line: Outstanding value for dryer owners needing idler pulley replacement. The combination of low price, broad compatibility, and return policy minimizes risk. If you’re comfortable with basic appliance disassembly and have the listed tools, this part delivers professional results at a fraction of service costs.
Why Belts and Pulleys Matter in Modern Laundry Appliances
The Heart of Mechanical Motion
Every top-load washer, front-load washer, and dryer relies on a precisely engineered system of belts and pulleys to transfer rotational force. Unlike direct-drive systems that couple motors directly to drums (common in some high-end washers), belt-driven designs offer smoother startups, natural slip protection against overloads, and quieter operation. The motor spins a small pulley, which drives a belt wrapped around a much larger drum pulley—this simple ratio reduction transforms high-speed motor rotation into the powerful, controlled drum movement your laundry needs.
Signs Your Belt or Pulley Is Failing
Your machine will tell you when something’s wrong, but you need to speak its language. A high-pitched squeal during spin cycles often indicates belt slippage from wear or improper tension. Rhythmic thumping or knocking suggests a pulley with a damaged bearing or one that’s wobbling on its shaft. If your washer fills and drains but the drum barely moves, a broken drive belt is the prime suspect. In dryers, a drum that won’t turn but still produces heat points directly to a snapped belt. Catching these symptoms early prevents motor damage and more expensive repairs down the road.
Drive Belts: The Workhorse Component
V-Belts vs Multi-Rib Belts
Traditional V-belts feature a trapezoidal cross-section that wedges into pulley grooves, creating friction through surface contact. They’re forgiving of minor misalignment but generate more heat and wear faster. Modern multi-rib serpentine belts—recognizable by their flat profile with multiple longitudinal ribs—distribute load across more surface area, run cooler, and last significantly longer. Most machines built after 2010 use multi-rib designs, but vintage washers and dryers still rely on classic V-belts. Knowing which type your machine uses before shopping saves frustration and returns.
Determining the Correct Length and Width
Belt sizing isn’t guesswork. The part number etched on your old belt is the gold standard, but when that’s worn away, you’ll need to measure. For V-belts, measure the outer circumference with a flexible tape, then subtract based on the belt’s cross-section to estimate the pitch length. Multi-rib belts require measuring the ribbed side’s effective length. Width matters critically—too narrow and the belt bottoms out in the pulley; too wide and it rides too high, reducing grip. Always check your machine’s technical manual for exact specifications, which typically list the belt’s profile (like 4PH or 5PH for multi-rib) and length in millimeters.
Load Rating and Durability Factors
Not all belts handle stress equally. The load rating—determined by tensile strength and reinforcement material—must match your machine’s torque requirements. A dryer drum belt needs less tensile strength than a washer’s agitator belt, which fights water resistance. Look for belts with aramid fiber (Kevlar) reinforcement if available; they resist stretching and handle shock loads better than polyester-reinforced versions. Temperature rating matters too: dryer belts must withstand 150°F+ environments without hardening or cracking. The durometer (hardness) of the rubber compound affects both grip and longevity—softer compounds grip better but wear faster.
Motor Pulleys: Small but Mighty
Fixed vs Adjustable Motor Pulleys
Motor pulleys come in two flavors. Fixed pulleys have a set diameter and are permanently pressed onto the motor shaft. They’re reliable and maintenance-free but offer no speed adjustment. Adjustable pulleys feature a split design with set screws that allow diameter changes, letting you fine-tune drum speed or compensate for slight belt variations. While adjustable sounds better, they require periodic tightening and can slip if not properly secured. Most modern machines use fixed pulleys for simplicity, but adjustable versions appear in some commercial-grade units and older machines.
Bore Size and Keyway Considerations
The bore—the central hole that fits over the motor shaft—must match precisely. Standard bore sizes range from 8mm to 12mm in residential machines. More critical is the keyway: a small slot that mates with a key on the motor shaft to prevent rotation. Some pulleys use a D-shaped bore that eliminates the need for a separate key. When ordering, you’ll need the shaft diameter, keyway width (if applicable), and whether the bore is threaded for a set screw. A pulley that’s loose on the shaft will destroy both components through fretting corrosion.
Material Options: Steel, Aluminum, Composite
Steel pulleys dominate the market for their durability and cost-effectiveness, but they’re heavy and can rust if the protective coating fails. Aluminum pulleys reduce motor startup load and resist corrosion naturally, making them ideal for high-efficiency machines. Composite (reinforced plastic) pulleys are lightweight, quiet, and won’t rust, but they’re more prone to cracking under shock loads and heat cycling. For most DIY repairs, steel offers the best value, but consider aluminum if you’re replacing a failed steel pulley in a frequently used machine.
Idler Pulleys and Tensioners: The Unsung Heroes
Spring-Loaded vs Manual Tensioners
Idler pulleys maintain belt tension and help route the belt around obstacles. Spring-loaded tensioners automatically compensate for belt stretch and wear, maintaining consistent tension throughout the component’s life. They’re convenient but the spring can fatigue over time. Manual tensioners require periodic adjustment via a bolt or sliding bracket. While more hands-on, they let you dial in exact tension and are easier to service. Check your machine’s design: many dryers use spring-loaded idlers, while washers often feature manual adjustment.
Bearing Quality and Longevity
The bearing inside an idler pulley determines its lifespan. Shielded ball bearings last longer than sleeve bearings but cost more. Listen for a grinding or chirping sound from the idler area—that’s bearing failure. When replacing, spin the new pulley in your hand; it should rotate smoothly with no play or rough spots. High-quality idlers use permanently lubricated, sealed bearings that never need maintenance. Cheaper versions may have grease fittings, requiring periodic lubrication that most homeowners forget.
Adjustability Range
A good tensioner provides enough adjustment range to accommodate both a new belt (tight) and a worn belt (loose) while maintaining proper deflection. Look for tensioners with at least 15mm of total travel. The adjustment mechanism should be robust—flimsy stamped steel brackets flex under load, causing belt misalignment. Cast or heavy-gauge steel brackets maintain geometry and prevent the belt from walking off the pulleys.
Drum Drive Pulleys: Power Transfer Essentials
Hub Design and Attachment Methods
The drum drive pulley connects directly to the washer’s transmission or the dryer’s drum shaft. Hub designs vary: some press-fit onto splined shafts, others bolt to a flange. Press-fit hubs require a gear puller for removal and careful heating/installation to avoid damaging bearings. Bolt-on designs are DIY-friendly but the bolts must be torqued to specification—over-tightening can crack the hub or strip threads. Check for a set screw with a reverse thread; many manufacturers use this to prevent loosening from rotation.
Diameter Ratios and Speed Calculations
The ratio between motor pulley diameter and drum pulley diameter determines drum speed. If you’re replacing a drum pulley with a different size, you’ll change wash or dry performance. A larger drum pulley slows the drum but increases torque—useful if you’re overloading the machine. A smaller pulley speeds up the drum but reduces torque and increases belt wear. Stick to OEM diameter unless you’re intentionally modifying performance. The ratio is typically stamped on the pulley or listed in the service manual.
Wear Patterns to Watch For
Inspect old pulleys carefully before replacing just the belt. A glazed or polished pulley groove indicates slipping and reduced grip. Grooves worn unevenly or with steps suggest a misaligned belt that’s been chewing away at the metal. Sharp edges in the groove will shred a new belt in days. Minor glazing can be cleaned with fine sandpaper, but significant wear means pulley replacement. Running a new belt on a worn pulley is like putting new tires on a bent rim—it won’t end well.
Pump Belts for Legacy Machines
Identifying Obsolete Configurations
If you’re repairing a washer built before 1995, you might encounter a separate pump belt. These small belts drive the drain pump independently from the main drive system. Part numbers for these are often discontinued, and manufacturers have moved to integrated direct-drive pumps. Identify your pump belt by measuring its circumference and cross-section precisely, noting any part numbers molded into the rubber. Online forums and vintage appliance communities are invaluable for cross-referencing obsolete numbers.
Modern Replacement Strategies
When OEM pump belts are unavailable, aftermarket suppliers offer “will-fit” replacements. These work but may require slight tensioner adjustment. Some DIYers successfully adapt O-rings or automotive belts in a pinch, but this is temporary at best. The best long-term solution for an obsolete pump belt is often replacing the entire pump assembly with a modern equivalent that uses a more common belt size or eliminates the belt entirely. This requires more labor but future-proofs the repair.
Tension Specifications
Pump belts need less tension than drive belts—over-tensioning quickly burns out the pump’s sealed bearing. The correct deflection is typically 1/4 inch under moderate finger pressure. Too loose and the belt slips during drain cycles; too tight and you’ll be replacing the pump next year. Some pump brackets have a built-in tension gauge or alignment marks—use them if present.
Serpentine Belt Systems in High-Efficiency Washers
Routing Complexity
Modern front-load washers often use a single serpentine belt driving the drum, pump, and sometimes a counterweight system. The routing diagram is usually printed on a sticker inside the cabinet or in the manual. Photograph the old belt’s path before removal—there are often 6-8 pulleys with specific wrap angles. Incorrect routing reduces grip on critical pulleys or runs the belt backward against idlers, causing immediate failure. Some machines require releasing the motor mount to create slack for installation.
Tensioner Pulley Types
Serpentine systems use either a spring-loaded arm tensioner or a fixed idler with a movable motor mount. The tensioner pulley itself is often smooth (unlike grooved drive pulleys) and rides on the belt’s flat backside. These pulleys fail more frequently than grooved ones because they endure constant side-loading. When replacing a smooth tensioner pulley, ensure the new one has the same width and bearing offset—variations cause the belt to track off-center.
Alignment Criticality
With multiple pulleys, alignment becomes paramount. A misaligned pulley in a serpentine system stresses the belt unevenly, causing rib separation and premature failure. Use a straightedge across pulley faces to check alignment—any deviation over 1/16 inch needs correction. Shims behind pulley mounting brackets can fine-tune alignment. Some high-end machines use adjustable motor bases with alignment screws; take time to get this right during installation.
Material Science: What Your Belts Are Made Of
Rubber Compounds and Reinforcement
Not all rubber is created equal. EPDM (ethylene propylene diene monomer) rubber dominates modern belts for its heat resistance and flexibility. Neoprene belts are common in older machines but degrade faster in hot, humid environments. The reinforcement layer—visible as cords inside the belt when cut—determines strength. Fiberglass cords offer excellent dimensional stability (no stretch) but are brittle; aramid (Kevlar) cords provide the best combination of strength and flexibility. Avoid belts with visible cotton or polyester cords—they’re economy-grade and won’t last.
Metal Pulley Finishes
Pulley finish affects both durability and belt life. Zinc plating offers basic corrosion resistance but wears through where the belt contacts. Powder coating provides better protection but can chip during installation. Hard anodizing on aluminum pulleys creates a wear-resistant surface that extends pulley life dramatically. Bare steel pulleys are only acceptable in dry environments—never in washers. If you must reuse a bare steel pulley, coat it with rust-inhibiting paint, avoiding the groove area.
UV and Chemical Resistance
Dryer belts face UV exposure from residual light and chemical attack from fabric softener fumes and lint. Look for belts rated for UV resistance—usually indicated by a “UV” suffix in the part number. For washers, chemical resistance to bleach and detergents matters. EPDM excels here, while natural rubber compounds swell and soften. If your machine has a bleach dispenser right near the belt path, prioritize chemical-resistant materials.
Compatibility and Sizing: Getting It Right the First Time
Model Number Decoding
Your appliance’s model number is the Rosetta Stone for parts compatibility. It’s not just the model—you need the full number including suffixes (e.g., “110.12345678” not just “110”). Manufacturers often change belt specs mid-production run. The model number plate is typically inside the door, on the back panel, or under the lid. Take a clear photo; the number may be stamped faintly. With this number, you can use online parts lookup tools to find the exact OEM belt and pulley specifications.
Cross-Reference Systems
OEM parts are expensive, and aftermarket equivalents abound. Quality aftermarket manufacturers publish cross-reference charts linking their part numbers to OEM numbers. These are reliable when sourced from reputable brands. Be wary of generic “fits most” listings—they rarely fit well. Some cross-reference systems also list “superceded” numbers, where a manufacturer replaced an old part number with an improved design. Using superceded parts is often beneficial, but may require minor bracket modifications.
When Generic Parts Work
Generic belts sold by size (e.g., “4PH 1240mm”) rather than model number can work perfectly if you know your machine’s requirements. This approach is ideal for older machines with obsolete OEM numbers. The key is precise measurement and understanding the profile. Generic pulleys are riskier—bore dimensions, hub offsets, and groove angles vary enough that “close enough” often isn’t. Stick to OEM or direct-cross pulleys; save the generic experimentation for belts.
Essential Tools for DIY Belt and Pulley Replacement
Specialized Pullers and Installers
A gear puller is non-negotiable for removing press-fit pulleys. Three-jaw pullers work for most applications, but some tight spaces require a two-jaw or bearing separator tool. For installation, a pulley installer kit uses a threaded rod and pressing plates to drive pulleys onto shafts without hammering—hammer blows damage bearings and can crack cast pulleys. Belt installation tools, essentially thin plastic levers, help stretch belts over pulleys without prying with screwdrivers (which damages belts and pulleys).
Tension Measurement Devices
Proper tension is critical and difficult to gauge by feel. Belt tension gauges, either spring-loaded or digital, measure deflection force accurately. For serpentine belts, some technicians use frequency meters that measure belt vibration pitch—tighter belts vibrate at higher frequencies. A low-tech but effective method: use a fish scale pulling at the belt’s midpoint to achieve specified deflection force. Many service manuals list tension in pounds of force for a given deflection distance.
Alignment Tools
A laser pulley alignment tool projects a line across pulley faces, showing misalignment instantly. For the budget-conscious, a machinist’s straightedge and feeler gauges work nearly as well. Some DIYers use string stretched tightly between pulley centers, but this only checks angular alignment, not offset. Digital angle finders placed on pulley faces can detect twist misalignment down to fractions of a degree.
Professional Installation Techniques
Step-by-Step Removal Process
Always disconnect power first—unplug the machine, don’t just switch it off. For washers, shut off water supply lines. Remove the cabinet or access panel according to the service manual (usually 6-10 screws). Release belt tension by moving the idler or motor mount, then slip the belt off the motor pulley first (smallest diameter). For pulley removal, photograph the assembly, remove any retaining hardware (set screws, snap rings), then use the puller. Apply penetrating oil to the shaft-pulley interface an hour before attempting removal.
Proper Belt Seating
New belts must seat fully in pulley grooves. Install the belt loosely on all pulleys except the motor pulley, then use the tensioner to apply final tension. Rotate the drum or pulley by hand several full revolutions to help the belt find its natural position. Check that the belt sits at the same depth in all grooves—if it’s proud on one pulley, that pulley is worn or mismatched. Never force a belt with a screwdriver; if it won’t fit, the tensioner isn’t released enough.
Tensioning Without Guesswork
After installation, apply the tension gauge at the belt’s midpoint between pulleys. The service manual specifies deflection (e.g., 1/2 inch) and force (e.g., 10 lbs). Adjust the tensioner to meet both specs simultaneously. Over-tensioning is the most common DIY mistake—it reduces belt life by 70% and stresses bearings. Under-tensioning causes slip, heat buildup, and poor performance. Double-check tension after running the machine for 10 minutes; new belts stretch slightly.
Advanced Troubleshooting Guide
Squealing vs Thumping Sounds
Squealing immediately after belt replacement usually means misalignment or insufficient tension. A chirping squeal that changes with load points to a failing idler bearing. Thumping or knocking, especially once per drum revolution, indicates a pulley with a damaged bearing or a drum pulley that’s loose on its shaft. Use a mechanic’s stethoscope (or long screwdriver pressed to your ear) to isolate the sound source—be careful of moving parts.
Premature Failure Root Causes
If you’re replacing belts yearly, something else is wrong. Check for seized bearings in the drum or motor that overload the belt. Verify pulley alignment with a straightedge. Inspect for oil contamination from a leaking transmission or motor—oil destroys rubber quickly. In dryers, excessive lint buildup in the belt path abrades belts. Also check for voltage issues; low voltage makes motors draw more current, increasing belt stress.
Intermittent Issues
A belt that works fine for three loads then slips on the fourth often indicates a thermal problem. As the machine heats up, pulleys expand slightly. If clearance is marginal, this causes binding. Check that pulleys spin freely when hot. Another cause: a weak tensioner spring that loses force when warm. Replace the tensioner assembly, not just the pulley. Intermittent problems are the hardest to diagnose but almost always trace back to thermal expansion or electrical issues affecting motor torque.
Preventive Maintenance Schedules
Inspection Intervals
Inspect belts every six months for cracking, glazing, or fraying. A good time is when you clean the dryer vent or run a washer cleaning cycle. Check pulley bearings annually by spinning them with the belt removed—they should spin freely and silently. Look for rust on pulleys and treat any spots immediately. Catching a cracked belt before it fails saves you from a mid-cycle breakdown and potential water damage from a washer that can’t drain.
Lubrication Points
Most modern idler pulleys have sealed bearings requiring no lubrication. However, older machines and some commercial units have grease fittings. Use only high-temperature lithium grease rated for appliance use—automotive grease can damage rubber belts. Apply two pumps from a grease gun annually; over-greasing forces grease into the belt path. Motor bearings are typically sealed and not serviceable. If your motor has oil ports (rare in machines under 15 years old), use two drops of SAE 20 non-detergent oil yearly.
Storage Best Practices
If you’re stocking spare belts, store them hung on a peg in a cool, dark place. Coiling belts tightly for storage creates permanent set and weakens the reinforcement. Keep them away from ozone sources like electric motors and fluorescent lights, which accelerate rubber degradation. Pulleys should be stored in their original packaging to prevent rust. If unpackaged, coat them lightly with machine oil and wrap in paper, not plastic (which traps moisture). Properly stored belts remain viable for 5-7 years; stored improperly, they’re worthless in under a year.
Smart Sourcing Strategies for Hard-to-Find Parts
OEM vs Aftermarket Quality Tiers
OEM parts guarantee fit and function but cost 2-3x more. Premium aftermarket parts from established brands often exceed OEM quality, using better materials or improved designs. Economy aftermarket parts cut corners on reinforcement and bearings—avoid them for critical applications like drive belts. For idler pulleys, premium aftermarket is usually worth the cost; a failed idler destroys a new belt instantly. Create a relationship with a local appliance parts supplier; they’ll steer you toward reliable brands and away from junk.
Online Marketplaces vs Local Suppliers
Online marketplaces offer convenience and price comparison but beware of counterfeit parts, especially for popular machine models. Check seller ratings and look for parts with detailed specifications, not just “fits model X.” Local suppliers charge more but provide expertise and immediate returns if wrong. They can also match your old part physically if you bring it in. For urgent repairs, local is unbeatable. For planning ahead, online offers better selection and pricing on premium brands.
Bulk Buying Benefits
If you maintain multiple rental properties or have several same-model machines, buying belts in two-packs or five-packs saves 30-40%. Pulleys rarely fail in batches, so single purchases make sense. Consider buying a “belt and idler kit” even if only one component failed; the other is likely near end-of-life, and kits cost less than separate parts. Some suppliers offer subscription services for common wear parts—belts, filters, hoses—delivered annually at a discount.
Safety Protocols Every DIYer Must Follow
Electrical Lockout Procedures
Unplugging the machine is step one, but lockout goes further. Tape the plug to prevent accidental reconnection. For hardwired machines, turn off the circuit breaker and lock the panel. Use a non-contact voltage tester to confirm power is dead at the motor terminals. Capacitors in some motor circuits store charge—short them with an insulated screwdriver before touching terminals. These steps feel excessive until you’ve seen a motor start unexpectedly with your hands in the belt path.
Mechanical Pinch Points
Belt tensioners are spring-loaded with significant force. Use a locking pin or clamp to hold the tensioner in the released position during installation. Never place fingers between the belt and pulley—even a manually turned drum can pinch severely. When using pullers, ensure the jaws are fully seated; a slipping puller can launch parts with dangerous force. Wear safety glasses when working underneath a raised machine—falling tools or parts can cause eye injuries.
When to Call a Professional
Know your limits. If you encounter seized pulleys that won’t budge even with a puller, stop. Forcing them can damage the transmission or motor shaft, turning a $30 repair into a $300 one. Complex electronic controls integrated with motor mounts (common in Samsung and LG machines) require diagnostic tools most DIYers lack. If the machine is under warranty, any DIY work voids coverage. Finally, if you’re not physically comfortable lifting heavy components or working in tight spaces, a professional’s efficiency is worth the cost.
Frequently Asked Questions
1. How long should a washing machine or dryer belt last?
In typical residential use, a quality drive belt should last 8-12 years. However, heavy use, overloading, or misaligned pulleys can reduce lifespan to 3-5 years. Premium aramid-reinforced belts often outlast the machine’s next major component failure.
2. Can I replace just the belt, or should I always replace pulleys too?
If pulleys spin smoothly without wobble or noise, and show no visible groove wear, you can replace only the belt. However, idler pulleys are inexpensive and often fail soon after a belt change due to disturbed tension—replacing them proactively is wise economics.
3. Why does my new belt squeal even though I installed it correctly?
New belts sometimes squeal for the first 5-10 cycles as they seat and polish pulley grooves. If squealing persists, check tension (usually too low), alignment, or for contamination like oil or fabric softener on the belt. A glazed pulley can also cause persistent squeal.
4. Are universal belts worth buying for multiple machine brands?
Universal belts are a compromise. They work in emergencies but rarely match OEM specifications perfectly. Keep one as a temporary spare, but source the correct belt for permanent repairs. The small savings isn’t worth reduced performance and shortened lifespan.
5. How do I know if my machine uses a belt or is direct-drive?
If you can see a motor mounted near the drum with a rubber belt connecting them, it’s belt-drive. Direct-drive machines have the motor directly attached to the drum or transmission with no visible belt. Most Whirlpool, Maytag, and Kenmore machines are belt-drive; many newer LG and Samsung front-loaders are direct-drive.
6. What’s the difference between a dryer belt and a washer belt?
Dryer belts are typically wider, flatter, and rated for higher temperatures (up to 180°F). Washer belts are often V-shaped or multi-rib and must resist water and detergent. Using a dryer belt in a washer causes slip; using a washer belt in a dryer causes rapid heat degradation.
7. Can I lubricate a squeaky pulley to make it quiet?
Never lubricate the belt-pulley contact area—it causes slip and failure. If the pulley bearing squeaks, replacement is the only proper fix. Temporary lubrication of the bearing may quiet it for days but forces grease into the belt path, destroying the new belt you’ll eventually need.
8. How tight should the belt be?
Proper tension allows about 1/2 inch of deflection when pressing firmly at the midpoint between pulleys. The belt should not feel slack, but you should be able to twist it 90 degrees by hand. Over-tightening is more damaging than slight looseness.
9. My old belt had a part number, but the new one with the same number is a different size. Why?
Manufacturers sometimes supercede part numbers with updated designs. The new belt may be slightly shorter to compensate for stretch in the tensioner spring, or made of a different compound. Always verify the new belt against the old one before installation, and check for service bulletins about design changes.
10. Is it normal for a new belt to produce black dust?
Yes, for the first few cycles. New belts shed a small amount of rubber as they conform to pulley grooves and burn off mold release compounds. Excessive black dust after a week indicates misalignment, over-tensioning, or a defective belt. Clean the cabinet interior after the first use to prevent dust contamination.