Transforming your workspace or living area shouldn’t require an engineering degree or a fully-stocked tool chest. Yet, many furniture projects languish half-finished in garages because “some assembly required” actually means hours of deciphering cryptic instructions and hunting for that one specific Allen wrench. Quick-install pedestals have revolutionized furniture assembly, offering sophisticated engineering disguised as simplicity. These innovative storage solutions prove that you can achieve professional-grade stability and functionality in under fifteen minutes using nothing more than your hands and a bit of common sense.
Understanding what separates genuinely tool-free pedestals from those that merely claim to be is crucial for making an informed purchase. The market is saturated with products promising effortless assembly, but only a select few deliver on that promise without compromising structural integrity. This guide dives deep into the engineering principles, material science, and design features that define truly rapid-installation pedestals, empowering you to identify quality solutions that won’t wobble, sag, or fail when you need them most.
Top 10 Quick-Install Pedestals Without Tools
Detailed Product Reviews
1. Easy Setups Light Stand Table Clamps Without Tool Required For Quick Installation In Outdoor Camping Activity Lightweight Stand
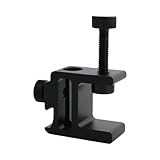
Overview: The Easy Setups Light Stand Table Clamp delivers hassle-free illumination mounting for outdoor enthusiasts. This aluminum alloy clamp attaches securely to tables up to 2.2cm thick without requiring any tools, making it an essential companion for camping trips, backyard gatherings, and market vending. Its lightweight yet robust construction ensures reliable performance in various outdoor conditions while supporting camping lamps and photography lights with confidence.
What Makes It Stand Out: The tool-free installation system sets this clamp apart from traditional light stands that require assembly. Simply tighten the adjustable screw to secure it to tabletops, branches, or other flat surfaces. The aircraft-grade aluminum alloy provides exceptional strength-to-weight ratio, resisting corrosion while remaining portable enough for backpacking. Its versatility extends beyond lighting—use it for hanging lanterns, cameras, or small equipment.
Value for Money: At $11.29, this clamp costs significantly less than full-size light stands ($30-$100) while offering superior portability. The durable construction ensures years of reliable service, making it a smart long-term investment for occasional campers and frequent outdoor photographers alike. Compared to DIY solutions, the professional finish and guaranteed weight capacity justify the modest price premium.
Strengths and Weaknesses: Pros: Tool-less quick setup; Lightweight aluminum construction; Corrosion-resistant finish; Versatile mounting options; Secure grip up to 2.2cm thickness Cons: Limited to relatively thin surfaces; Maximum load capacity not specified; May scratch delicate table surfaces; Black finish shows wear over time
Bottom Line: This clamp excels for users prioritizing portability and convenience over maximum load capacity. It’s ideal for casual campers, event photographers, and vendors needing quick lighting solutions. While surface thickness limitations exist, the tool-free design and durable build make it a worthwhile addition to any outdoor gear collection.
2. Easy Setups Light Stand Table Clamps Without Tool Required for Quick Installation in Outdoor Camping Activity Black Clamps
Overview: The Easy Setups Light Stand Table Clamp offers a streamlined solution for mounting lighting fixtures outdoors without tools. Designed for surfaces up to 2.2cm thick, this black aluminum clamp provides stable support for camping lamps and photography lights during barbecues, camping trips, and market stalls. Its quick-release mechanism eliminates setup frustration, while the lightweight design ensures easy transport.
What Makes It Stand Out: This clamp’s sleek black finish combines aesthetics with functionality, resisting wear while blending seamlessly with modern outdoor gear. The tool-release installation allows single-handed operation, perfect when you’re setting up camp alone or adjusting lighting mid-event. Its compact profile packs easily into camera bags or camping totes, unlike bulky traditional stands.
Value for Money: Priced at $11.39, this clamp sits in the sweet spot between flimsy plastic alternatives and expensive professional equipment. The aluminum alloy construction delivers durability that plastic mounts can’t match, while costing a fraction of carbon fiber options. For outdoor enthusiasts who value reliability without breaking the bank, it represents excellent value.
Strengths and Weaknesses: Pros: Instant tool-free installation; Premium aluminum build; Wear-resistant black coating; Ultra-portable design; Secure non-slip grip Cons: Restricted to 2.2cm maximum thickness; Load weight limit unclear; Requires flat surface edge; Single clamp per package
Bottom Line: Perfect for photographers and campers seeking minimalist gear solutions. The black aluminum construction offers professional durability at an entry-level price. While surface compatibility is limited, the convenience factor and solid build quality make it a smart purchase for anyone regularly working in outdoor environments.
3. Heavy-Duty Angle Grinder Stand & Bench Grinder Wall Mount (2PCS) - Multi-Tool Holder for Polisher, Air Tools - Metal Garage Workshop Organizer with Quick-Install Brackets

Overview: The Heavy-Duty Angle Grinder Stand & Bench Grinder Wall Mount (2PCS) transforms cluttered workshops into organized workspaces. These multi-functional holders accommodate angle grinders, bench grinders, polishers, and air tools using a compact 5.2x4x1.7-inch footprint. Designed for quick installation, each mount clears bench space while keeping essential tools within arm’s reach.
What Makes It Stand Out: The universal design accepts multiple tool types, eliminating the need for separate holders. Quick-install brackets require minimal hardware and work on drywall, wood, or concrete walls. The robust metal construction withstands workshop vibrations and heavy tool weights without bending or flexing. Its space-saving vertical storage solution maximizes efficiency in cramped garages.
Value for Money: At $11.99 for two mounts ($6 each), this set undercuts most single-tool holders that cost $10-$15 individually. The multi-tool compatibility essentially provides four storage solutions in one purchase. For DIY enthusiasts and professional mechanics alike, the durability and versatility offer outstanding return on investment compared to pegboard hooks or custom fabrication.
Strengths and Weaknesses: Pros: Holds multiple tool types; Space-efficient vertical storage; Sturdy metal construction; Simple installation; Exceptional price per unit Cons: Mounting hardware not included; Limited to tools with specific handle diameters; Powder coating may chip over time; No locking mechanism
Bottom Line: An essential organization upgrade for small to medium workshops. The two-pack provides immediate impact for most users’ primary tools, though serious collectors may want the four-pack version. Installation requires basic DIY skills, but the space savings and accessibility improvements are immediate and significant.
4. Heavy-Duty Angle Grinder Stand Wall Mount (4PCS) - Metal Tool Holder for Bench Grinder, Polisher & Air Tools - Garage, Workshop Clutter-Free Organizer with Quick-Install Brackets

Overview: The Heavy-Duty Angle Grinder Stand Wall Mount (4PCS) delivers a complete workshop organization system for power tool enthusiasts. These versatile holders accommodate angle grinders, bench grinders, polishers, and air tools within a compact 5.2x4x1.7-inch design. The four-pack configuration allows comprehensive tool storage across multiple workstations or walls, creating a clutter-free environment.
What Makes It Stand Out: The bulk package provides unmatched value for workshops with extensive tool collections. Each mount features identical multi-tool compatibility, enabling uniform storage solutions throughout your space. The quick-install brackets facilitate rapid deployment across garage, basement, or shed walls. The industrial-grade metal construction ensures consistent performance under heavy loads.
Value for Money: At $19.99 for four mounts ($5 each), this package offers superior per-unit savings compared to the two-pack version. Competitors charge $8-$12 for similar single mounts, making this set 40-60% more economical. For serious DIYers or professional shops, the ability to organize an entire tool collection at under $20 represents exceptional value.
Strengths and Weaknesses: Pros: Best price-per-unit value; Uniform multi-tool design; Heavy-duty stability; Scalable workshop solution; Quick mounting system Cons: Hardware not included; May not fit oversized tools; Requires multiple wall anchors; No security lock feature
Bottom Line: The four-pack is the smart choice for comprehensive workshop organization. It provides enough mounts for primary and secondary tools while maintaining the sturdy build quality of the smaller set. Professional mechanics and avid hobbyists will appreciate the scalability and cost-effectiveness. Plan your layout carefully before installation to maximize this system’s potential.
5. JSGHGDF Quick Install Bike Handlebar Phone Mount Stand Reinforced Aluminum Alloy Frame Fit for Cycling Shock Aluminum Bike Phone Mount

Overview: The JSGHGDF Quick Install Bike Handlebar Phone Mount Stand provides secure smartphone access for cyclists tackling any terrain. Constructed from aircraft-grade aluminum alloy, this reinforced mount features tool-less installation and vibration-dampening clamps. The streamlined design integrates with existing handlebar stems, offering 360-degree adjustable viewing angles for optimal navigation and road awareness.
What Makes It Stand Out: The aluminum construction distinguishes it from plastic mounts that crack under stress. Anti-shake reinforcement keeps devices stable on bumpy trails, while the universal clamp fits most handlebar diameters. The clever stem integration reduces wind resistance compared to handlebar-extending designs. Single-handed adjustment allows mid-ride angle changes without stopping.
Value for Money: At $8.59, this mount competes with premium options costing $15-$25. The aluminum frame provides durability typically found in higher-priced models, while the vibration dampening addresses a common failure point in budget mounts. For commuters and mountain bikers who’ve broken plastic mounts, this represents a cost-effective upgrade that prevents device damage.
Strengths and Weaknesses: Pros: Premium aluminum build; Effective vibration dampening; Tool-free installation; 360-degree rotation; Aerodynamic low profile Cons: Handlebar diameter limitations; May interfere with brake cables; Clamp pressure can mar finishes; No quick-release for phone
Bottom Line: An excellent choice for cyclists prioritizing durability and stability. The aluminum construction justifies the slight price premium over basic plastic mounts, while the anti-shake design protects expensive smartphones. Ideal for commuters and trail riders alike, though racers may want an even lighter carbon option. For most riders, this mount hits the sweet spot of performance and value.
6. JSGHGDF Quick Install Bike Handlebar Phone Mount Stand Reinforced Aluminum Alloy Frame Fit for Cycling Shock Aluminum Bike Phone Mount

Overview: This aluminum bike phone mount targets cyclists needing secure, accessible device placement. Constructed from aircraft-grade aluminum alloy, it promises durability without the bulk of cheaper plastic alternatives. The tool-less installation system appeals to riders who want quick setup, while its universal design accommodates various phone sizes for commuters and mountain bikers alike.
What Makes It Stand Out: The mount’s vibration-dampening clamps protect both your device and handlebar surfaces from damage—a thoughtful touch for off-road use. Its streamlined, aerodynamic profile reduces wind resistance, and the 360-degree rotation provides customizable viewing angles for navigation apps. The anti-shake reinforcement specifically addresses the jarring impacts of rough terrain, offering confidence during aggressive riding.
Value for Money: At $8.59, this mount significantly undercuts premium competitors like Quad Lock or Peak Design while delivering similar aluminum construction. The multi-device compatibility eliminates the need for brand-specific cases, saving additional costs. For budget-conscious cyclists unwilling to sacrifice quality materials, this represents exceptional value, though long-term durability remains unproven given the unknown brand.
Strengths and Weaknesses: Strengths: Premium aluminum build at plastic-mount pricing; genuinely tool-free installation; effective vibration isolation; versatile 360-degree adjustability; works with any phone case.
Weaknesses: Obscure brand with limited warranty support; “vibrations clamps without surfaces” description is confusing; clamp mechanism may loosen on extreme downhill trails; no specified weight limit for larger devices.
Bottom Line: This mount delivers premium features at a bargain price, making it ideal for casual commuters and moderate trail riders. Serious mountain bikers should verify clamp security on extreme terrain, but for everyday cycling navigation, it’s a smart, cost-effective choice that punches above its weight class.
7. Ywmsfl Adhesive Silicone Wall Mount Stand for 2 Indoor Camera Anti Slip Sapce Saving Camera Bracket Quick Install Bracket

Overview: This silicone adhesive mount offers a minimalist solution for indoor security camera placement. Designed for homeowners seeking non-permanent installation, the bracket uses industrial-strength adhesive to eliminate drilling and tools entirely. Its space-saving profile positions cameras flush against walls, making it suitable for renters or those wanting clean, unobtrusive surveillance setups.
What Makes It Stand Out: The pure adhesive approach maximizes placement flexibility on smooth surfaces where traditional mounts won’t work. Its silicone construction provides natural grip and vibration dampening, reducing footage shake. The twin-pack design at under $8 delivers value for multi-camera systems, while the zero-footprint installation preserves wall integrity—critical for rental properties where drilling violates lease agreements.
Value for Money: Priced at $7.89 for two mounts, this is among the cheapest camera mounting solutions available. Compared to screw-in mounts requiring tools and wall repair upon removal, the adhesive method saves time and potential deposit deductions. However, the low cost reflects limited load capacity and surface restrictions, making it suitable only for lightweight indoor cameras under 0.5 pounds.
Strengths and Weaknesses: Strengths: Truly tool-free installation; renter-friendly with no wall damage; excellent for smooth surfaces like tile or glass; space-saving low profile; affordable two-pack pricing.
Weaknesses: Adhesive may fail in humid environments; limited to perfectly smooth, clean surfaces; requires regular inspection; cannot support heavy cameras; removal may leave residue.
Bottom Line: Perfect for lightweight indoor cameras in climate-controlled environments, this mount excels for renters and temporary installations. Avoid for outdoor use or heavy devices, and always test adhesion before trusting expensive equipment to it. A niche solution that delivers exactly what it promises at a fair price.
8. NTCLHFXU Simple to Setups TVs Base Stand Featuring Quick Installation Steps and Secure Hold for Various Televisions Models Base

Overview: This universal TV base stand provides an affordable replacement for lost or damaged OEM stands. Constructed from high-strength ABS plastic reinforced with metal components, it supports a wide range of television brands and models. The included assembly tools and adjustable height settings make it an accessible solution for homeowners, renters, and families needing quick, stable TV placement without wall mounting.
What Makes It Stand Out: The height adjustability addresses ergonomic viewing angles, reducing neck strain during extended watching sessions—rare in budget stands. Its universal compatibility eliminates the frustration of model-specific parts, while the reinforced metal core provides stability that pure plastic stands lack. The stand’s modern aesthetic integrates into living rooms, bedrooms, or home offices without looking like an afterthought.
Value for Money: At $13.89, this stand dramatically undercuts manufacturer replacements that often cost $30-60. The integrated tool kit and adjustable features add value typically reserved for premium alternatives. While it won’t match heavy-gauge steel mounts, the price-to-function ratio is exceptional for TVs up to 55 inches. It’s a practical insurance policy against the inevitable loss of original stands during moves.
Strengths and Weaknesses: Strengths: Extremely affordable universal solution; height adjustability improves ergonomics; includes necessary tools; modern design blends with decor; tool-free assembly for basic setup.
Weaknesses: Unknown maximum weight capacity; ABS plastic may flex under heavier loads; not suitable for very large screens over 65 inches; brand reputation unverified; base footprint may be too large for narrow media consoles.
Bottom Line: An excellent budget replacement stand for mid-sized TVs in secondary rooms or temporary setups. Verify weight limits before mounting expensive displays, but for most 32-55 inch televisions, it provides stability and adjustability at a fraction of OEM costs. A smart buy for renters and frequent movers.
9. JSGHGDF Quick Install Bike Handlebar Phone Mount Stand Reinforced Aluminum Alloy Frame Fit for Cycling Shock Aluminum Bike Phone Mount

Overview: This aluminum bike phone mount offers cyclists a robust, lightweight solution for securing smartphones and GPS devices. Built from aircraft-grade aluminum alloy, it emphasizes durability over the plastic construction common in this price range. The tool-free clamp system enables rapid installation across various handlebar diameters, targeting commuters and mountain bikers who need reliable device access without permanent modifications to their bikes.
What Makes It Stand Out: The mount’s anti-shake reinforcement directly addresses a critical failure point in budget mounts—stability on rough terrain. Its aerodynamic profile minimizes drag, while the 360-degree ball joint allows portrait or landscape orientation for navigation apps. The vibration-isolating clamp design protects both device and bike finish, a premium feature rarely seen under $10. Multi-device compatibility means no proprietary cases required.
Value for Money: Priced at $8.59, this mount competes with plastic alternatives while offering metal construction typically costing $25+. The universal fit eliminates ongoing costs as you upgrade phones, and the included security features reduce the risk of costly device damage. For cyclists wanting premium materials without premium pricing, the value proposition is compelling, though brand reliability remains a question mark.
Strengths and Weaknesses: Strengths: Genuine aluminum build resists fatigue; genuinely tool-less installation; impressive vibration dampening; versatile rotation and tilt; secure clamping on varied handlebars.
Weaknesses: Vague brand with uncertain warranty; “without surfaces” description is misleading; may require periodic retightening on carbon bars; no stated IP rating for weather resistance; limited customer service channels.
Bottom Line: A surprising value that delivers metal construction and thoughtful features at plastic prices. Ideal for everyday commuters and light trail riding. Serious downhill riders should test extensively before trusting expensive phones, but for general cycling use, it outperforms its price point. Buy with realistic expectations about support and longevity.
10. Bass Drum Microphone Stand Mount - Sturdy Easy Install Mic Holder for Drum Set Accessories- Without mic clip

Overview: This bass drum microphone mount provides targeted mic positioning for drummers seeking optimal kick drum capture. Constructed from durable metal alloy, it withstands high-volume vibrations and physical impacts inherent to drum kit environments. The quick-install system attaches directly to drum hoops without tools, making it equally valuable for studio sessions and live performances where setup speed matters.
What Makes It Stand Out: The mount’s vibration-resistant metal construction prevents the microphonic feedback and resonance issues that plague plastic alternatives. Its hoop-clamping design eliminates the need for bulky boom stands, reducing stage clutter and tripping hazards. The quick-release mechanism allows rapid repositioning between songs, a practical advantage for working drummers. The metal alloy finish resists corrosion from sweat and humidity.
Value for Money: At $22.95, this sits in the mid-range for drum mic hardware, but the “without mic clip” caveat significantly impacts value. While the mount itself is fairly priced for metal construction, you’ll need to purchase a compatible clip separately ($5-15), pushing total cost toward $30-40. Compared to complete solutions like the Audix DCLIP or Shure A56D, it’s less economical unless you already own spare clips.
Strengths and Weaknesses: Strengths: Robust metal alloy construction; excellent vibration isolation; tool-free drum hoop attachment; compact design saves space; quick installation and adjustment.
Weaknesses: NO MICROPHONE CLIP INCLUDED—requires additional purchase; limited compatibility with non-standard hoops; may scratch drum finishes if over-tightened; single-axis adjustment limits positioning options; not suitable for rack tom miking.
Bottom Line: A solid hardware component for drummers who already own mic clips and need reliable kick drum positioning. The build quality justifies the price, but factor in the cost of a separate clip before purchasing. For complete setups, consider all-in-one alternatives. Best as a replacement or expansion piece for existing mic locker, not a standalone solution.
What Makes a Pedestal Truly “Quick-Install”?
The term “quick-install” gets thrown around liberally in product marketing, but genuine tool-free assembly hinges on three non-negotiable elements: intuitive design, precision manufacturing, and mechanical advantage systems that work in harmony. A truly rapid-install pedestal eliminates the need for screwdrivers, hammers, or wrenches by incorporating fastening mechanisms directly into the components themselves. These systems rely on interlocking geometries, pre-installed hardware, and clever leverage points that allow secure connections through simple push, twist, or snap actions.
The fifteen-minute benchmark isn’t arbitrary—it represents the threshold where assembly becomes psychologically effortless. Beyond this point, frustration builds and error rates increase exponentially. Manufacturers achieving sub-15-minute assembly have invested heavily in design-for-assembly principles, reducing component counts and eliminating decision points where users might pause to interpret instructions. Look for systems with color-coded components, molded alignment guides, and audible/tactile feedback that confirms proper engagement without guesswork.
The Evolution of Tool-Free Assembly Systems
Furniture assembly has undergone a quiet revolution over the past decade. Early quick-install systems were often gimmicky, sacrificing strength for speed through flimsy plastic connectors that failed under load. Modern engineering has changed the game entirely. Today’s premium tool-free pedestals borrow principles from aerospace fastening systems and automotive manufacturing, adapting industrial-grade cam locks and snap-fit technology for residential use.
The breakthrough came when manufacturers began designing components from the ground up for tool-free assembly rather than retrofitting traditional furniture with simplified fasteners. This holistic approach means every joint, panel, and connector works as an integrated system. The result is furniture that assembles faster yet exceeds the durability of conventionally assembled pieces. Contemporary systems often exceed ANSI/BIFMA stability standards while requiring zero tools—a combination that would have seemed impossible just fifteen years ago.
Key Engineering Principles Behind 15-Minute Assembly
Achieving robust construction without tools demands sophisticated engineering that remains invisible to the end user. The magic happens in three areas: mechanical fastening systems, material interface design, and force distribution geometry. Each component must be manufactured to tolerances measured in hundredths of an inch—any variance and the entire system becomes either too loose (wobbly) or too tight (impossible to assemble).
Force distribution is particularly critical. Traditional furniture relies on screws to pull joints tight and create friction-based stability. Tool-free systems must achieve the same result through interlocking shapes that direct loads along engineered pathways. This often involves dovetail-inspired joints, wedge-locking tabs, and pre-tensioned components that actually grow stronger as weight is applied. The best designs use gravity and normal use forces to reinforce connections rather than stress them.
Cam Lock Mechanisms: The Unsung Heroes
Cam locks form the backbone of most professional-grade tool-free furniture, yet consumers rarely understand their sophistication. These cylindrical fasteners feature an off-center rotating hub that engages with a mating pin or bolt. When you turn the integrated handle (often disguised as a decorative knob), the cam rotates and pulls components together with hundreds of pounds of clamping force—no screwdriver required.
Quality indicators include metal rather than plastic cams, precision-machined engagement surfaces, and positive stop mechanisms that prevent over-rotation. Premium systems incorporate redundant locking features where the cam automatically secures itself against accidental loosening from vibration or movement. The cam’s lever arm is carefully calculated to provide sufficient mechanical advantage for hand-tightening while preventing overtightening that could strip the mechanism.
Snap-Fit Technology: How It Actually Works
Snap-fit connections, borrowed from automotive interior panels and consumer electronics, represent the cutting edge of tool-free furniture design. These systems use engineered plastic or metal components that deflect temporarily during insertion, then spring back to create a positive mechanical lock. The audible “click” isn’t just satisfying—it’s acoustic confirmation of proper engagement.
The real engineering challenge lies in designing snaps that are strong enough to hold permanently yet require reasonable insertion force. This is achieved through careful material selection (glass-filled nylon or high-impact ABS for plastic components) and precise geometry control. The best snap-fit pedestals incorporate release mechanisms for disassembly without damage, using hidden tabs or secondary release motions that prevent accidental disengagement while allowing intentional deconstruction for moving or storage.
Material Selection: Balancing Speed with Durability
Rapid assembly imposes unique material demands. Components must be dimensionally stable enough to maintain tight tolerances, yet forgiving enough to accommodate minor alignment errors during assembly. They need to be lightweight for easy handling but dense enough to resist denting and wear. The material paradox—lighter is easier to assemble but heavier is more stable—drives innovation in composite engineering.
Manufacturers have responded with hybrid construction strategies. A typical high-quality quick-install pedestal might combine a steel frame for structural backbone, engineered wood panels for substrate flatness, and laminated surfaces for durability. Each material is selected for specific performance characteristics, then integrated using fastening systems designed for that exact combination. This material specificity is why mixing components between different pedestal models almost always results in failure—the engineering assumptions are baked into every joint.
Engineered Wood Composites vs. Solid Hardwood
The debate between engineered and solid wood takes on new dimensions in tool-free furniture. While solid hardwood offers undeniable prestige, its natural variability in density and grain structure makes it problematic for precision fastening systems. A cam lock installed in one part of a hardwood panel might engage perfectly, while the same setup in a different grain orientation could split the wood.
Engineered wood composites—particularly high-density fiberboard (HDF) and laminated veneer lumber (LVL)—provide consistent mechanical properties throughout the panel. This predictability allows engineers to design fasteners that exploit the material’s uniform density and directional strength. Premium composites feature internal screw-holding values that rival or exceed many hardwoods, while their manufactured flatness ensures gap-free joints. For tool-free assembly, consistent material behavior trumps natural beauty every time.
Powder-Coated Steel Frames: What to Look For
When pedestals incorporate steel frames, the finish quality directly impacts both assembly ease and long-term durability. Powder coating should be applied after all holes are punched and formed, ensuring exposed metal edges don’t become rust points. The coating thickness matters—too thin and it chips during assembly; too thick and it interferes with precision fits.
Examine frame designs for continuous welds rather than spot welds at stress points. Look for reinforced corners with gusset plates or doubled material. The best quick-install steel frames incorporate captive nuts or threaded inserts that are permanently fixed, eliminating the need to hold a nut with pliers during assembly. Frame members should be roll-formed or stamped with alignment features that mate positively with wood panels, creating mechanical registration that guides assembly and prevents shifting under load.
Weight Capacity Ratings: Decoding the Numbers
Weight capacity claims in tool-free furniture require careful scrutiny. Manufacturers often advertise impressive static load numbers that have little bearing on real-world performance. A pedestal rated for 200 pounds static load might hold that weight when perfectly stationary, but fail under dynamic loading—like the repeated impact of a heavy object being placed on it or the lateral forces from opening a fully-loaded drawer.
Understanding the testing methodology behind capacity ratings reveals more than the number itself. Look for pedestals tested to ANSI/BIFMA standards, which specify not just static loads but also cyclic testing (repeated loading/unloading), stability testing on uneven surfaces, and impact resistance. Some manufacturers go further with “tool-free specific” testing that evaluates whether cam locks and snap-fits maintain preload after repeated assembly/disassembly cycles.
Static vs. Dynamic Load Considerations
Static load capacity represents the maximum weight the pedestal can support when at rest, evenly distributed across the top surface. Dynamic load capacity—rarely advertised but more important—measures performance under real-world conditions: drawers opening and closing, items being placed or slid across the surface, and occasional bumps or impacts. A well-engineered quick-install pedestal maintains at least 60% of its static rating under dynamic conditions.
The difference lies in connection preload and material damping. Cam locks must maintain tension under vibration; snap-fits need anti-backoff features; panels require sufficient mass and internal damping to absorb impacts without resonating. When evaluating a pedestal, consider your actual use case. A printer stand experiences constant vibration; a file cabinet sees repeated drawer cycling; a side table might endure occasional heavy impacts. Each scenario demands different dynamic performance characteristics.
Stability Factors That Separate Good from Great
Tool-free assembly introduces unique stability challenges. Traditional furniture uses screws to create rigid, monolithic structures through clamping force. Quick-install systems must achieve equivalent rigidity through geometry and mechanical interlock. The difference between a rock-solid pedestal and a wobbly disappointment often comes down to design details invisible in product photos.
Center of gravity management is paramount. Pedestals with lower centers of gravity resist tipping inherently, but this must be balanced against usable storage volume. The best designs use heavy materials in the base (sometimes incorporating hidden steel plates) while keeping upper sections lighter. Drawer slide placement affects stability too—full-extension slides shift weight forward when extended, requiring anti-tip mechanisms or counterweighting strategies.
Anti-Tip Design Features
Modern quick-install pedestals incorporate sophisticated anti-tip technology that activates without tools. Look for interlocking drawer systems where only one drawer can open at a time, or mechanical stops that prevent full extension of multiple drawers simultaneously. Some designs use a “progressive resistance” approach, where opening additional drawers becomes progressively harder, providing tactile feedback before the unit becomes unstable.
The most advanced systems integrate tip sensors that automatically lock casters or extend stabilizer feet when the unit approaches its tipping threshold. These mechanisms are purely mechanical, using pendulums or weighted levers that respond to angle changes. While complex to engineer, they remain invisible to the user and require no adjustment or maintenance—perfect examples of sophisticated simplicity.
Floor Compatibility and Leveling Systems
No floor is perfectly level, and tool-free pedestals must accommodate this reality without requiring shims or adjustable feet that need wrenches. Premium designs incorporate self-leveling systems where the entire base assembly pivots on a central fulcrum, distributing weight across three or four contact points regardless of floor imperfections. Others use independent, tool-adjustable feet with large knurled surfaces you can grip by hand.
Consider your flooring type. Hard casters work beautifully on carpet but can damage hardwood or tile. Soft, non-marking casters protect floors but may compress unevenly under load, creating wobble. The best quick-install pedestals offer caster options or integrated floor protection that doesn’t compromise the tool-free promise. Some designs distribute load through wide, flat glides rather than point-contact casters, providing inherent stability on any surface.
Adjustability Features That Matter
True quick-install philosophy extends beyond initial assembly to long-term usability. Pedestals that adapt to changing needs without tools offer substantially better value. This includes height adjustability for ergonomic optimization, reconfigurable drawer layouts, and modular add-on capabilities. The engineering challenge is creating adjustable features that lock securely by hand yet support full rated loads.
Look for height adjustment systems using spring-loaded pins that engage with precision-drilled holes, or twist-lock columns that use ramped cams to create mechanical advantage. Drawer repositioning should involve simple lift-and-remove actions, with slides that automatically re-engage at new positions. Avoid systems requiring separate locking pins or clips that can be lost—the best designs integrate all adjustment mechanisms into the components themselves.
Height Adjustment Without Tools
Tool-free height adjustment transforms a static pedestal into a dynamic workspace component. The most reliable systems use a “detent” mechanism where spring-loaded balls or pins engage with a series of holes or notches at precise intervals. Each position should provide positive tactile and audible feedback, preventing accidental height changes from casual contact.
Premium implementations incorporate safety features that prevent sudden drops if the adjustment mechanism is inadvertently released while loaded. This might involve secondary support ledges that engage automatically or hydraulic dampers that control descent speed. The adjustment range should be meaningful—at least 4-6 inches—to accommodate different chair heights, user statures, or task-specific needs. Consider how often you’ll need to adjust; daily adjustments demand more robust mechanisms than occasional seasonal changes.
Safety Certifications and What They Actually Mean
Tool-free construction raises legitimate safety concerns—can something that assembles this easily really be secure? Reputable manufacturers submit their quick-install pedestals to rigorous third-party testing that often exceeds requirements for conventional furniture. Understanding these certifications helps separate marketing fluff from genuine safety engineering.
ANSI/BIFMA certification for office furniture and ASTM standards for residential furniture both apply to tool-free designs. However, the testing protocols are evolving to address unique failure modes in snap-fit and cam-lock systems. Look for pedestals certified to newer standards specifically mentioning “repeated assembly” or “tool-free construction.” These tests verify that connections maintain strength after multiple assembly/disassembly cycles—a critical factor if you move frequently or need to store the unit flat.
Common Installation Pitfalls and How to Avoid Them
Even the best quick-install pedestal can be assembled incorrectly. The most frequent error involves forcing connections out of sequence. Most tool-free systems are designed with a specific assembly order that progressively builds structure and alignment. Skipping steps or assembling “out of order” often results in misaligned holes, damaged snap-fits, or cam locks that won’t engage fully.
Another common mistake is ignoring surface preparation. While these pedestals work on uneven floors, starting with a clean, level assembly surface ensures square construction. Assemble on carpet and you may introduce twist that isn’t apparent until the unit is placed on a hard floor. Similarly, failing to verify all connections are fully engaged—listening for the click, feeling for the positive stop—leads to wobble and premature wear. Take the full fifteen minutes; rushing to beat the clock often causes the very problems the design aims to prevent.
Maintenance Tips for Long-Term Performance
Tool-free connections can loosen over time, especially in high-use applications or environments with temperature and humidity fluctuations. The good news is that maintenance itself requires no tools. Schedule quarterly “touch tests” where you gently rock the pedestal and tug on each connection point. Any play can usually be corrected by simply re-engaging cam locks or pressing snap-fits back into position.
Cleanliness directly impacts performance. Dust and debris in cam lock housings can prevent full rotation, while grit in snap-fit mechanisms increases wear rates. A quick blast with compressed air or a wipe with a damp cloth during routine cleaning prevents these issues. For pedestals with steel frames, check that powder coating remains intact at connection points—bare metal can rust and swell, making future disassembly difficult or impossible.
Cost vs. Value: Making Smart Investment Decisions
The price spectrum for quick-install pedestals is vast, from budget options under $50 to premium designs exceeding $300. The difference isn’t just materials—it’s engineering investment. Budget models often achieve tool-free assembly by simplifying connections to the point of weakness, using plastic where metal is needed, or reducing component count by eliminating stability features.
Mid-range pedestals ($100-200) typically represent the sweet spot, offering robust cam lock systems, hybrid material construction, and meaningful weight capacities. Premium models justify their cost through advanced features like integrated cable management, modular expansion capabilities, and sophisticated anti-tip systems. Consider total cost of ownership: a $150 pedestal that lasts ten years costs less than a $60 unit replaced every two years. Factor in your time value too—if a tool-free design saves you an hour versus conventional assembly, that’s real value even at a higher purchase price.
Frequently Asked Questions
How do I know if a pedestal will really assemble in under 15 minutes without tools?
Look for third-party verification in product descriptions and reviews. Reputable manufacturers often include time-lapse videos showing actual assembly. Check component count—fewer than 10 main pieces typically indicates true rapid assembly. Avoid products mentioning “minimal tools required” or “simple assembly” without specifying tool-free; these phrases often hide hidden hardware requirements.
Can tool-free pedestals support as much weight as traditionally assembled furniture?
Absolutely. Modern engineering allows tool-free designs to meet or exceed conventional construction weight ratings. The key is connection preload and load path design. Quality quick-install pedestals direct forces through mechanical interlocks rather than relying solely on friction. Always verify ANSI/BIFMA certification or equivalent testing standards, which confirm the unit has been tested to the same loads as screwed-together furniture.
What happens if I need to disassemble the pedestal for moving?
Most quality quick-install systems are designed for multiple assembly/disassembly cycles. Cam locks can be released and re-engaged dozens of times without degradation. Snap-fit connections vary—look for designs with release mechanisms rather than permanent one-way snaps. Check product specifications for “reassembly rating” or contact manufacturers about expected cycle life before purchase if you move frequently.
Will the connections loosen over time and make the pedestal wobble?
Properly engineered systems actually tighten under load through a phenomenon called “self-seating.” However, environmental changes can affect connections. Quarterly inspection and re-engagement of all fasteners prevents issues. If a pedestal develops wobble, it’s usually due to incomplete initial assembly rather than connection failure. Fully disassemble and reassemble following the correct sequence to restore rigidity.
Are tool-free pedestals durable enough for commercial office use?
Many commercial-grade pedestals now use tool-free construction specifically to reduce installation costs in large office deployments. Look for ANSI/BIFMA certification, which includes durability testing simulating years of commercial use. Steel-frame hybrid designs typically outperform all-wood construction in commercial environments. For high-traffic areas, prioritize units with replaceable wear components like caster wheels and drawer slides.
How do I fix a cam lock that won’t tighten properly?
First, verify the mating pin is fully inserted and the cam is rotating in the correct direction. If the cam spins freely without engaging, the pin may be misaligned or the cam mechanism may be damaged. Try loosening adjacent connections slightly to relieve tension, then re-engage the problematic cam. If issues persist, the unit may have manufacturing defects—contact the manufacturer as most offer warranty support for connection hardware.
Can I assemble these pedestals on carpet or do I need a hard surface?
While you can assemble on carpet, it’s not recommended. Soft surfaces allow components to shift and flex during assembly, potentially introducing twist that appears as wobble on hard floors. If carpet is your only option, use a large piece of cardboard or a plywood sheet to create a firm assembly surface. Always do final assembly verification on the floor where the pedestal will reside.
What’s the environmental impact of tool-free versus traditional furniture?
Tool-free designs often have a smaller carbon footprint. They ship flat, maximizing shipping density and reducing transportation emissions. The absence of separate hardware packets eliminates packaging waste and the risk of missing parts requiring reshipment. Many manufacturers use recyclable engineered wood and steel. Additionally, easy disassembly facilitates end-of-life recycling and reduces landfill waste compared to furniture with permanent adhesive or nailed connections.
Do tool-free pedestals work on uneven floors?
Quality designs incorporate compensation systems. Look for units with independent adjustable feet you can turn by hand, or self-leveling base designs that pivot to maintain three-point contact. For severely uneven floors (more than 1/2 inch variation), consider pedestals with wide, flat glides rather than casters, as these bridge gaps more effectively. Some premium models include built-in leveling indicators that show when the unit is properly stabilized.
Are there any safety concerns unique to tool-free assembly?
The primary concern is incomplete engagement of connections. Always verify each fastener clicks, locks, or rotates to its full stop position. Test stability before loading drawers fully. Keep children away during assembly—snap-fit components can release suddenly if misaligned, and some cam locks have strong springs. Once properly assembled, a certified tool-free pedestal is as safe as traditionally built furniture. The connections are designed to fail-safe, meaning they loosen rather than catastrophically break if overloaded, providing warning before collapse.