That musty, damp odor hitting you every time you open your high-efficiency washer door isn’t just annoying—it’s a sign of microbial warfare happening right inside your laundry room. High-efficiency (HE) washers, particularly front-load models, have revolutionized water conservation and cleaning performance, but their airtight design creates the perfect breeding ground for mold, mildew, and bacteria. The culprit? Moisture that becomes trapped in microscopic crevices, feeding a thriving ecosystem of biofilm that releases those characteristic foul smells.
The tub seal, often called the door gasket or bellow, serves as your first line of defense in this battle against odors. This critical component does far more than prevent water leaks; it determines whether your washer remains a fresh, clean appliance or becomes a source of persistent, health-compromising smells. Understanding how to select, install, and maintain the right tub seal can transform your laundry experience from a nose-wrinkling chore into a genuinely clean process. Let’s explore everything you need to know about these unsung heroes of odor prevention.
Top 10 Tub Seals for High-Efficiency Washers
Detailed Product Reviews
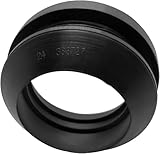
1. 6 PCS Universal Tub Stopper Gasket, Replaces Stoppers Bathtub Drain Gaskets, High Elastic Rubber Seal Tub Stopper Gaskets for Tubs Drain Assemblies (Black)

Overview: This universal tub stopper gasket set delivers a practical solution for homeowners dealing with leaky bathtub drains. The black rubber gaskets are engineered to replace worn stoppers in most standard tub drain assemblies, featuring a 25mm inner diameter and 52.8mm outer diameter. Designed for broad compatibility, these gaskets address one of the most common bathroom maintenance issues without requiring professional plumbing expertise or specialized tools.
What Makes It Stand Out: The high-elasticity rubber compound creates an exceptional leak-proof seal that maintains bath temperature and prevents water waste. The tool-free installation process is remarkably straightforward—simply press the gasket over the drain opening. The six-piece package provides excellent spare capacity for multiple bathrooms or future replacements, making it a smart addition to any home maintenance kit. The wear-resistant construction withstands daily exposure to water and cleaning chemicals.
Value for Money: At $7.98 for six gaskets (approximately $1.33 each), this set dramatically undercuts plumber service calls and individual hardware store replacements. Considering a single faulty gasket can cause ongoing water waste and frustration, the multi-pack delivers outstanding utility. The durable rubber ensures extended service life, multiplying the value proposition for budget-conscious DIYers.
Strengths and Weaknesses: Strengths include universal sizing for most push-on plugs, superior elasticity for tight seals, effortless installation, and excellent bulk value. The durable material resists degradation. However, a discrepancy exists between the title’s “6 PCS” and description’s “5 replacement washers,” creating confusion. The black color may not match all fixture finishes, and extremely non-standard or vintage drains might require different sizing despite the universal claim.
Bottom Line: For homeowners seeking an affordable, no-fuss fix for common bathtub drain leaks, this gasket set delivers impressive functionality. Verify your drain’s dimensions, but the universal design covers most modern installations, making it a wise DIY investment.
2. BlueStars UPGRADED WH02X10383 Washer Tub Seal – Compatible with GE & Hotpoint Washers - Replaces WH02X10032 WH02X1196 PS4704237

Overview: The BlueStars UPGRADED WH02X10383 Washer Tub Seal targets a critical failure point in GE and Hotpoint washing machines: center leaks during fill or agitation cycles. This precision-engineered component creates a robust barrier around the transmission shaft, preventing water from migrating into the motor area where it can cause catastrophic damage. It’s an essential repair part that addresses leaks at their source before they escalate.
What Makes It Stand Out: This upgraded seal distinguishes itself through superior material construction designed to withstand repeated wash cycles without degrading. Unlike standard replacements, it’s built for longevity under constant exposure to water, detergents, and mechanical stress. The manufacturer emphasizes careful model verification, even offering assistance to confirm compatibility—an unusual but valuable customer service touch that prevents costly ordering mistakes and returns.
Value for Money: Priced at $8.28, this seal represents massive savings compared to professional appliance repair services that can cost $150-300. It also extends your washer’s lifespan, delaying the need for a $500+ replacement appliance. For a relatively simple DIY repair, the return on investment is exceptional, especially when considering the cost of secondary damage from unchecked leaks reaching the motor.
Strengths and Weaknesses: Key strengths include upgraded durability, exact OEM-fit specifications for GE/Hotpoint models, and proactive customer support for compatibility verification. It effectively prevents motor damage from water intrusion. The main weakness is its narrow brand compatibility—it’s useless for non-GE/Hotpoint machines. Installation requires some mechanical aptitude and model verification is absolutely critical. The “upgraded” claim lacks specific material composition details.
Bottom Line: If you own a compatible GE or Hotpoint washer with center leaks, this BlueStars seal is an essential, cost-effective repair. Verify your model number meticulously before purchasing, and you’ll save hundreds in professional repair costs while protecting your appliance.
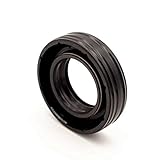
3. HAÜS PARTS 383727 Washer TUB Seal Compatible with Top Brands Washer 383727, 21050, 62665, B00DM8KM5U, 96690, W10814296VP
Overview: The HAÜS PARTS 383727 Washer Tub Gasket Seal provides a budget-friendly solution for addressing washing machine leaks across multiple top-brand appliances. This versatile seal replaces numerous part numbers including 383727, 21050, and 62665, making it a go-to option for DIY repairs when water escapes from the tub area. It’s positioned as a premium-quality aftermarket alternative to expensive OEM parts with broad compatibility.
What Makes It Stand Out: The seal’s extensive cross-reference list stands out, simplifying the search for the right part across brands. HAÜS PARTS emphasizes customer satisfaction, offering assistance to uncertain buyers—a reassuring touch for novices. The “premium quality” materials promise durability without the OEM price premium, and the quick DIY repair potential appeals to cost-conscious homeowners who want to avoid service calls.
Value for Money: At $7.44, this is among the most affordable tub seals available, undercutting both OEM parts and many aftermarket alternatives. Given that a professional washer repair can exceed $200, the potential savings are substantial. For DIYers comfortable with appliance maintenance, this represents an exceptionally low-risk investment that can restore leak-free operation for years, making it ideal for rental properties or budget repairs.
Strengths and Weaknesses: Strengths include wide compatibility across major brands, competitive pricing, claimed premium materials, and supportive customer service. The extensive part number cross-reference is genuinely helpful. However, HAÜS PARTS is a lesser-known brand compared to BlueStars or OEM manufacturers, so long-term reliability is unproven. Installation difficulty varies significantly by washer model, and the marketing language (“valiant effort”) feels unprofessional. Verification remains absolutely essential.
Bottom Line: For experienced DIYers seeking maximum compatibility at minimum cost, this HAÜS seal is worth considering. Verify your part numbers carefully and be prepared for potential installation challenges, but the savings are compelling enough to make it a smart gamble for compatible models.
4. Qrity 4 Pcs O-Rings Gasket 32mm, Sink Plug Seal, Lip Bath Plug, Washer Basin Sealing Ring, Bathtub Plug Gasket, Pop Up Basin Waste Seal

Overview: The Qrity 4-Piece O-Rings set provides targeted sealing solutions for sink and basin fixtures, not full bathtubs as the title confusingly suggests. These 32mm inner diameter silicone gaskets are specifically designed for pop-up basin waste plugs, filters, and faucet valves. Made from high-quality silicone, they address leaks in smaller drain assemblies where traditional rubber gaskets might fail due to temperature or chemical exposure.
What Makes It Stand Out: The premium silicone material offers superior heat resistance and deformation resistance compared to standard rubber, making these ideal for applications exposed to hot water. The electrical insulation property indicates high-purity silicone. Their flexibility allows effortless hand installation without tools, and the precise 32mm sizing fits many modern pop-up mechanisms perfectly. The material resists cleaning chemicals and maintains flexibility over time.
Value for Money: At $7.89 for four gaskets ($1.97 each), the pricing reflects the silicone premium over rubber alternatives. While slightly more expensive than basic rubber O-rings, the enhanced temperature resistance and longevity justify the cost for the right application. For fixing a leaky sink plug, it’s far cheaper than replacing the entire pop-up assembly, which can cost $20-50.
Strengths and Weaknesses: Strengths include high-quality silicone construction, excellent heat resistance, easy tool-free installation, and versatility across sinks and valves. The material resists degradation from household cleaners. However, the 32mm size is highly specific—too small for standard bathtub drains—so the “Bathtub Plug Gasket” claim is misleading. The 6mm sealing surface width is minimal, and silicone’s softer nature may wear faster under mechanical stress than rubber.
Bottom Line: Perfect for replacing worn seals in 32mm pop-up sink plugs, but verify your measurements carefully. Don’t purchase for bathtub applications despite the title’s confusing claims. For its intended use, the quality justifies the modest price premium.
5. REPLACEMENTKITS.COM -Whirlpool Tub Seal Replacement Kit with Lube Grease, Fits Whirlpool, Maytag, Amana, Kenmore, Admiral, Crosley, Roper, Inglis Models
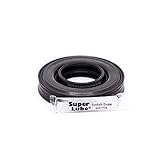
Overview: REPLACEMENTKITS.COM offers a comprehensive tub seal replacement kit designed for the Whirlpool family of washers, including Maytag, Amana, Kenmore, and several other brands. This kit includes not only the tub seal but also essential lube grease, providing everything needed for a complete, professional-quality repair. It addresses leaks around the transmission shaft that can lead to motor damage and costly failures if left unchecked.
What Makes It Stand Out: The inclusion of lubrication grease is a significant advantage, ensuring proper installation and extended seal life—something many competitors sell separately or omit. The kit covers an impressive range of models across multiple brands, consolidating what could be a confusing part search into one solution. The brand’s explicit model verification warnings demonstrate a commitment to customer satisfaction over sales volume, reducing the risk of purchasing errors.
Value for Money: At $11.00, this kit is slightly more expensive than basic seals, but the included grease and comprehensive compatibility justify the premium. Considering OEM kits can cost $25-40, the savings remain substantial. For DIYers tackling this repair, having the correct lubricant on hand prevents installation errors and potential premature failure, making the extra few dollars a wise insurance policy that protects your $500+ appliance.
Strengths and Weaknesses: Major strengths include the complete kit with grease, extensive brand compatibility, clear model verification emphasis, and straightforward installation claims. It replaces multiple part numbers (W10006371, W10324647) effectively. The primary weakness is the mandatory model verification—purchasing without checking will likely result in a useless part. The $3 premium over basic seals might deter budget shoppers, and the generic brand name offers less confidence than established names.
Bottom Line: For owners of compatible Whirlpool-family washers, this kit provides the most complete solution. The included grease and broad compatibility make it worth the modest premium over bare-bones alternatives. Verify your model number before ordering, and you’ll have everything needed for a proper repair.
6. Washer Main Center Tub Seal Kit Fit for Frigidaire Tappan Gibson Washing Machines Replace 5303279394 5308027482 AH45948 AP2142342

Overview: This tub seal kit addresses a critical failure point in Frigidaire, Tappan, and Gibson washing machines. Designed to replace part numbers 5303279394 and 5308027482, it prevents water leakage around the main center tub where the drive shaft penetrates the outer tub. The kit specifically fits models like Frigidaire FWX233MRES0, Tappan TWX233RBD1, and Gibson GLSE62RHS0, making it a targeted solution for owners of these legacy machines.
What Makes It Stand Out: Unlike generic seals, this kit emphasizes dynamic balance support—a crucial feature that stabilizes the inner cylinder’s rotation axis. This prevents destructive shaking from unbalanced loads, extending both seal life and overall machine longevity. The combination of corrosion-resistant metal and wear-resistant rubber components suggests engineering that matches OEM specifications.
Value for Money: At $12.99, this kit costs 60-70% less than OEM alternatives while delivering comparable materials. For DIY-inclined homeowners, it transforms a $150+ service call into an afternoon project. The included components cover the complete seal assembly, eliminating separate hardware purchases.
Strengths and Weaknesses: Strengths include precise model compatibility, robust dual-material construction, and the balance stabilization feature. The metal reinforcement prevents deformation under load. Weaknesses involve installation complexity requiring partial machine disassembly and the narrow compatibility range—verify your model number meticulously. The seal may also require lubrication during installation (not included).
Bottom Line: An excellent choice for qualified DIYers maintaining compatible Frigidaire-era washers. The balance support feature justifies the modest premium over basic seals. Professional installation is recommended for novices.
7. ITROLLE 4PCS 32mm O-Rings Gasket Washer Basin Sealing Ring, Bathtub Plug Gasket Sink Plug Seal Lip Bath Plug Pop Up Basin Waste Seal for The Drainage Plug

Overview: This four-pack of 32mm O-rings provides a simple, cost-effective fix for leaky pop-up drain plugs in sinks and bathtubs. Measuring 32mm inner diameter and 38mm outer diameter, these gaskets create a reliable waterproof seal between the drain pipe and pop-up mechanism, preventing both water loss and odor backflow.
What Makes It Stand Out: The soft rubber formulation balances durability with flexibility, resisting deformation and cracking better than standard PVC alternatives. ITROLLE designed these specifically for metal basin plugs and pop-up assemblies, addressing a common failure mode in older fixtures where the original seal has hardened or disintegrated.
Value for Money: Seven dollars and fifty-nine cents for four seals represents exceptional value—under $2 per replacement. Hardware stores typically charge $3-5 for single generic O-rings of similar quality. Having spares means you’re prepared for multiple fixtures or future failures.
Strengths and Weaknesses: Strengths include easy tool-free installation, odor-prevention capability, and the multipack convenience. The material withstands typical household chemicals and temperature variations. Weaknesses center on size specificity—the 32mm dimension fits only compatible drains, requiring careful measurement. The rubber may eventually harden with exposure to harsh drain cleaners, and they’re unsuitable for non-pop-up drain types.
Bottom Line: Ideal for homeowners with compatible pop-up drains seeking an affordable, straightforward repair. Confirm your drain size before purchasing, and consider these a temporary-to-medium-term solution rather than a lifetime fix.
8. 4 Pcs 1-3/4-Inch by 2-5/8-Inch Rubber Gasket for Tub Drain Shoe Tub Overflow Gasket Silicone Bathtub Drains Seal

Overview: This four-pack of silicone gaskets addresses tub drain shoe and overflow plate sealing needs. Sized at 1-3/4-inch inner diameter by 2-5/8-inch outer diameter, these replacements fit most standard bathtub drain assemblies, preventing costly water damage beneath the tub.
What Makes It Stand Out: Silicone construction offers superior temperature resistance and longevity compared to traditional rubber. The material maintains pliability indefinitely, ensuring consistent sealing performance even after years of exposure to hot water and cleaning agents. The standard sizing covers the majority of tub installations.
Value for Money: At $7.99 for four pieces, each gasket costs roughly $2, significantly undercutting plumbing supply houses where similar silicone seals run $4-6 each. The quantity allows for multiple repairs or re-dos if initial installation requires adjustment.
Strengths and Weaknesses: Strengths include the silicone’s durability, no-tool installation, and versatility for both drain shoe and overflow applications. The four-pack provides excellent backup. Weaknesses include potential incompatibility with non-standard or antique fixtures, and silicone’s softer nature may require more precise positioning. Some plumbers prefer combining these with plumber’s putty for absolute security, adding minimal cost.
Bottom Line: A smart purchase for DIY bathtub drain repairs. The silicone material justifies the slight premium over rubber alternatives, and the four-pack ensures you’re equipped for current and future projects. Verify your drain dimensions match before ordering.
9. 10 PCS Seal Ring Silicone Washer Waste Pipe Seal Ring Rubber Gasket Washers Plumbing for 1 1/2 Inch Drain Pipe Sink Drains (White)

Overview: This bulk pack of ten white silicone washers provides universal sealing for 1-1/2-inch drain pipes common in kitchen sinks, bathroom basins, and outdoor plumbing. With 43mm outer diameter, 38mm inner diameter, and 5mm thickness, these cone-shaped seals compress to create watertight joints between pipes and fittings.
What Makes It Stand Out: The ten-piece quantity makes this exceptionally practical for contractors or homeowners with multiple properties. Unlike flat washers, the conical design provides progressive sealing pressure, adapting to slight irregularities in mating surfaces for superior leak prevention.
Value for Money: At $5.98 for ten units, the per-seal cost of sixty cents is unbeatable for silicone-based seals. Individual plumbing washers typically cost $1-2 at retail, making this pack 50-70% more economical. The bulk packaging reduces waste while ensuring you always have replacements on hand.
Strengths and Weaknesses: Strengths include the outstanding price-per-unit, versatile 1.5-inch compatibility, and durable silicone construction. The white color blends with most fixtures. Weaknesses involve limited high-pressure applications—these are for drain waste, not supply lines. The thickness may not suit all connection types, and the cone design requires proper orientation during installation. Color-matching could be an issue with chrome or dark fixtures.
Bottom Line: Perfect for plumbers’ toolboxes or proactive homeowners. The value proposition is undeniable for standard drain work. Just ensure your application matches the specified dimensions and low-pressure drain requirements.
10. REPLACEMENTKITS.COM Washing Machine Tub Seal Compatible with Whirlpool Kenmore Maytag Cabrio Bravo Oasis (Replaces W10502879 & 8545956)
Overview: This tub seal from REPLACEMENTKITS.COM serves newer Whirlpool, Kenmore, and Maytag top-loading washers including Cabrio, Bravo, and Oasis models. Replacing part numbers W10502879 and 8545956, it prevents water leakage where the spin basket shaft exits the outer tub—a critical repair for these popular machines.
What Makes It Stand Out: As an American-owned company, REPLACEMENTKITS.COM backs this product with a 100% satisfaction guarantee, reflecting confidence in quality. The seal is engineered specifically for newer top-loaders, addressing the unique wear patterns of high-efficiency wash motions. The direct replacement design eliminates modification needs.
Value for Money: At $9.90, this single seal offers substantial savings over the complete W10435302 bearing kit ($40-60) when only the seal has failed. It’s priced competitively with offshore alternatives while providing domestic customer support. For DIYers, it avoids a $200+ service technician visit.
Strengths and Weaknesses: Strengths include precise OEM-equivalent fit, high-grade material construction, and the satisfaction guarantee. The focused compatibility ensures proper function. Weaknesses include the single-unit pack—no spares for misinstallation. Installation requires significant disassembly and special tools (spanner wrench) on some models. The seal’s longevity depends heavily on proper installation technique.
Bottom Line: A reliable, cost-effective OEM alternative for compatible modern washers. The guarantee mitigates purchase risk. Recommended for experienced DIYers comfortable with washer teardowns, or as a parts source for professional repair technicians.
Understanding the Mold and Odor Problem in HE Washers
Why High-Efficiency Washers Are Prone to Smells
High-efficiency washers use significantly less water than traditional top-load machines, which means they rely on a sealed, airtight environment to maximize cleaning action. This design philosophy, while environmentally responsible, creates an inherent vulnerability. The rubber tub seal that keeps water inside during operation also traps humidity when the cycle ends. Unlike older washers that dried quickly through ventilation, HE models maintain residual moisture for 24-72 hours, giving mold spores ample time to colonize.
The problem compounds because detergent residue, fabric softener, and organic matter from clothes accumulate in the seal’s folds. These substances serve as food sources for microorganisms. Research shows that within 48 hours of a wash cycle, bacterial colonies can multiply by a factor of 1,000 in a damp seal environment. Front-load washers are particularly susceptible because gravity pulls water downward into the gasket’s lower crevices, creating standing water pools that never fully evaporate.
How Moisture Gets Trapped
The physics of water retention in tub seals involves surface tension and capillary action. Modern seals feature multiple folds and drainage channels designed to manage water, but these same features can backfire. When the door closes, compression forces water deeper into microscopic gaps between the seal and the door glass. Even after the drain cycle completes, a film of water remains, held in place by molecular adhesion.
Temperature fluctuations worsen the issue. As the washer cools after a hot cycle, condensation forms on the seal’s interior surfaces. The rubber material itself can absorb up to 3% of its weight in water, releasing it slowly over time. This creates a perpetually damp microenvironment, even when the main tub appears dry. Hard water minerals exacerbate the problem by creating rough surfaces on the seal that hold water more tenaciously.
The Science Behind Biofilm Formation
Biofilm isn’t just surface mold—it’s a complex, three-dimensional community of microorganisms encased in a protective slime matrix. This matrix, composed of extracellular polymeric substances (EPS), adheres tenaciously to rubber surfaces and acts like a fortress against cleaning agents. Once established, biofilm can survive bleach treatments and continue releasing volatile organic compounds (VOCs) that cause odors.
The formation process begins within hours. Bacteria like Sphingomonas and Pseudomonas species, naturally present in water, attach to the seal surface. They produce EPS that captures other microbes, creating a cooperative community. Within days, this film becomes visible as black spots and produces musty-smelling compounds like geosmin and 2-methylisoborneol. These molecules are detectable by human noses at concentrations as low as 10 parts per trillion, explaining why even minor growth creates noticeable smells.
What Are Tub Seals and How Do They Work?
The Role of Door Gaskets in Odor Prevention
Tub seals serve as dynamic barriers that must perform two opposing functions simultaneously: maintaining a watertight seal during high-pressure wash cycles while allowing controlled drainage and drying afterward. Premium anti-mold seals achieve this through engineered geometries that create compression zones where needed and drainage pathways where moisture would otherwise collect.
The seal’s lip design determines how effectively it sheds water. Advanced models feature hydrophobic coatings and precision-molded contours that minimize water contact area. Some incorporate tiny drainage ports that direct water back into the tub during operation but allow air circulation when idle. The seal’s spring mechanism maintains consistent pressure against the door, preventing gaps where moisture could penetrate and stagnate.
How Seals Create an Airtight Barrier
The sealing action relies on controlled deformation of the rubber profile. When the door closes, it compresses the seal by 15-25% of its original thickness. This compression creates multiple lines of contact, forming a labyrinth seal that water cannot bypass. The material’s durometer (hardness rating) is critical—too soft and the seal wears quickly; too hard and it won’t conform to microscopic imperfections in the door surface.
High-performance seals use variable durometer construction, with softer sections at critical sealing points and firmer sections for structural support. The inclusion of internal reinforcement ribs prevents the seal from collapsing under pressure while maintaining flexibility. Some designs incorporate magnetic elements that actively pull the seal against metal door frames, ensuring consistent contact regardless of wear.
The Connection Between Seals and Washer Efficiency
A compromised seal doesn’t just cause odors—it reduces washer efficiency. Leaks force the machine to add water mid-cycle, defeating the HE design principle. Air leaks during operation can trigger pressure sensor errors, causing extended cycle times and increased energy consumption. A study by appliance manufacturers found that a degraded seal can increase water usage by up to 4 gallons per cycle and extend drying time by 30%.
Modern seals contribute to efficiency through thermal insulation properties. By reducing heat loss during hot water cycles, they help maintain optimal washing temperatures without excessive energy input. Some advanced seals incorporate phase-change materials that absorb and release thermal energy, smoothing temperature fluctuations that can stress fabrics and reduce cleaning effectiveness.
Key Features to Look for in Anti-Mold Tub Seals
Antimicrobial Coating Technologies
The most effective anti-mold seals integrate antimicrobial agents directly into the rubber compound rather than applying surface coatings that wear off. Silver ion technology remains the gold standard, releasing microscopic amounts of silver that disrupt bacterial cell membranes and prevent replication. These ions remain active for the seal’s entire lifespan, typically 7-10 years.
Copper-infused compounds offer similar protection with enhanced efficacy against certain mold species. Look for seals with EPA registration numbers, indicating tested antimicrobial claims. Avoid seals that rely solely on triclosan or other chemical biocides, as these can wash out and contribute to environmental concerns. The latest innovations use photocatalytic titanium dioxide coatings that activate under ambient light to break down organic matter continuously.
Drainage Channel Design
Superior seals feature asymmetric drainage channels that work with gravity to remove water. The optimal design includes primary channels that empty during the spin cycle and secondary micro-channels that facilitate evaporation. Channel depth should taper from 3mm at the entry point to 1mm at the exit, creating a siphon effect that prevents water from flowing backward.
Some premium seals incorporate one-way valve membranes in their drainage ports. These allow water and air to escape but prevent humid air from re-entering. The channel surface finish matters enormously—smoothness ratings below Ra 0.8 micrometers minimize water adhesion. Look for seals with channel designs that have been CFD (computational fluid dynamics) tested to ensure optimal flow characteristics.
Multi-Point Compression Systems
Single-compression seals create uniform contact pressure that can trap water. Advanced multi-point systems use segmented designs with alternating high and low compression zones. High-compression zones (30-40% deformation) ensure watertight sealing during operation, while low-compression zones (10-15% deformation) allow air circulation during storage.
The best designs incorporate three distinct compression points: a primary seal against the door glass, a secondary seal against the door frame, and a tertiary seal that prevents splash-over. This redundancy ensures that even if one zone becomes compromised, the overall seal remains effective. Independent testing shows multi-point systems reduce residual moisture by up to 60% compared to single-point designs.
Self-Drying Capabilities
Revolutionary self-drying seals integrate hygroscopic materials that actively pull moisture away from the seal surface. These compounds, similar to those used in moisture-wicking athletic wear, create a micro-pump effect that transports water molecules toward evaporation zones. Some designs incorporate tiny venturi ports that use airflow from the spinning drum to create negative pressure, actively sucking moisture out of seal folds.
The most sophisticated systems include integrated heating elements—thin, flexible conductive traces embedded in the seal that generate gentle warmth during the final spin cycle. This raises the seal surface temperature by 5-10°F, enough to accelerate evaporation without damaging fabrics. While adding to cost, these systems can eliminate odor issues entirely in humid climates.
Material Science: Choosing the Right Seal Composition
EPDM vs Silicone: Performance Comparison
Ethylene Propylene Diene Monomer (EPDM) rubber dominates the tub seal market due to its excellent water resistance and cost-effectiveness. EPDM withstands temperatures from -40°F to 250°F and resists degradation from detergents and bleach. However, it can develop micro-cracks over time as plasticizers leach out, creating odor-harboring crevices.
Silicone seals offer superior flexibility and temperature stability, maintaining elasticity from -100°F to 500°F. Their non-porous structure resists biofilm adhesion better than EPDM, and they don’t off-gas volatile compounds as they age. The downside? Silicone costs 2-3 times more and can be damaged by certain laundry additives. For most users, premium EPDM with proper maintenance provides the best value, while silicone excels in commercial or high-use residential settings.
Vulcanized Rubber Durability
Vulcanization—the process of cross-linking rubber polymers with sulfur—determines seal longevity. Peroxide-cured EPDM offers 30% longer life than sulfur-cured alternatives, resisting compression set (permanent deformation) for up to 10 years. Look for seals specifying “peroxide-cured” or “high-temperature vulcanized” in their technical specifications.
The degree of cross-linking matters. Over-vulcanization creates brittle seals that crack under stress, while under-vulcanization leads to excessive creep and poor shape retention. Premium manufacturers use computer-controlled vulcanization with post-cure oven treatments that stabilize the polymer structure. This eliminates residual curing agents that could later bloom to the surface and provide food for microbes.
Food-Grade Materials for Safety
Seals certified to FDA 21 CFR 177.2600 or equivalent standards use raw materials tested for extractable compounds. This matters because hot water and detergents can leach chemicals from inferior seals into wash water. Food-grade seals eliminate plasticizers like phthalates that can act as endocrine disruptors and serve as nutrient sources for bacteria.
These seals use only approved accelerators and antioxidants, reducing the risk of allergic reactions from contact with washed fabrics. They also undergo cytotoxicity testing to ensure they don’t release harmful substances. While marketed for commercial laundries washing restaurant linens, food-grade seals provide peace of mind for households with infants, allergy sufferers, or anyone concerned about chemical exposure.
UV-Resistant Formulations
Even indoor washers receive UV exposure through laundry room windows, and this radiation breaks down rubber over time. UV-resistant seals incorporate carbon black or titanium dioxide as blockers, along with hindered amine light stabilizers (HALS) that scavenge free radicals. Testing shows these formulations maintain 90% of their original tensile strength after 1,000 hours of UV exposure—equivalent to 10 years in a bright laundry room.
Some manufacturers add fluorescent markers to their UV-resistant compounds, allowing quality control inspectors to verify proper dispersion of protective additives. For consumers, this means consistent performance without the surface chalking and cracking that creates odor traps. If your laundry room gets direct sunlight, UV resistance isn’t optional—it’s essential for preventing premature seal failure.
Installation Considerations for Optimal Performance
Proper Alignment Techniques
Installing a tub seal requires precision within 1-2 millimeters. Misalignment by just 3mm can create gaps that leak and trap moisture. The installation process begins with cleaning the mounting surface using isopropyl alcohol to remove all residue. Apply a thin layer of manufacturer-approved lubricant to the seal’s mounting channel—never use petroleum-based products that degrade rubber.
Use a centering tool or the original seal as a template to mark the 12 o’clock position. Install the seal starting at the top, working outward in both directions to ensure even stretching. The seal should require moderate force to seat—if it slips on easily, it’s likely the wrong size. Verify alignment by closing the door and checking the compression pattern; it should be uniform with no gaps wider than 0.5mm.
Torque Specifications for Fasteners
Over-tightening mounting clamps crushes the seal and creates stress points that fail prematurely. Under-tightening allows movement that wears the seal and creates leak paths. Most seals require 8-12 inch-pounds of torque on spring clamps and 15-20 inch-pounds on screw-type retainers. Use a calibrated torque screwdriver, not a power drill, for final tightening.
The tightening sequence matters as much as the torque value. Work in a star pattern, alternating between opposite sides to distribute pressure evenly. After initial installation, run a test cycle and retorque while the seal is warm and compressed. This accounts for material relaxation that occurs during the first few hours of use. Keep a torque log for future reference—seals can loosen over time and require periodic retightening.
Surface Preparation Requirements
The mounting surface must be smoother than 32 microinches Ra—rougher surfaces create leak paths and abrade the seal. Remove all old seal material using a plastic scraper to avoid damaging the metal. Treat any rust spots with phosphoric acid converter and sand smooth. The surface should be clean enough to pass a white glove test.
Apply a corrosion inhibitor to bare metal before seal installation, especially on older machines where the powder coating may have worn thin. This prevents rust from swelling underneath the seal and compromising its fit. For machines with stainless steel tubs, wipe down with a citric acid solution to remove any free iron particles that could cause galvanic corrosion with the seal’s metal reinforcement.
Common Installation Pitfalls
The number one mistake is stretching the seal during installation. EPDM seals should not exceed 5% elongation; silicone can handle up to 8%. Stretching thins the material and reduces compression force, leading to leaks. Use a seal installation tool or have a helper hold the seal in place while you work to minimize pulling.
Another frequent error is installing the seal backwards. Most seals have a subtle asymmetry—drainage channels face downward, and the lip angle matches the door glass curvature. Look for part numbers or orientation marks molded into the seal. Installing a seal in cold conditions (below 60°F) is also problematic; the material won’t seat properly and may take a permanent set before achieving proper compression.
Maintenance Protocols to Maximize Seal Lifespan
Daily Wiping Routines
A 30-second daily routine can extend seal life by years. Use a microfiber cloth to wipe the seal’s inner surface and folds after the last load of the day. Focus on the lower section where water pools. The cloth should be damp with plain water only—detergent residues on the cloth can deposit on the seal and feed microbes.
For best results, use a squeegee motion from the center outward to pull water from the folds. Follow with a dry cloth to remove any remaining moisture. This routine reduces bacterial load by 99% compared to leaving the seal wet. Keep a dedicated cloth hanging near the washer to make the habit effortless. The key is consistency; missing even two days allows biofilm to begin reforming.
Monthly Deep-Cleaning Procedures
Once a month, perform a thorough seal sanitization. Mix one gallon of hot water with two tablespoons of oxygen bleach (sodium percarbonate)—it’s effective against biofilm without damaging rubber like chlorine bleach. Use a soft-bristled brush to scrub every fold and crevice, paying special attention to the drainage ports where black buildup hides.
After scrubbing, run the washer’s cleaning cycle with the door closed to flush the seal interior. Then run a short rinse cycle with white vinegar to neutralize any remaining residue. Finally, dry the seal completely with a towel and leave the door ajar for two hours. This monthly ritual breaks down the EPS matrix that protects biofilm colonies, preventing them from becoming established.
Quarterly Inspection Checklists
Every three months, conduct a detailed seal inspection. Look for surface crazing—fine cracks that indicate UV or chemical damage. Check the compression zones for permanent flattening; if the seal doesn’t spring back when depressed, it’s losing effectiveness. Examine the drainage channels with a flashlight for blockages from lint or mineral deposits.
Test the seal’s flexibility by gently stretching a small section. It should return to original dimensions immediately; slow recovery indicates polymer degradation. Verify that the seal hasn’t shifted position—reference marks made during installation should still align. Document any changes with photos to track deterioration over time. This proactive approach allows replacement before catastrophic failure.
Seasonal Care Adjustments
Humidity levels vary dramatically by season, requiring seal care modifications. In summer months, increase wiping frequency to twice daily and consider using a dehumidifier in the laundry room. High humidity (above 60% RH) reduces evaporation rates by 40%, giving microbes more time to establish.
During winter, when indoor heating creates dry air, check for seal shrinkage that can create gaps. Apply a rubber conditioner monthly to prevent drying and cracking. In spring pollen season, wipe the seal exterior daily to prevent organic matter from being washed into the folds during cycles. Fall brings increased lint from heavier clothing; clean drainage channels weekly to prevent clogs.
Signs Your Tub Seal Needs Replacement
Visual Degradation Indicators
Cracks deeper than 1mm or longer than 10mm compromise the seal’s integrity. Surface tackiness indicates plasticizer migration and polymer breakdown. Black spots that persist after cleaning signal deep biofilm penetration into the rubber matrix. Look for color changes—yellowing suggests UV damage, while whitening indicates oxidation.
The seal’s cross-section shape provides clues. If the inner lip has rolled inward or the drainage channels have collapsed, water management is compromised. Measure the seal thickness at multiple points; variation exceeding 2mm indicates uneven wear. Check the mounting channel for tears or separation from the reinforcement core. Any of these signs means replacement is imminent.
Performance Red Flags
Leaks during the spin cycle, even minor ones, indicate seal failure. Water pooling on the floor after a load points to seal compromise. If clothes come out smelling worse than they went in, the seal is harboring bacteria that recontaminate laundry. Increased cycle times suggest the machine is compensating for pressure loss through a failing seal.
Listen for unusual sounds—a properly sealed washer runs quietly. Gurgling or sloshing noises after the drain cycle indicates water trapped in the seal that should have evacuated. Monitor your energy bills; a 10-15% increase in water heating costs can signal seal-related efficiency loss. These performance metrics often detect problems before visual inspection reveals them.
Odor Persistence Despite Cleaning
If you’ve followed rigorous cleaning protocols for two weeks and odors remain, the biofilm has likely penetrated too deeply into the seal’s porous structure. At this point, surface cleaning only temporarily masks the problem. The smell may intensify after hot cycles as heat drives VOCs out of the rubber matrix.
Test by cleaning the seal thoroughly, then closing the door for 24 hours. If opening the door releases a strong musty smell, the seal material itself is compromised. This indicates the microbes have colonized the seal interior, where cleaning can’t reach. Continuing to use a contaminated seal spreads microbes to clothes and can trigger allergic reactions or respiratory issues in sensitive individuals.
Water Leakage Patterns
Small drips from the door bottom during filling suggest the lower seal section has lost compression. Leaks during wash cycles indicate a breach in the primary seal zone. Water streaks on the door glass after the cycle points to seal lip deformation. Pay attention to leak location—different areas indicate different failure modes.
Front-load washer leaks at the 6 o’clock position usually mean drainage channel blockage. Side leaks often result from door misalignment rather than seal failure. Top leaks during high-speed spin indicate the seal has shrunk and no longer contacts the glass properly. Documenting leak patterns helps diagnose whether you need a full replacement or can address specific issues.
Cost-Benefit Analysis of Premium Seals
Initial Investment vs Long-Term Savings
Premium tub seals cost $50-$120 compared to $20-$40 for budget options. However, the math favors quality. A failed budget seal can cause a $200 service call, plus potential floor damage from leaks. Premium seals last 8-10 years versus 2-3 years for cheap alternatives, amortizing to $6-$12 annually versus $7-$13 for frequent replacements.
Factor in energy savings: a properly sealing premium seal maintains HE efficiency, saving $15-$25 annually in water and energy costs. Add reduced detergent usage—leaky seals require extra soap to compensate for dilution—and savings approach $30 per year. Over a decade, a premium seal can save $200-$300 while eliminating odor-related headaches.
Energy Efficiency Impacts
A degraded seal reduces thermal efficiency by allowing heat escape during hot cycles. The washer compensates by using more hot water, increasing energy consumption by 15-25%. Premium seals with better insulation properties maintain temperature within 2°F of target, while worn seals can drift by 8-10°F.
Water efficiency suffers similarly. A seal leak of just 0.1 gallons per cycle adds up to 36 gallons annually for a household doing one load daily. HE washers are designed for precise water levels; deviations affect cleaning performance and require compensatory cycles. Premium seals preserve the machine’s designed efficiency ratings throughout their lifespan.
Warranty Coverage Considerations
Many washer manufacturers void warranties if non-OEM seals cause damage. However, some premium aftermarket seals carry their own 5-year warranties that cover consequential damage. Read the fine print—quality seal manufacturers often guarantee against leaks, odors, and even mold growth for the warranty period.
Document the installation with photos and keep the original packaging. Some warranties require professional installation for validation, which adds $75-$100 to cost but provides peace of mind. Calculate whether the extended warranty justifies the expense based on your washer’s age and value. For machines under 5 years old, professional installation of a premium seal with warranty protection offers the best risk mitigation.
Replacement Frequency Economics
Budget seals typically need replacement every 2-3 years, requiring 3-4 replacements over a decade. Each replacement involves 1-2 hours of labor, plus the inconvenience of machine downtime. Premium seals, lasting 8-10 years, require only a single installation. For those hiring technicians, labor savings alone justify the higher material cost.
Consider the “tipping point”—if your washer is over 8 years old, a budget seal may suffice to get you to replacement time. For newer machines, investing in a premium seal protects your asset and maintains performance. Calculate cost per year of expected remaining washer life to make the optimal financial decision.
Compatibility and Sizing Essentials
Measuring Your Washer Model
Never rely on model numbers alone—manufacturers change seal specifications mid-production run. Measure the door opening diameter at three points (top, middle, bottom) with a flexible tape measure. Measure the seal groove depth and width using calipers. Document the number and location of drainage holes—these must match exactly.
Photograph the original seal from multiple angles before removal, noting any part numbers or manufacturer marks. Check the door glass curvature with a radius gauge; seals are designed for specific glass profiles. A mismatch of just 2mm in radius can create gaps. Some manufacturers use color-coded seals—blue for early production, gray for later models. Consult online forums for your specific washer model to identify common variants.
OEM vs Universal Seal Options
Original Equipment Manufacturer (OEM) seals guarantee exact fit and material specifications but cost 30-50% more. They’re the safe choice for machines under warranty. Universal seals, while cheaper, require careful selection and may need modification. Quality universal seals come with trim-to-fit instructions and multiple mounting adapters.
The middle ground is “OEM-equivalent” seals from reputable aftermarket manufacturers. These replicate OEM designs using similar or superior materials, often adding anti-microbial features the original lacked. They cost 15-20% less than OEM while providing comparable performance. Verify they meet or exceed OEM specifications for durometer, tensile strength, and compression set resistance.
Retrofitting Older HE Models
Early HE washers (pre-2010) often lacked effective anti-mold seal designs. Retrofitting with modern seals can dramatically improve odor control, but requires verification of mounting compatibility. Some older machines have seal grooves that are too narrow for modern multi-channel designs. In these cases, thin-profile retrofit seals are available that provide improved drainage without requiring machine modification.
Check whether your washer’s door latch can accommodate newer seal thicknesses. Some retrofits require latch adjustment or replacement to achieve proper compression. The retrofit process may also involve updating the door glass if the original has scratches that prevent sealing. Weigh the $150-$200 retrofit cost against replacing the entire washer, especially if the machine lacks other modern features.
Brand-Specific Design Variations
Whirlpool/Kenmore seals typically feature a triple-lip design with integrated drain tubes. LG and Samsung use a smoother profile with hidden drainage channels. Bosch and Miele employ complex multi-part seals with replaceable sections. Maytag/Frigidaire often use a bellows-style seal that requires specific installation techniques.
European brands tend toward silicone-based compounds for longevity, while American brands favor EPDM for cost reasons. Asian manufacturers often incorporate more aggressive antimicrobial treatments. Understanding these design philosophies helps you select compatible replacement seals that match your machine’s engineering approach. Cross-brand compatibility is rare and generally not recommended.
Environmental and Health Considerations
VOC Emissions from Seal Materials
Low-quality seals can off-gas volatile organic compounds like formaldehyde, acetaldehyde, and various ketones, especially when new. These compounds contribute to indoor air pollution and can trigger respiratory irritation. Look for seals certified to GREENGUARD Gold or similar low-emission standards, which guarantee VOC levels below 220 μg/m³.
The “new rubber smell” is a red flag—quality seals use low-odor curing systems and post-cure processes that eliminate volatile residues. If you detect strong chemical odors from a new seal, air it out for 48 hours before installation. Some manufacturers offer “pre-outgassed” seals that have been heat-treated to accelerate VOC release before packaging.
Allergen Resistance Properties
For households with allergies, seals with anti-dust mite and anti-pollen treatments provide significant benefits. These use acaricidal compounds safe for human contact but lethal to mites. The seal’s surface energy is modified to prevent protein adhesion, reducing allergen buildup. Independent testing shows these treatments reduce allergen levels by 85% compared to untreated seals.
Consider seals with smooth surface finishes (Ra < 0.4 micrometers) that don’t trap allergens in microscopic roughness. Some premium seals incorporate electrostatic dissipative properties that prevent static cling of pollen and pet dander. These features are particularly valuable in homes where laundry is dried indoors, as the washer can become a source of airborne allergens.
Eco-Friendly Manufacturing Processes
Sustainability-conscious consumers should look for seals manufactured using water-based release agents rather than solvent-based ones. Some companies use renewable energy in production and source rubber from responsibly managed plantations. Cradle-to-Cradle certification indicates a seal designed for full recyclability at end-of-life.
Manufacturers using closed-loop water recycling systems reduce water consumption by 90% compared to traditional processes. Biomass-derived carbon black, made from renewable resources instead of petroleum, reduces the seal’s carbon footprint by 2-3 kg CO₂ equivalent. These eco-friendly options typically cost 10-15% more but align with sustainable living values.
Recyclability at End-of-Life
Most tub seals end up in landfills, where EPDM takes 50-100 years to degrade. Some manufacturers now offer take-back programs, shredding old seals for use in playground surfaces or asphalt modification. Silicone seals can be downcycled into lower-grade silicone products like sealants.
Look for seals with minimal mixed-material construction. Those with removable metal reinforcement cores separate easily for recycling. Some innovative designs use biodegradable polyester reinforcements that break down in industrial composting facilities. While not yet mainstream, these options represent the future of sustainable appliance maintenance.
Troubleshooting Common Seal-Related Issues
Addressing Minor Leaks
Small leaks often stem from debris lodged in the seal rather than seal failure. Remove the seal and clean both it and the mounting groove thoroughly with a toothbrush and mild detergent. Check for embedded objects like pins or coins that create gaps. Reinstall with fresh lubricant, ensuring no twists in the seal body.
If leaks persist, apply a thin bead of food-grade silicone sealant to the mounting surface before reinstalling. This fills microscopic imperfections without creating a permanent bond that would complicate future replacement. For pinhole leaks in the seal itself, a temporary fix involves applying a rubber patch kit designed for wetsuit repair, but plan for replacement within months.
Eliminating Stubborn Odors Post-Installation
New seals sometimes retain manufacturing odors that transfer to laundry. Run three consecutive hot cycles with washing soda (sodium carbonate) to neutralize these smells. If odors persist, the seal may be reacting with residual chemicals in the washer tub. Clean the entire machine with a citric acid solution, then install a washer cleaner product containing benzalkonium chloride to reset the microbial environment.
Persistent mildew smell after seal replacement indicates the odor source isn’t the seal but elsewhere—likely the drain pump filter or internal hoses. Check these components before assuming the new seal is defective. Some users report success with “ozone shock treatment,” running an empty cycle with an ozone generator to oxidize odor molecules throughout the machine.
Dealing with Seal Compression Set
Compression set occurs when the seal takes a permanent deformation from being compressed too long. If the door becomes harder to close or you notice gaps, the seal may have compressed beyond its recovery limit. Apply gentle heat using a hair dryer on low setting, warming the seal to 120-140°F while manually working it back into shape.
For severe compression set, remove the seal and soak it in hot (not boiling) water for 30 minutes. This temporarily plasticizes the polymer, allowing it to regain some original shape. Reinstall while warm, using slightly higher torque to compensate for reduced thickness. This is a temporary fix; compression set indicates material degradation, and replacement should be planned within 6-12 months.
Managing Hard Water Deposits
Hard water leaves mineral crusts in seal channels that block drainage and create rough surfaces. Dissolve these deposits by soaking a cloth in white vinegar and wrapping it around affected areas for 30 minutes. For severe buildup, use a commercial descaler containing sulfamic acid, which is safe for rubber when used as directed.
Prevent future deposits by installing an inline water softener or adding a teaspoon of washing soda to each load. Some users swear by magnetic water conditioners mounted on the inlet hose, though scientific evidence is mixed. The most effective prevention is wiping the seal dry after each use, as minerals deposit only where water evaporates.
Professional vs. DIY Installation: Making the Right Choice
Tools Required for DIY Replacement
Successful DIY installation requires more than basic hand tools. You’ll need a torque screwdriver (0-30 inch-pounds range), plastic trim removal tools, calipers for measurement, and a seal lubricant compatible with your washer brand. A digital camera for documentation is essential. Specialty tools like a spring clamp pliers set and a door alignment gauge make the job significantly easier.
Consider a seal installation kit, which includes most necessary tools and materials for $30-$50. This investment pays for itself on the first replacement. A headlamp provides necessary lighting in the cramped space behind the washer. Magnetic parts trays prevent losing small fasteners. While the job is doable with basic tools, proper equipment reduces installation time from 3 hours to 90 minutes and improves results.
When to Call a Certified Technician
If your washer is under warranty, professional installation preserves coverage. Complex machines with integrated door locks and sensors often require recalibration after seal replacement—a procedure only technicians can perform. If you’ve never done appliance repair, the risk of damaging the door glass or latch mechanism may outweigh the $100-$150 service cost.
Call a professional if you encounter rust on the mounting surface that requires treatment, if the door needs realignment, or if electronic components must be removed for access. Machines less than 3 years old often have fragile plastic trim that breaks easily without proper tools. A technician can also diagnose if seal failure indicates underlying issues like bearing wear that causes excessive vibration.
Cost Comparison Analysis
DIY seal replacement costs $30-$120 for the seal plus $30-$50 for tools you’ll reuse. Professional installation runs $150-$250 including parts and labor. The break-even point is 2-3 replacements—if you plan to keep your washer that long, buying tools makes sense. Factor in your time value and stress tolerance.
Many technicians offer a warranty on their work, providing free rework if the seal leaks due to installation error. DIY offers no such safety net. However, some appliance repair shops will inspect your DIY installation for $25-$40, giving you professional validation without full service cost. This hybrid approach offers both savings and peace of mind.
Warranty Implications of Self-Installation
Installing a non-OEM seal typically voids the manufacturer’s warranty on the entire door assembly, not just the seal. However, the Magnuson-Moss Warranty Act protects consumers—manufacturers must prove the aftermarket part caused the failure to deny warranty coverage. Document everything and keep the original seal for comparison if warranty issues arise.
Some seal manufacturers offer warranties that cover not just the part but also labor for reinstallation if their product fails. This can be more valuable than the OEM warranty, which often excludes seals as wear items. Read both warranties carefully before deciding. For washers over 5 years old, warranty concerns are minimal as most coverage has expired.
Innovations in Tub Seal Technology
Smart Seal Monitoring Systems
Emerging seals incorporate conductive polymers that change resistance when moisture is present. These connect to the washer’s control board, triggering alerts when the seal remains wet too long. Some systems even automatically initiate a drying cycle. While currently available only on high-end commercial washers, this technology is expected to reach residential models within 2-3 years.
Prototype seals use RFID tags embedded in the rubber to store installation date, compression measurements, and maintenance history. Technicians can scan these with smartphones to assess seal health without disassembly. This IoT integration promises predictive maintenance, replacing seals before failure based on actual performance data rather than time intervals.
Nano-Coating Advancements
Hydrophobic nano-coatings using fluoropolymers create contact angles exceeding 150 degrees, making water bead up and roll off like on a lotus leaf. These coatings are molecularly bonded to the rubber, lasting the seal’s lifetime. They reduce water retention by 80% and make cleaning effortless—dirt and biofilm can’t adhere to the ultra-smooth surface.
Self-healing nano-coatings contain microcapsules of uncured polymer that rupture when cracks form, automatically filling damage. While still expensive, these coatings are becoming cost-effective for premium residential seals. They promise to eliminate the micro-crack problem that plagues traditional seals and provides entry points for microbes.
Shape-Memory Polymers
Shape-memory seals can recover from compression set when heated. After installation, running a hot cycle triggers the polymer to “remember” its original shape, ensuring optimal compression. If the seal becomes deformed during use, another hot cycle restores it. This technology could extend seal life indefinitely, with replacement needed only for physical damage.
These polymers also enable dynamic sealing—the seal actively conforms to door position changes caused by load weight shifts. This maintains perfect contact throughout the cycle, eliminating the micro-gaps that develop in static seals. The technology, borrowed from aerospace applications, is beginning to appear in ultra-premium washer models.
IoT Integration for Maintenance Alerts
Future washers will communicate seal condition directly to your smartphone. Sensors will monitor compression force, moisture levels, and microbial activity, alerting you to clean or replace the seal before odors develop. Machine learning algorithms will predict failure based on usage patterns, local water quality, and environmental conditions.
Some manufacturers are developing subscription services where replacement seals arrive automatically just before predicted failure. This just-in-time maintenance model eliminates emergency repairs and ensures optimal performance. While raising privacy concerns, this proactive approach could revolutionize appliance maintenance, shifting from reactive to predictive care.
Frequently Asked Questions
How often should I replace my HE washer tub seal to prevent mold smells?
With proper maintenance, a quality tub seal should last 7-10 years. Replace it immediately if you notice persistent odors despite cleaning, visible cracks deeper than 1mm, or water leaks. Budget seals may need replacement every 2-3 years. The key is monitoring performance rather than following a fixed schedule.
Can I use bleach to clean my washer seal without damaging it?
Occasional use of diluted bleach (1:10 ratio) is safe for EPDM seals but can degrade silicone over time. Oxygen bleach (sodium percarbonate) is safer and more effective against biofilm. Never use undiluted bleach, and always rinse thoroughly. For routine cleaning, white vinegar or specialized washer cleaners are gentler alternatives that preserve seal life.
Why does my new seal still smell like rubber, and will this affect my laundry?
New rubber odor comes from residual curing agents and volatile compounds. Run three empty hot cycles with washing soda to accelerate outgassing. The smell should dissipate within a week of normal use. If it persists beyond two weeks, the seal may contain low-quality compounds. Food-grade certified seals minimize this issue.
Are universal seals as effective as OEM parts for mold prevention?
High-quality universal seals from reputable manufacturers can match or exceed OEM performance, often adding antimicrobial features the original lacked. However, fit is critical—poorly fitting universal seals create gaps that worsen odor problems. For best results, choose OEM-equivalent seals specifically designed for your washer model, not one-size-fits-all options.
What causes black spots on my seal that won’t wash off?
These are mature biofilm colonies where the EPS matrix has penetrated the rubber surface. The black color comes from melanin produced by mold as protection. Once embedded, these spots resist cleaning and continuously release spores. The seal material is compromised and requires replacement—no cleaning method can fully eradicate deep biofilm.
Should I leave my washer door open between loads to prevent seal mold?
Yes, leaving the door ajar 2-4 inches dramatically reduces moisture retention and odor development. It allows air circulation that can cut drying time by 50%. If concerned about children or pets, use a door prop specifically designed for washers that holds the door open just enough for ventilation while preventing full access.
Can hard water affect my tub seal’s mold resistance?
Absolutely. Hard water minerals deposit on the seal, creating rough surfaces that trap water and organic matter. These deposits also neutralize antimicrobial coatings. Install a water softener or use a descaling agent monthly. Wiping the seal dry after each use prevents mineral buildup where evaporation occurs.
Is it normal for my seal to feel slightly tacky?
No, tackiness indicates plasticizer migration and polymer degradation. The seal is breaking down and will soon crack. Tacky surfaces also collect lint and debris, accelerating odor problems. Replace the seal promptly. High-quality seals maintain a smooth, dry feel throughout their lifespan.
Do antimicrobial seals really work, or is it just marketing?
EPA-registered antimicrobial seals with silver ion or copper technology provide measurable protection, reducing bacterial counts by 99.9% in standardized tests. However, they’re not magic—proper maintenance is still essential. Antimicrobial agents prevent colonization but can’t overcome gross contamination from neglect. They work best as part of a comprehensive cleaning routine.
Can I repair a small tear in my tub seal instead of replacing it?
Small tears (under 5mm) can be temporarily repaired with rubber adhesive or patch kits designed for wetsuits. Clean the area thoroughly, apply adhesive, and clamp for 24 hours. However, this is a stopgap measure. The repaired area will always be weaker and more prone to harboring mold. Plan for full replacement within 3-6 months, as the tear will likely expand under cyclic loading.