There’s nothing quite as frustrating as opening your washing machine to find your clothes swimming in soapy water that hasn’t moved for an hour. That telltale silence where the rhythmic agitation should be—the heart of the cleaning process—has gone quiet. Before you panic and start shopping for a new appliance, take a breath. That dead agitator might just be a $15 part away from roaring back to life, and you could have it fixed before your coffee gets cold.
The universal motor coupling is the unsung hero connecting your washer’s motor to its transmission, and when it fails, the entire operation grinds to a halt. The good news? This is one of the most DIY-friendly repairs in the appliance world. With the right universal coupling and a handful of basic tools, you can restore that essential agitation in about 15 minutes, saving yourself hundreds of dollars and the headache of appliance shopping.
Top 10 Universal Motor Couplings for Restoration
Detailed Product Reviews
1. Lippert Components 238461 Torque Shaft Motor Coupling - Hex Cutout
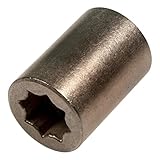
Overview: This torque shaft motor coupling from Lippert Components is a specialized replacement part designed for In-Wall RV slide-out systems. At $7.64, it offers a direct-fit solution for RV owners experiencing slide-out motor connection failures. The component features a hex cutout design that accommodates various motor types, eliminating assembly requirements and streamlining what could otherwise be a complex repair process.
What Makes It Stand Out: The hex cutout configuration provides exceptional versatility compared to standard couplings, allowing compatibility with multiple motor configurations within Lippert’s slide-out ecosystem. The exact-match engineering means no modifications or adapters are necessary—simply remove the failed coupling and install this replacement. Lippert’s reputation for RV-specific components ensures you’re getting a part designed with the unique demands of mobile living in mind, including vibration resistance and durability for road conditions.
Value for Money: At under eight dollars, this coupling represents significant savings compared to dealer service visits or complete slide-out mechanism replacements. OEM-grade components for RV systems typically command premium prices, making this an accessible preventative maintenance item. The cost is justified by its specialized design and the expensive problems it prevents; a failed coupling can render an entire slide-out room immobile.
Strengths and Weaknesses: Strengths: Exact-fit design eliminates guesswork; hex cutout increases motor compatibility; no assembly required for installation; affordable OEM-quality part; backed by Lippert’s RV industry reliability. Weaknesses: Limited to specific In-Wall slide-out systems; plastic construction may eventually fatigue like the original; requires manual compatibility verification before purchase; not suitable for non-Lippert mechanisms.
Bottom Line: If your Lippert In-Wall slide-out system needs coupling replacement, this is the part to buy. It’s an inexpensive, genuine solution that restores functionality without professional service costs.
2. Power Seat Motor to Transmission Coupling Coupler for 1979-1988 GM Vehicles, Replaces Part Numbers 20614175 & 20113451
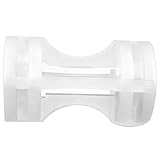
Overview: This power seat motor coupler addresses a common failure point in vintage GM vehicles, replacing brittle original parts for 6-way adjustable seats across Buick, Chevrolet, Oldsmobile, and Pontiac models from 1979-1988. Priced at $18.99, it restores functions like headrest adjustment, reclining, and fore-aft positioning that enthusiasts of classic cars often find disabled.
What Makes It Stand Out: The high-resin plastic formulation functions as an intentional safety shear pin, designed to fail before damaging expensive seat transmission components—a thoughtful engineering choice missing in many aftermarket alternatives. Its comprehensive compatibility covers a full decade of GM vehicles, and the manufacturer explicitly positions it as exceeding OEM standards for durability. The simple R&R (remove and replace) installation process requires only basic hand tools.
Value for Money: Vintage GM power seat components are increasingly scarce, making this $19 coupler a bargain compared to salvage yard hunting or professional upholstery shop rates. Considering a complete seat transmission can cost hundreds, this sacrificial component’s replacement cost is negligible insurance. The part matches GM numbers 20614175 & 20113451 exactly, ensuring proper fit without modification.
Strengths and Weaknesses: Strengths: Exact OEM replacement with improved material; safety shear pin protects transmission; covers wide range of classic GM models; straightforward installation; restores multiple seat functions simultaneously. Weaknesses: Plastic construction may not satisfy metal-only purists; limited to 1979-1988 model years; requires disassembling seat base for access; some vehicles may need multiple couplers if all positions are failed.
Bottom Line: Essential for restoring power seat functionality in classic GM vehicles. The safety engineering and precise fit make it worth every penny for preservationists and daily drivers alike.
3. 5Pack Vgoohobby Universal Rotatable Steering Shaft U Joint Coupling Motor Connector Coupler for RC Car Robot Crawler Boat (3.17mm to 4mm)
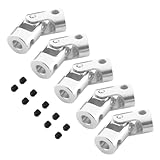
Overview: This five-pack of universal joint couplings serves the RC hobbyist and robotics builder market, providing metal connectors for linking small motors to drive shafts. Sized for 3.17mm to 4mm shafts, these couplers work with brushed and small brushless motors common in cars, crawlers, boats, and robotic applications. The $10.99 price point delivers multiple spares for experimental projects.
What Makes It Stand Out: The 360-degree rotatable design accommodates significant angular misalignment while maintaining smooth power transmission—critical in RC vehicles where chassis flex and suspension movement constantly alter geometry. Machined from quality metal rather than plastic, these couplers handle higher torque loads without deformation. The variety pack concept extends beyond this specific size, with options from 3mm to 6mm available, allowing builders to standardize on one supplier.
Value for Money: Five metal couplings for eleven dollars represents exceptional value in the hobby market, where single aluminum couplers often cost $3-5 each. The inclusion of mounting screws adds convenience, eliminating separate hardware store trips. For RC enthusiasts who frequently modify or repair vehicles, having spares on hand prevents project delays.
Strengths and Weaknesses: Strengths: Durable metal construction outperforms plastic alternatives; 360-degree rotation handles misalignment; five-pack provides excellent spares; includes necessary screws; versatile across multiple RC platforms. Weaknesses: Set screws require careful tightening to avoid stripping; small size limits application to micro and mini RC; no wrench included; may loosen under extreme vibration without threadlocker.
Bottom Line: An unbeatable value for RC hobbyists needing reliable, flexible shaft couplings. Keep this pack in your workshop for quick repairs and custom builds—just add threadlocker for maximum security.
4. Befenybay 2 Pcs 5mm to 8mm Universal Joint Shaft Coupling with Screws for Motor
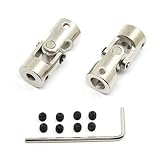
Overview: Befenybay offers a pair of heavy-duty universal joint couplings designed for medium-duty motor applications requiring 5mm to 8mm shaft connections. Constructed from electroplated 45# steel, these couplers target DIY machinery, robotics, and light industrial uses where durability matters. The $10.99 kit includes both couplings, mounting screws, and an M4 hex wrench for immediate installation.
What Makes It Stand Out: The 45# steel construction with electroplated finish provides substantially higher strength than aluminum or plastic couplings in this price range, resisting wear in continuous operation scenarios. Adherence to international flange standards ensures compatibility with many motor and shaft configurations beyond hobbyist equipment. The inclusion of a dedicated hex wrench demonstrates thoughtful packaging—users won’t need to hunt for tools during installation.
Value for Money: Two steel couplings for eleven dollars with included hardware and tool presents solid value, particularly for builders needing robust connections. Comparable steel universal joints typically cost $8-12 individually, making this dual-pack economical for symmetrical drive systems or having a spare ready. The electroplating adds corrosion resistance, extending service life in humid environments.
Strengths and Weaknesses: Strengths: High-grade steel construction ensures durability; electroplated finish resists corrosion; includes wrench and all fasteners; international standard sizing; handles higher torque than hobby-grade parts. Weaknesses: Only two pieces limits project scope; 14mm outer diameter may be bulky for compact builds; heavier than aluminum alternatives; no vibration dampening features.
Bottom Line: A robust, no-nonsense solution for medium-duty applications where steel strength is required. The included wrench and competitive pricing make it practical for serious builders.
5. 5Pcs 5mm to 8mm Universal Joint Motor Shaft Couplers, Rotatable Coupling Steering Connectors for RC Cars Boats Models DIY Airplane and Robots

Overview: This five-pack of 5mm to 8mm universal joint couplings targets RC hobbyists and robotics enthusiasts needing reliable steel connections for larger motors than typical micro-couplers handle. At $9.99 for five units, it undercuts competitors while including twenty screws and a wrench. The 34.4mm length and 14mm diameter accommodate standard RC car and boat motor shafts, while the steel construction supports higher torque applications.
What Makes It Stand Out: The value proposition is unmatched—five electroplated 45# steel couplings for less than ten dollars provides workshop inventory for multiple projects. The vibration-dampening design, unusual in this price tier, reduces noise and component wear in high-RPM applications. The 360-degree rotation with set screw mounting offers both flexibility and security, while the comprehensive hardware kit eliminates separate fastener purchases.
Value for Money: This is arguably the best bulk deal in its class. Individual steel couplings of similar specification sell for $4-7 each, making this pack worth $20-35 at typical retail. The included wrench and generous screw count (twenty for five couplings) demonstrates customer-focused packaging. For club racers or robotics teams, bulk purchasing power translates directly to project budget savings.
Strengths and Weaknesses: Strengths: Exceptional quantity-to-price ratio; durable electroplated steel; vibration-reducing design; complete hardware kit included; versatile across RC and robotics platforms. Weaknesses: Set screw mounting requires careful torque application; steel adds weight compared to aluminum; may be oversized for 1/18 scale or smaller; no threadlocker included.
Bottom Line: Stock your workshop with this five-pack. It’s the smartest buy for RC hobbyists and robot builders needing reliable 5mm-8mm couplings, offering professional-grade materials at bulk pricing.
6. HARSKIYER Screw Drive Coupler Part, 4 Pc Polyurethane Replacement Coupling, 0.8 Inch Inner Diameter with 8 Grooves, Universal Repair Kit for Garage Door Opener Drive Shafts

Overview: The HARSKIYER 4-piece polyurethane coupler kit offers a universal solution for repairing screw-drive garage door openers. Designed to replace worn couplings that cause operational failures, this kit provides homeowners with essential spare parts for emergency repairs across most major brands.
What Makes It Stand Out: Precision engineering defines this product, featuring exact dimensions of 1.57"L x 1.18"W x 1.18"H with an 0.8-inch inner diameter and eight-groove design. The 0.12-inch gear spacing prevents slippage during high-torque operations. Molded from industrial-grade polyurethane through a seamless injection process, these couplers resist tearing and deformation while eliminating burrs that accelerate wear.
Value for Money: At $5.49 for four couplers (approximately $1.37 each), this kit delivers exceptional value compared to OEM replacements costing $15-25 per unit. The four-pack configuration ensures you have spares for future failures or multiple opener systems, making it a cost-effective maintenance investment.
Strengths and Weaknesses:
- Pros: Universal compatibility across major brands; durable polyurethane construction; straightforward installation requiring only two bolts; eliminates motor-shaft separation issues; includes four units for multiple repairs.
- Cons: May not fit all garage door opener models; polyurethane may have shorter lifespan than metal alternatives in extreme conditions; requires careful verification of dimensions before purchase.
Bottom Line: An indispensable emergency repair kit that belongs in every homeowner’s toolbox, offering professional-grade quality at a fraction of dealer prices.
7. 5Pack Vgoohobby Universal Rotatable Steering Shaft U Joint Coupling Motor Connector Coupler for RC Car Robot Crawler Boat (3mm to 3mm)

Overview: This 5-pack Vgoohobby universal joint coupling set serves RC hobbyists and small-scale robotics enthusiasts with precision-machined metal connectors. Designed for 3mm to 3mm shaft connections, these couplings enable flexible power transmission in compact spaces where perfect alignment is impossible. The universal design makes them essential for complex drivetrain layouts.
What Makes It Stand Out: The 360-degree rotatable universal joint design accommodates angular misalignment while maintaining smooth torque transfer. Constructed from high-quality metal, these couplers handle brush and small brushless motor applications reliably. The package includes five units with mounting screws, providing immediate spares for multiple projects or replacements. Multiple size options extend versatility beyond the 3mm specification.
Value for Money: Priced at $11.99 for five couplers ($2.40 each), this set offers solid value for hobbyists. Comparable individual metal u-joints retail for $4-6 each, making this multi-pack economical for RC car, robot crawler, and boat applications where multiple connection points are common. The included hardware adds further value.
Strengths and Weaknesses:
- Pros: Durable metal construction; complete 360-degree rotation; includes mounting hardware; five-piece quantity supports multiple projects; various size options available.
- Cons: Limited to small 3mm shafts; hobby-grade quality not suitable for industrial applications; set screws may loosen under vibration; requires precise shaft alignment for optimal performance.
Bottom Line: An excellent value proposition for RC enthusiasts and robot builders needing reliable, flexible shaft connections in compact applications.
8. Bawkars 2 PCS Flexible Steering Coupling Steering Column Motor, Steering Gear Rubber Bushings, Replace OE# 563152K000FFF 56330-4Z000, Compatible with Hyundai Sonata Kia K5 (Black)

Overview: The Bawkars 2-piece steering coupling kit provides a direct replacement for failing flexible couplings in Hyundai and Kia vehicles. Specifically designed to replace OE parts 563152K000FFF and 56330-4Z000, this kit addresses common steering column issues in multiple popular models from 2007-2018. The black nylon construction blends seamlessly with factory components.
What Makes It Stand Out: Featuring a multi-tooth buffer design that fills gaps between steering gear and column, these nylon couplers reduce vibration and eliminate clunking noises during low-speed turns. The high-strength nylon construction withstands steering gear impact while resisting temperature-induced aging, restoring precise steering feedback without complete steering gear disassembly. This targeted engineering solves specific OEM design weaknesses.
Value for Money: At $5.69 for two couplers, this kit offers dramatic savings over dealer parts exceeding $50 each. The two-piece package allows replacement of both couplings simultaneously or provides a spare for future maintenance, delivering professional-grade steering restoration at DIY prices that budget-conscious owners appreciate.
Strengths and Weaknesses:
- Pros: Exact OE fitment for specified Hyundai/Kia models; eliminates steering noise and vibration; high-strength nylon resists wear; no need to disassemble entire steering gear; includes two units.
- Cons: Limited to specific vehicle applications; nylon material may wear faster than OEM rubber; requires dimensional verification before ordering; not suitable for vehicles outside compatibility list.
Bottom Line: A cost-effective, targeted solution for Hyundai and Kia owners experiencing steering column play or noise, delivering dealer-quality results at a fraction of the cost.
9. HARSKIYER Screw Drive Coupler Part, 1 Pc Polyurethane Replacement Coupling, 0.8 Inch Inner Diameter with 8 Grooves, Universal Repair Kit for Garage Door Opener Drive Shafts

Overview: HARSKIYER’s single-piece polyurethane coupler provides the same precision-engineered solution as its 4-pack counterpart for garage door opener repairs. This universal replacement coupling addresses motor-shaft separation issues in screw-drive openers from most major brands, offering a targeted fix for single-door systems. The compact packaging reduces waste for one-time repairs.
What Makes It Stand Out: Identical engineering to the multi-pack version, this coupler features exact 1.57"L x 1.18"W x 1.18"H dimensions with an 0.8-inch inner diameter and eight-groove design. The industrial-grade polyurethane construction resists tearing and deformation, while the seamless injection molding eliminates wear-accelerating burrs. The 0.12-inch gear spacing ensures secure high-torque engagement and reliable long-term performance.
Value for Money: At $3.99 for a single unit, this coupler costs more per piece than the 4-pack option but provides better value for homeowners needing only one replacement. It’s ideal for immediate repairs without the extra expense of unused spares, though frequent DIYers should consider the bulk option for better long-term savings.
Strengths and Weaknesses:
- Pros: Universal compatibility; durable polyurethane construction; quick installation; prevents motor-shaft separation; cost-effective for single repairs.
- Cons: Higher per-unit cost than multi-pack; may not fit all opener models; polyurethane durability concerns in extreme conditions; requires dimensional verification.
Bottom Line: Perfect for homeowners facing a single garage door opener failure who want a quality repair without committing to a multi-pack purchase.
10. Universal Motor Joint Shaft Coupling Connector Steering Steel DIY Motor Joint(16mm)

Overview: This 16mm alloy steel universal joint coupling delivers heavy-duty performance for industrial and mechanical applications. Designed to transmit rotary motion between misaligned shafts, this robust connector handles demanding environments from textile machinery to medical equipment, supporting torque loads up to 45N.M. The precision engineering ensures reliable motion transfer in challenging conditions.
What Makes It Stand Out: The exquisite quality alloy steel construction provides exceptional rust resistance and longevity. The hinge design with cross-shaft connection accommodates angular misalignment while maintaining smooth power transmission. With a 45N.M moment force rating, this coupling exceeds requirements for most DIY and professional mechanical applications. Its versatility spans automotive, industrial, and even dental equipment uses.
Value for Money: Priced at $11.49, this single heavy-duty coupling offers excellent value for industrial-grade hardware. Comparable steel universal joints typically cost $15-20, making this an economical choice for machinery repairs, custom builds, and automotive applications requiring robust torque handling. The long service life further enhances its cost-effectiveness.
Strengths and Weaknesses:
- Pros: High 45N.M torque capacity; durable alloy steel construction; versatile industrial applications; rust-resistant; precise hinge design.
- Cons: Single unit only; 16mm size limits compatibility; may be overkill for light-duty tasks; requires precise installation; heavier than aluminum alternatives.
Bottom Line: An essential component for mechanics and DIY enthusiasts working on heavy-duty machinery, offering professional-grade durability at a competitive price point.
Understanding Motor Couplings: The Unsung Heroes of Washer Agitation
What Is a Motor Coupling and Why Does It Matter?
A motor coupling is a small but critical component that sits between the drive motor and the transmission in most top-loading washing machines. Think of it as a mechanical fuse—a deliberate weak point designed to protect far more expensive parts. This flexible connector transmits torque while absorbing vibration and shock loads that would otherwise damage the motor or gearbox. When it shears apart under stress, it sacrifices itself to save your wallet from a $400 transmission replacement.
How Motor Couplings Enable the Agitation Cycle
During the wash cycle, your motor spins in one direction at a relatively low speed. The coupling transfers this rotational force to the transmission input shaft, which then engages a series of gears to create that familiar back-and-forth agitator motion. The coupling’s flexible design allows for slight misalignments between the motor and transmission while maintaining consistent power transfer. Without this connection, your motor might hum happily, but that energy never reaches where your clothes need it most.
The 15-Minute Promise: Reality Check
What “15 Minutes” Actually Means for DIY Repairs
Let’s be honest—that quarter-hour estimate assumes you’ve done this before and have your tools laid out. For first-timers, plan on 30-45 minutes. The 15-minute timeline becomes realistic once you know the drill: disconnect power, remove the cabinet, pop off the pump, unbolt the motor, swap the coupling, and reverse the process. Your second coupling replacement might actually clock in under ten minutes. The key is understanding that this timeframe represents the mechanical simplicity of the task, not necessarily the learning curve.
Tools You’ll Need for a Speedy Installation
You won’t need a full mechanic’s toolbox, but having the right implements within reach prevents mid-job frustration. Grab a 1/4-inch nut driver or socket set, a flathead screwdriver, and needle-nose pliers. Some models hide their screws under decorative caps, so keep a putty knife handy for gentle prying. A flashlight proves invaluable for spotting that one screw you missed in the shadows. For stubborn couplings, a small gear puller or even a sturdy butter knife can help coax pieces off the shafts without scoring the metal.
Diagnosing a Failed Coupling: Symptoms and Signs
Auditory Clues: The Sound of a Broken Coupling
Your washer will tell you exactly what’s wrong if you listen carefully. A broken coupling produces a distinctive sound—often described as a rapid clicking, buzzing, or humming without the usual mechanical action. Some homeowners report a sound like a playing card in bicycle spokes, while others hear what seems like the motor running freely with no load. The absence of the normal agitation “chug-chug” is your biggest clue. If you hear the motor straining but nothing’s moving, the coupling has likely sheared completely.
Performance Issues: When Your Washer Stops Agitating
The most obvious symptom is a wash basket full of stationary clothes and undissolved detergent. However, partial failures show more subtle signs. You might notice weak agitation that moves clothes sluggishly or intermittent stopping and starting mid-cycle. The spin cycle often continues working normally since it uses the same motor but different transmission engagement. If your washer drains fine but won’t agitate, that’s nearly a smoking gun for coupling failure. Conversely, if it agitates but won’t spin, you might be looking at a clutch or lid switch issue instead.
Visual Inspection: What to Look For
Unplugging the machine and tipping it back reveals the coupling between the motor and transmission. A healthy coupling sits flush with three distinct plastic or rubber arms connecting two metal hubs. Cracks radiating from the center hub, missing chunks, or a completely separated piece tell the whole story. Sometimes you’ll find the motor-side hub spinning independently while the transmission-side hub sits motionless. Rust-colored dust around the area indicates the coupling has been grinding itself apart for weeks before finally giving up.
Universal vs. OEM: Making the Right Choice
What “Universal” Really Means in Appliance Parts
“Universal” doesn’t mean one-size-fits-all in the literal sense. Rather, it indicates the coupling is designed to replace multiple manufacturer-specific part numbers. These aftermarket components reverse-engineer the critical dimensions—shaft bore sizes, hub height, and drive tab configuration—to match dozens of models. Quality universal couplings undergo rigorous testing to ensure they meet or exceed OEM torque specifications. The best ones include adapter sleeves or reversible hubs to accommodate slight variations in shaft diameters that exist even within the same brand.
Pros and Cons of Universal Motor Couplings
The primary advantage is cost and availability. Universal couplings typically run 30-50% cheaper than OEM parts and can be sourced locally when you’re in a pinch. Many DIYers report universal versions lasting just as long as factory originals. However, the downside involves fitment precision. Some budget universal couplings use softer plastics that wear faster or have slightly off-center bores that cause vibration. OEM parts guarantee exact specifications but at a premium price and potentially longer wait times. For a machine nearing the end of its lifespan, a quality universal coupling offers the best value proposition.
Key Features to Evaluate Before Buying
Material Composition: Plastic, Rubber, or Metal-Reinforced?
Most couplings use a high-impact plastic like acetal or nylon for the drive arms, chosen specifically to fail before metal components do. Premium universal options incorporate rubber dampening rings between the plastic and metal hubs, reducing vibration and noise. The latest generation features metal-reinforced centers that prevent the cracking that plagues pure plastic designs. When examining options, look for glass-filled nylon or similar composite materials—these offer superior strength while maintaining the sacrificial protection your machine needs. Avoid couplings that feel brittle or have visible molding defects.
Drive Configuration: Three-Tab vs. Six-Tab Designs
The number of drive tabs directly correlates to torque capacity. Three-tab designs handle standard loads in machines up to 3.5 cubic feet. Larger capacity washers or heavy-duty models often require six-tab couplings to manage increased stress. Some clever universal kits include both configurations in one package, allowing you to snap off the extra tabs if needed. Pay attention to tab thickness too—thicker tabs resist shearing but transfer more shock to the transmission. The sweet spot balances durability with protective failure characteristics.
Shaft Compatibility: Matching Your Motor and Transmission
This is where measurements matter. Motor shafts typically run 1/2-inch or 5/8-inch diameter, while transmission input shafts vary more widely. Bring your old coupling to compare bore sizes, or measure the shafts with calipers. Quality universal couplings include stepped bores or compression sleeves that adapt to slight mismatches. Check the hub depth as well—too shallow and the coupling won’t engage enough splines; too deep and it bottoms out before seating properly. Some manufacturers color-code their couplings to indicate shaft size compatibility, a handy feature when you’re staring at a wall of options.
Installation Essentials: Getting It Right the First Time
Pre-Installation Safety Protocols
Never skip the basics. Unplug the machine completely—even a brief motor jolt while you’re handling bare metal transmission shafts can cause serious injury. Shut off the water supply valves and disconnect the hoses to prevent accidental flooding when you tilt the cabinet. If you have a gas dryer stacked on top, resist the urge to work around it; the 30 minutes spent unstacking prevents a potentially catastrophic mistake. Take a photo of the wiring harness and belt routing before disassembly—your future self will thank you when reassembly gets confusing.
Step-by-Step Removal of the Old Coupling
After removing the cabinet or access panel, locate the water pump attached to the motor shaft. Two clips hold it in place—squeeze the tension with pliers and slide it off. The motor itself mounts on two spring clips and possibly a ground screw. Once freed, the motor drops down, revealing the coupling halves. The old coupling likely shattered, leaving one piece on the motor shaft and another on the transmission. Use a flathead screwdriver to pry between the coupling and shaft gently, working around the circumference. If it’s stubborn, penetrating oil helps, but avoid getting any on the new coupling’s friction surfaces.
Aligning the New Coupling for Optimal Performance
Slide the new coupling onto the motor shaft first, ensuring it seats fully against the motor face. The transmission-side hub should slip on with firm hand pressure—if you need a mallet, something’s misaligned. The two halves should have a small gap between them when the motor is relaxed; this gap closes when you remount the motor and its spring clips apply tension. Rotate the coupling by hand to check for wobbling or binding. A smooth, centered rotation means you’ve nailed the installation. If it feels gritty or off-center, pull it off and check for burrs on the shaft or debris in the coupling bore.
Troubleshooting Post-Installation Issues
Dealing with Stubborn Shafts and Corrosion
Older machines in humid climates often present shafts coated in rust or mineral deposits. A wire brush and fine sandpaper can clean them up, but stop short of removing metal. For couplings that simply won’t budge, a gear puller applies even pressure without damaging the shaft. In extreme cases, you might need to cut the coupling off with a Dremel tool, but protect the shaft seal behind it with a metal shield. Once clean, apply a light coat of anti-seize compound to future-proof the next replacement—just keep it off the drive surfaces themselves.
When the Washer Still Won’t Agitate After Replacement
First, double-check that you plugged the motor harness back in fully—those connectors can feel seated when they’re not. Verify the lid switch is engaging; many washers won’t agitate with an open lid, and the switch can get bumped during reassembly. If the motor hums but doesn’t spin, you might have a seized pump or article of clothing jammed between the baskets. Remove the pump again and try running the motor without it. Should the problem persist, you’re potentially looking at a motor capacitor failure or transmission issue, though these are far less common than coupling failures.
Maintenance Strategies to Extend Coupling Life
Load Management: The Weight Factor
Overloading is the number one coupling killer. Those “max fill” lines exist for a reason—exceeding them forces the motor to work harder, increasing torque spikes that fatigue the coupling’s plastic arms. Heavy items like comforters and rugs should be washed individually or taken to a laundromat with industrial machines. Distribute clothes evenly around the agitator; an unbalanced load creates side forces that stress the coupling asymmetrically. Remember, the coupling’s protective design means it will sacrifice itself to save the transmission, so every overload brings it closer to failure.
Balancing Acts: Preventing Future Failures
Check your machine’s leveling feet quarterly. A washer that rocks during spin cycles transmits vibration directly to the coupling, causing premature wear. Run the machine empty on a rinse cycle and watch for excessive movement. The feet should be adjusted so the machine sits solidly on all four corners with minimal rocking when you push on it. Additionally, inspect the suspension springs and dampening straps that hold the tub assembly. Worn suspension allows the tub to move excessively, creating dynamic loads that couplings aren’t designed to handle long-term.
Cost Considerations: Budgeting for Quality
Price Ranges and What They Indicate
Universal motor couplings typically range from $8 to $25. At the low end, you’re getting basic plastic construction that might last 2-3 years under normal use. Mid-range options around $15-18 offer reinforced designs and sometimes include extra hardware like replacement motor clips. Premium couplings above $20 often feature metal-reinforced hubs and multi-year warranties. While it’s tempting to grab the cheapest option, remember that this $15 part protects your $400 transmission. Spending an extra five dollars for a reinforced design often doubles the service life, making it the economical choice in the long run.
Warranty Value: What Coverage Actually Means
A one-year warranty is standard, but some manufacturers offer two or even three years on premium couplings. Read the fine print—most warranties only cover manufacturing defects, not normal wear or overload damage. Some require professional installation to remain valid, which defeats the DIY purpose. The best warranties are those that offer no-questions-asked replacement within the first year. Keep your receipt and take a photo of the part number before installation. If a coupling fails prematurely, it often indicates another issue in your machine, so a warranty replacement gives you a second chance to diagnose properly.
Where to Source Quality Universal Couplings
Online Marketplaces vs. Local Suppliers
Online shopping offers convenience and reviews, but shipping times can stretch your laundry downtime to a week. Local appliance parts stores stock universal couplings because they fail so frequently, and the counter staff often have decades of experience to offer advice. Big-box hardware stores carry them too, but selection tends toward the budget end. Specialty online appliance parts retailers provide detailed cross-reference tools that match your model number to the correct universal part, removing guesswork. Consider buying two couplings online—keep one as a spare for the inevitable next failure, which will be even faster to install.
Reading Between the Lines of Customer Reviews
Look for reviews that mention specific model numbers similar to yours. Comments like “fit my Kenmore 110 series perfectly” are gold. Be wary of reviews complaining about fitment on older machines—these often involve rusted shafts rather than coupling defects. Pay attention to longevity reports; a review mentioning failure after six months of heavy use tells you more than one posted immediately after installation. Filter for reviews that discuss vibration and noise levels—quality couplings should run quieter than the worn part they replace. Ignore star ratings without context; the detailed experiences reveal the real story.
Common Installation Pitfalls to Avoid
Forcing Components: A Recipe for Disaster
If the coupling doesn’t slide on with moderate pressure, stop and reassess. Forcing it with a hammer can crack the new part or, worse, damage the motor bearings. Check for burrs on the shaft with a fingernail—any catch points need light filing. Ensure you’re not trying to install it backward; most have a slight taper that only works one way. The motor should pivot smoothly on its mounts without binding. If you find yourself muscling anything beyond the spring clips, something’s wrong. Patience now prevents ordering another coupling tomorrow.
Ignoring Pre-Existing Damage
That broken coupling didn’t die in a vacuum. Inspect the motor mounts for cracks—these allow excess movement that kills couplings prematurely. Check the pump for seized bearings; a stiff pump increases motor load and coupling stress. Look at the transmission input shaft seal for leaks. Gear oil dripping onto the coupling softens plastic and causes rapid failure. Address these underlying issues during your repair, or you’ll be repeating the job in six months. The 15-minute fix becomes a waste of time if you don’t solve what broke the coupling in the first place.
Advanced Tips for Tricky Situations
Working in Tight Spaces
Some laundry closets offer barely enough room to slide the machine out. In these cases, you can often replace the coupling without fully removing the cabinet. Tilt the washer back at 45 degrees and support it with a 2x4 block. This gives you access to the motor and coupling from underneath. Work by feel, using needle-nose pliers to manipulate the spring clips. A headlamp becomes essential here. This method cuts installation time dramatically but requires confidence—if you drop a clip, retrieving it becomes a contortionist act. Always have a helper when working in tight spaces to prevent the machine from tipping.
When to Call a Professional
If you discover the transmission shaft is severely rusted or the motor bearings feel gritty when you spin them, a coupling alone won’t solve your problems. Machines over 15 years old often have multiple failing components; sinking money into parts for a dying appliance becomes a losing proposition. Likewise, if you’ve replaced the coupling twice in one year, something else is critically wrong—likely the transmission itself. A service call costing $75 for diagnosis can save you from throwing good money after bad. Know your limits; there’s no shame in admitting a machine has reached its end of life.
Compatibility Beyond the Model Number
Cross-Referencing Part Numbers Effectively
That model number sticker inside your lid contains more information than you might think. The first three digits often indicate the actual manufacturer (Whirlpool, GE, Frigidaire) even on store brands. Use these prefix numbers when searching for universal replacements. Appliance parts websites offer cross-reference tools where you input your OEM part number and receive a list of compatible universals. Keep in mind that manufacturers sometimes change coupling designs mid-production run, so always verify shaft measurements against the new part. When in doubt, remove the old coupling first and take it with you to match physically.
Understanding Manufacturer Variations
Whirlpool and Kenmore direct-drive washers use the most common coupling design, but even these have variations. Some late-model machines switched to a splined coupling rather than the traditional three-tab. GE and Frigidaire often use a different configuration entirely, sometimes incorporating a rubber isolator. Maytag’s design historically used a belt drive, but their later direct-drive models adopted a unique coupling with a metal sleeve. When buying universal, ensure it’s specifically rated for your machine’s brand family. A “fits most” claim isn’t enough—look for explicit compatibility statements or measurement diagrams that let you verify fit before purchase.
Frequently Asked Questions
How do I know if my motor coupling is actually broken?
Listen for the motor running without agitation, and manually check for movement. Unplug the washer, remove the cabinet, and inspect the coupling between the motor and transmission. Cracked, missing, or separated pieces confirm failure. You can also try rotating the agitator by hand—if it moves freely in both directions without engaging the motor, the coupling is likely shot.
Will a universal coupling fit my specific washer model?
Most universal couplings are designed to replace dozens of OEM part numbers, especially for Whirlpool and Kenmore direct-drive machines. Verify by checking your model’s prefix number and measuring the motor and transmission shaft diameters. Quality universal packaging lists compatible model series, and many online retailers have cross-reference tools. When in doubt, remove the old coupling and compare it physically to the new one before installation.
What if I can’t get the old coupling pieces off the shafts?
Start with penetrating oil and patience. Work a flathead screwdriver around the circumference to gradually pry it up. For stubborn pieces, a small gear puller applies even pressure without damaging the shaft. In extreme cases, carefully cut the coupling with a Dremel tool, but shield the shaft seal from metal shavings. Never use excessive force that could bend the motor shaft or damage transmission bearings.
Is it worth buying a more expensive coupling?
The $15-20 premium couplings often feature metal-reinforced hubs and higher-grade plastics that last significantly longer. Given that this $15 part protects your $400 transmission, the extra cost is usually justified. Premium versions also tend to include replacement hardware and better warranties. For heavily used machines or those washing bulky items regularly, spend the extra money for the reinforced design.
Can I use my washer if the coupling is cracked but still working?
A cracked coupling is a ticking time bomb. It may work for a few more loads, but the stress will propagate the crack until complete failure—usually during a full load when you least want to deal with it. The coupling is designed as a sacrificial part; running it damaged risks transferring shock loads to the transmission. Replace it at the first sign of cracking to avoid a messy mid-cycle failure.
How long should a new motor coupling last?
Under normal use with proper loading, expect 5-7 years from a quality universal coupling. Overloading, unbalanced loads, or running the washer on an uneven floor can reduce lifespan to 2-3 years. Metal-reinforced versions may last 8-10 years. If you’re replacing couplings more frequently, investigate underlying issues like worn suspension or a failing pump that increases motor stress.
Do I need any special tools beyond a screwdriver and wrench?
A 1/4-inch nut driver makes the job much faster than a screwdriver. Needle-nose pliers are essential for removing spring clips. A flashlight helps spot hidden screws, and a putty knife removes decorative caps without scratching. For stubborn couplings, a gear puller is invaluable. Most homeowners already have everything needed; no specialty appliance tools are required.
Why did my coupling fail in the first place?
The most common culprit is overloading or unbalanced loads that spike torque beyond design limits. Age and material fatigue also play roles—plastic becomes brittle over time. Less obvious causes include a seized water pump increasing motor load, worn suspension allowing excessive tub movement, or a leaky transmission seal coating the coupling in oil. Investigate these issues during replacement to prevent recurrence.
What if my washer still doesn’t agitate after replacing the coupling?
First, verify the motor plug is fully seated and the lid switch is engaging properly. Check that the pump isn’t seized by running the motor without it connected. If the motor hums but won’t spin, you may have a bad capacitor. Persistent issues could point to a failed motor or transmission problem, though these are less common. Don’t assume the new coupling is defective until you’ve ruled out these other failure points.
Are there any safety risks with this repair?
The primary risk is electrical—always unplug the machine before starting. Motor capacitors can hold a charge, so avoid touching their terminals. When tilting the washer, ensure it can’t fall on you; use solid blocks for support. Sharp metal edges inside the cabinet can cause cuts, so wear gloves. If you smell burning or see smoke during a test run, immediately unplug the machine—incorrect installation can cause motor overheating.