If you’re drowning in clutter or struggling to maximize vertical space in your garage, warehouse, or commercial facility, stackable installation brackets might be the game-changing solution you never knew you needed. These ingenious mounting systems have revolutionized how we think about storage, organization, and equipment installation by allowing you to build upward safely and efficiently. Unlike traditional fixed brackets that lock you into a single configuration, stackable brackets create a modular ecosystem where your storage can evolve alongside your needs.
Whether you’re a DIY enthusiast looking to transform your garage into a model of efficiency, a facilities manager optimizing warehouse capacity, or a contractor seeking reliable mounting solutions for clients, understanding the nuances of stackable installation brackets is crucial. This comprehensive guide dives deep into everything from load calculations and material selection to installation best practices and safety compliance—giving you the expert knowledge to make informed decisions and execute flawless installations that stand the test of time.
Top 10 Stackable Installation Brackets
Detailed Product Reviews
1. IMPRESA Washer & Dryer Stacking Kit 8541503 Bracket - Compatible with Whirlpool, Kenmore & Sears Front-Load Models - Steel Construction - Easy Installation Guide
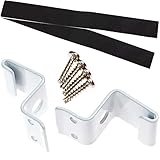
Overview: The IMPRESA 8541503 stacking kit offers a budget-friendly solution for maximizing laundry room space. Designed specifically for Whirlpool, Kenmore, and Sears front-load models, this steel bracket system allows you to safely stack your dryer atop your washer, transforming cramped utility rooms into efficient workspaces without breaking the bank.
What Makes It Stand Out: At just $5.02, this kit delivers remarkable value with its durable steel construction and broad compatibility across major American appliance brands. The straightforward installation process requires only basic tools and a helper, making it accessible for DIY enthusiasts who want professional results without specialized expertise.
Value for Money: This is arguably the best budget option on the market. OEM stacking kits typically cost $30-50, making the IMPRESA kit’s sub-$6 price point exceptional. While it lacks premium finishing touches, the steel build provides reliable performance that rivals more expensive alternatives for compatible models.
Strengths and Weaknesses: Strengths include unbeatable pricing, solid steel durability, clear instructions, and trusted brand compatibility. Weaknesses involve limited model compatibility (front-load only), basic aesthetic design, and potentially shorter hardware lifespan compared to premium kits. The ultra-low price may raise durability concerns for heavy-use scenarios.
Bottom Line: For Whirlpool, Kenmore, or Sears front-load owners on a tight budget, this kit is a no-brainer. It delivers essential functionality at a fraction of OEM costs. While not luxurious, it provides secure, stable stacking that safely reclaims valuable floor space in compact homes.
2. HeoCaye Replacement GFA24KITL Stacking Kit for G-E 24 Inch Wide Washers and Dryers, Stack Bracket Kit 24 In Front Load Laundry Stacking Kit, White

Overview: The HeoCaye GFA24KITL stacking kit provides a tailored solution for G-E 24-inch front-load laundry pairs. This white bracket system enables vertical stacking in tight spaces like closets and alcoves, specifically engineered for models including GFQ14ESSNWW and GFW148SSMWW, ensuring a precise factory-like fit for compact laundry setups.
What Makes It Stand Out: Unlike universal kits, this product offers model-specific engineering for G-E appliances, eliminating guesswork. The included comprehensive hardware package—left and right brackets with long and short screws—ensures you have every component needed. The clean white finish matches G-E appliances for a cohesive, professional appearance.
Value for Money: At $13.99, this kit sits comfortably between budget generics and pricey OEM parts. Genuine G-E stacking kits often exceed $40, making this a smart middle-ground investment. The perfect fit guarantee saves potential return hassles and installation headaches, justifying the modest premium over universal alternatives.
Strengths and Weaknesses: Strengths include precise G-E 24-inch compatibility, complete hardware inclusion, durable construction, and aesthetic matching. Weaknesses are its narrow brand applicability and limited size range. If you don’t own G-E 24-inch models, this kit is useless, and the white color may clash with stainless steel units.
Bottom Line: G-E 24-inch washer/dryer owners should strongly consider this kit. It offers OEM-quality fitment at one-third the price, with all necessary hardware included. The brand-specific design ensures safety and stability, making it worth every penny for compatible appliance owners seeking hassle-free installation.
3. 24 Inch Stacking Kit Replaces SK-DH Laundry Stack Bracket for Sam-sung 24 in. Wide Front Load Washers and Dryers, Set of 1

Overview: This SK-DH replacement stacking kit delivers a rust-resistant solution for Samsung 24-inch front-load laundry appliances. Crafted from galvanized iron, the bracket set allows safe vertical stacking, making it ideal for apartments and tight laundry closets where preserving floor space is paramount for functional living.
What Makes It Stand Out: The galvanized iron construction provides superior corrosion resistance compared to standard steel kits, crucial in humid laundry environments. Designed specifically for Samsung’s 24-inch models, it ensures exact fitment without modification, while the comprehensive package includes both left and right brackets with all installation accessories.
Value for Money: Priced at $15.99, this kit offers fair value for Samsung owners. While slightly more expensive than generic options, the galvanized finish adds longevity, potentially outlasting cheaper alternatives. Compared to Samsung’s OEM kits that retail for $50+, the savings are substantial without compromising on model-specific precision.
Strengths and Weaknesses: Strengths include rust-proof galvanized iron, perfect Samsung compatibility, complete parts package, and space-saving design. Weaknesses involve limited brand specificity and a mid-range price point that may deter budget shoppers. The iron construction, while rust-resistant, is slightly less robust than heavy-gauge steel alternatives.
Bottom Line: For Samsung 24-inch front-load washer/dryer owners, this kit strikes an excellent balance between cost and quality. The rust-resistant build ensures durability in damp environments, making it a wise investment for apartment dwellers and those seeking reliable, long-term stacking solutions.
4. Dryer Stacking Kit, Space Saving Easy Installation, Stack Bracket Kit for 7A, Replaces Part AP, KWSTK1 - Fit for Your Laundry Area

Overview: This universal dryer stacking kit positions itself as a premium, heavy-duty solution for diverse laundry configurations. Constructed from quality steel and available in multiple sizes, it supports various washer and dryer brands in both residential and commercial settings, promising stability and quiet operation across different appliance combinations.
What Makes It Stand Out: The kit’s universal compatibility and commercial-grade construction set it apart from brand-specific alternatives. Its versatility accommodates mixed-brand laundry pairs and various dimensions, while the robust steel design ensures stability that reduces vibration and noise—particularly valuable in multi-unit dwellings or high-use environments.
Value for Money: At $36.49, this is the most expensive option reviewed. The price premium is justified if you have incompatible or mixed-brand appliances requiring a custom solution. For standard same-brand pairs, however, it’s overpriced. The universal design eliminates trial-and-error purchases, potentially saving money long-term for unique setups.
Strengths and Weaknesses: Strengths include broad compatibility, heavy-duty steel construction, commercial suitability, vibration reduction, and multiple size options. Weaknesses are the high cost, vague specifications (“7A, AP, KWSTK1”), and unnecessary robustness for typical home use. The generic nature may require minor modifications for perfect fitment.
Bottom Line: Recommended for commercial applications or households with mixed-brand laundry appliances where standard kits won’t work. For typical same-brand home installations, cheaper brand-specific options offer better value. This kit excels when versatility and heavy-duty performance are non-negotiable requirements.
5. Stainless Steel Peterbilt Lower Cab Exhaust Stack Bracket 359 379 14-12998 21299

Overview: The Peterbilt Lower Cab Exhaust Stack Bracket is a heavy-duty mounting solution for commercial trucks and RVs. Crafted from rust-proof stainless steel, this 14-12998 21299 bracket securely positions exhaust stacks on Peterbilt 359 and 379 models, with a clamp-type design that simplifies installation without requiring specialized tools.
What Makes It Stand Out: This bracket’s stainless steel construction provides exceptional durability in harsh road conditions, resisting corrosion from weather and exhaust heat. The innovative clamp-on installation allows for quick, secure mounting without welding or drilling, while the universal design accommodates most trucks and RVs beyond just Peterbilt models.
Value for Money: At $28.09, this bracket offers solid value for commercial vehicle owners. OEM replacement brackets often cost twice as much, and the stainless steel construction ensures longevity that cheaper mild steel alternatives can’t match. The time-saving clamp design reduces labor costs, adding hidden value for fleet operators.
Strengths and Weaknesses: Strengths include premium stainless steel durability, tool-free clamp installation, broad truck/RV compatibility, and weather resistance. Weaknesses involve the confusing product description mentioning “fruit bottom light effects” (likely a listing error) and its complete unsuitability for laundry applications—despite stacking kit search results.
Bottom Line: An excellent choice for truck and RV owners needing reliable exhaust stack mounting. The stainless steel build and clamp-on design justify the price. However, this is NOT a washer/dryer stacking kit. Laundry appliance owners should avoid this product entirely and search for proper model-specific brackets.
6. GFA28KITN Stacking Kit for GE 28"W Washer Dryer Stack Bracket Kit - Compatible with GE 28 inch Width Front Load Washers and Dryers Laundry Stacking Kit [Patented]
![GFA28KITN Stacking Kit for GE 28"W Washer Dryer Stack Bracket Kit - Compatible with GE 28 inch Width Front Load Washers and Dryers Laundry Stacking Kit [Patented]](https://m.media-amazon.com/images/I/31nZO4P11VL._SL160_.jpg)
Overview: The GFA28KITN Stacking Kit provides a secure solution for vertically arranging GE 28-inch front load washers and dryers. This patented bracket system includes all necessary components to safely mount your dryer above the washer, maximizing floor space in compact laundry rooms. Designed specifically for GE appliances, it ensures proper alignment and stability during operation.
What Makes It Stand Out: This kit distinguishes itself through its premium construction and comprehensive package. The spacers utilize high-quality PP material while the carbon steel brackets feature anti-rust paint, exceeding OEM durability standards. Unlike generic alternatives, it includes every component needed—two spacers, four metal brackets, sixteen screws, and detailed instructions. The manufacturer emphasizes strong after-sales support, promising resolution for any compatibility or quality concerns.
Value for Money: At $44.90, this kit positions itself as a cost-effective alternative to GE’s official parts while maintaining superior build quality. The included hardware eliminates extra hardware store trips, and the enhanced materials suggest longer service life than budget competitors. For GE appliance owners, the perfect fit and dedicated support justify the moderate premium over universal kits.
Strengths and Weaknesses: Strengths include robust materials exceeding OEM specs, complete hardware package, model-specific compatibility, and responsive customer service. The patented design ensures reliable performance. Weaknesses involve limited compatibility to GE 28-inch models only, making it unsuitable for other brands. The price, while fair, exceeds generic universal brackets that might work with modification.
Bottom Line: For owners of compatible GE front-load laundry pairs, the GFA28KITN offers exceptional peace of mind. The quality materials, comprehensive kit, and strong warranty support make it a worthwhile investment that prioritizes safety and durability over minimal savings from universal alternatives.
7. Seymour Stack-It Bracket Set, 4 Heavy-Duty Steel Brackets per Set

Overview: The Seymour Stack-It Bracket Set offers a basic solution for stacking appliances or storage units with four heavy-duty steel brackets. Marketed as a simple, no-frills kit, this product targets DIY enthusiasts seeking an economical mounting option. However, minimal product information creates uncertainty about specifications and compatibility.
What Makes It Stand Out: These brackets promise heavy-duty steel construction at a budget-friendly price point of $35.12 for a four-piece set. The “easy and simple use kit” designation suggests straightforward installation without complex hardware. Manufactured in China, they represent a generic, widely-available hardware solution for various stacking applications beyond just laundry units.
Value for Money: The price appears competitive for four steel brackets, but the “closeout item” status with no returns policy introduces significant risk. Without detailed dimensions, weight ratings, or compatibility lists, purchasers gamble on fitment. The value proposition hinges entirely on whether the brackets suit your specific needs, as mistakes cannot be corrected through returns.
Strengths and Weaknesses: Strengths include affordable bulk pricing, heavy-duty steel material, and versatility for multiple applications. The simple design appeals to experienced DIYers. Major weaknesses are the complete lack of technical specifications, missing hardware (screws not mentioned), no installation guidance, and the strict no-return policy. Product duplication in the listing suggests poor quality control.
Bottom Line: Only recommended for buyers who can physically verify measurements before purchasing and accept the no-return risk. For most consumers, the lack of documentation and buyer protection makes this a questionable choice despite the low price. Consider alternatives with clear specifications and standard return policies.
8. Corsair Dual SSD Mounting Bracket (3.5” Internal Drive Bay to 2.5", Easy Installation) Black
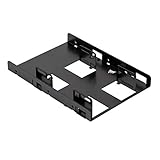
Overview: Corsair’s Dual SSD Mounting Bracket solves the common PC builder’s dilemma of installing modern 2.5-inch SSDs into older cases with only 3.5-inch drive bays. This adapter accommodates two SSDs simultaneously, making it ideal for storage upgrades and RAID configurations. The black finish ensures it blends seamlessly into most case interiors.
What Makes It Stand Out: This bracket’s dual-drive capacity maximizes space efficiency, while adjustable mounting holes support both symmetrical and asymmetrical configurations. It universally fits any standard 3.5-inch bay and includes all necessary mounting screws for both SSDs and the adapter itself. The design provides adequate clearance for strain-free SATA cable connections, addressing a common frustration with budget adapters.
Value for Money: At $9.99, this Corsair-branded adapter delivers exceptional value. It costs less than many no-name alternatives while offering superior design and included hardware. The ability to mount two drives essentially provides two adapters for the price of one, making it a smart investment for future expansion.
Strengths and Weaknesses: Strengths include universal compatibility, dual-drive support, complete screw sets, adjustable mounting options, and reputable Corsair branding. The thoughtful cable clearance design prevents connector damage. Weaknesses are limited to 3.5-inch bay requirement (useless in modern tool-less cases) and potential overkill for single-SSD builds. The all-metal construction adds durability but minimal weight.
Bottom Line: An essential tool for PC upgraders working with legacy cases. Its dual-drive capability, included hardware, and thoughtful engineering make it the best value in SSD mounting solutions. For under $10, it eliminates hassle and ensures professional installation results.
9. 5" Exhaust Stack Mounting Bracket Kit - Compatible with Peterbilt 379 & 359 (1987-1993),Replace#10294,2pcs Chrome Clamp & Adjustment Bolt Included - Silver
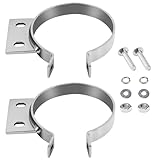
Overview: This specialized bracket kit addresses a specific need for Peterbilt 379 and 359 truck owners, providing replacement mounting hardware for 5-inch exhaust stacks on 1987-1993 models. Designed as a direct replacement for part #10294, the kit includes two complete mounting assemblies with chrome-plated clamps and adjustment bolts for straightforward installation.
What Makes It Stand Out: Vehicle-specific engineering ensures perfect fitment without modification, a critical factor for commercial vehicle compliance. The alloy steel construction with corrosion-resistant silver finish withstands extreme road conditions, vibrations, and temperature fluctuations. The complete kit approach includes all mounting hardware, eliminating sourcing challenges for hard-to-find parts.
Value for Money: Priced at $39.99 for two heavy-duty brackets, this kit offers fair value for specialized truck parts. OEM replacements often cost significantly more, and generic alternatives require fabrication. For fleet operators or owner-operators, the time saved on installation and guaranteed compatibility offsets the modest investment.
Strengths and Weaknesses: Strengths include precise OEM-style fitment, durable alloy steel construction, complete hardware package, and chrome finish for professional appearance. The adjustable clamp design accommodates minor variances. Weaknesses are extremely limited application (only Peterbilt 379/359, 1987-1993) and potential chrome deterioration in salt-heavy regions. The exterior mounting location exposes hardware to theft and damage.
Bottom Line: An indispensable solution for maintaining vintage Peterbilt exhaust systems. While niche, it perfectly serves its target audience with OEM-quality fit and finish. If you own the specified trucks, this kit saves time and ensures DOT-compliant repairs. Others should look for universal alternatives.
10. GE GFA24KITL Washer/Dryer 24" Stack Bracket Kit

Overview: GE’s GFA24KITL enables vertical stacking of compatible 24-inch front load washers and dryers, targeting apartment dwellers and space-constrained laundry rooms. As an official GE accessory, it promises seamless integration with select GE laundry pairs. The kit includes necessary hardware to securely position the dryer atop the washer, reducing footprint while maintaining accessibility.
What Makes It Stand Out: The reversible swinging door feature, while unusual for a bracket kit, suggests enhanced installation flexibility for various laundry room layouts. As genuine GE equipment, it guarantees compatibility and maintains warranty compliance. The bracket system is engineered specifically for GE’s 24-inch models, ensuring proper weight distribution and vibration dampening.
Value for Money: At $69.99, this kit commands a premium over universal alternatives. The price reflects GE branding and guaranteed compatibility rather than included components—hardware appears standard. For renters or those prioritizing manufacturer warranty protection, the cost may be justified. DIYers comfortable with modifications will find better value elsewhere.
Strengths and Weaknesses: Strengths include OEM certification, assured compatibility, potential warranty preservation, and GE’s reputable build quality. The reversible door feature adds unique flexibility. Weaknesses are the steep price for basic brackets, minimal product detail in the listing, and likely requirement for professional installation to maintain warranty. The 24-inch specificity limits versatility.
Bottom Line: Recommended only for owners of compatible GE 24-inch laundry units who prioritize manufacturer approval over cost savings. The premium price buys peace of mind but little functional advantage over quality third-party kits. For most buyers, a well-reviewed universal kit at half the price delivers equivalent performance.
What Are Stackable Installation Brackets?
Stackable installation brackets are specialized mounting hardware designed to connect vertically, creating multi-tiered support systems from identical or compatible components. Unlike conventional brackets that function as solitary supports, these units feature integrated connection points—typically interlocking tabs, reinforced slots, or proprietary fastening systems—that allow them to securely mate with additional brackets above or below.
The Core Mechanism Explained
The magic lies in the engineered interface between units. Most designs incorporate a male-female connection system where the top of one bracket nests into the bottom of another, creating a continuous load path that transfers weight directly through the stack rather than relying solely on the mounting surface. This design philosophy distributes forces more effectively and often results in a stronger overall assembly than individual brackets mounted separately.
How They Differ From Standard Brackets
Traditional brackets are standalone solutions—each unit is mounted independently and cannot share structural integrity with its neighbors. Stackable systems, conversely, behave as unified columns when assembled correctly. This fundamental difference means you can achieve greater heights and spans without proportional increases in wall reinforcement, provided you respect the manufacturer’s engineering specifications.
Why Choose Stackable Over Traditional Brackets?
The decision to invest in stackable bracket systems extends beyond mere convenience. These solutions address fundamental limitations of conventional mounting hardware while offering strategic advantages for both immediate projects and long-term flexibility.
Space Optimization Benefits
Vertical real estate is often the most underutilized asset in any storage environment. Stackable brackets let you exploit this dimension ruthlessly, creating tiered shelving that can double or triple your storage density without expanding your footprint. In commercial settings, this translates to measurable ROI through reduced square footage requirements and improved inventory organization.
Flexibility and Scalability
Perhaps the most compelling argument for stackable systems is their inherent adaptability. Need to add a third shelf six months after your initial installation? Simply unlock the top bracket, slide in another unit, and reconfigure. This modularity eliminates the need to drill new holes or patch old ones, preserving your wall integrity and reducing labor costs for future modifications.
Cost-Effectiveness Over Time
While the per-unit cost may be slightly higher than basic brackets, stackable systems deliver superior long-term value. The ability to reconfigure without replacement, combined with typically heavier-duty construction, means these brackets often outlast and outperform their conventional counterparts by a factor of years rather than months.
Key Applications and Use Cases
Understanding where stackable brackets excel helps you match the right system to your specific challenge. Their versatility makes them suitable for environments ranging from residential garages to heavy industrial facilities.
Residential Garage Organization
Garage walls are prime candidates for stackable systems. From storing seasonal sports equipment and holiday decorations to creating workshop zones with multiple tool racks, these brackets handle diverse loads while keeping floors clear. The ability to adjust shelf heights as your storage needs change—kids’ bikes giving way to kayaks, for instance—makes them ideal for evolving household requirements.
Commercial Warehouse Systems
In logistics and distribution centers, stackable brackets support everything from picking shelves to conveyor system components. Their uniform design allows for standardized installation protocols across massive facilities, while the vertical stacking capability maximizes cubic footage utilization—a critical metric in warehouse efficiency calculations.
Retail Display Configurations
Visual merchandising demands frequent layout changes to maintain customer engagement. Stackable brackets enable retail managers to reconfigure display walls rapidly without closing sections for construction. The clean, uniform appearance of properly installed systems also presents a more professional aesthetic than mismatched individual brackets.
Industrial Equipment Mounting
Beyond storage, heavy-duty stackable brackets secure machinery, electrical panels, and piping systems in industrial environments. The ability to create tiered equipment racks with verified load ratings ensures compliance with safety regulations while optimizing maintenance access.
Understanding Weight Capacity and Load Ratings
Weight capacity isn’t just a number—it’s a complex calculation influenced by multiple variables. Misinterpreting these ratings is the most common cause of bracket system failure.
Static vs. Dynamic Loads
Static loads refer to stationary weight that doesn’t move once placed. Dynamic loads involve motion—pulling a bin from a shelf, the vibration of a compressor, or seismic activity. Most manufacturer ratings assume static conditions. For dynamic applications, you must apply a derating factor, typically reducing the stated capacity by 30-50% depending on the motion intensity.
Distributed vs. Point Loads
A 200-pound distributed load spread across a 48-inch shelf places far less stress on any single bracket than a 200-pound point load concentrated in the center. Stackable systems often perform better with distributed loads because the weight transfers through the entire stack. Always verify whether the rated capacity assumes uniform distribution or point loading, and design your layout accordingly.
Safety Margins and Derating Factors
Professional installations always incorporate safety margins. For residential use, multiply your expected maximum load by 1.5 to determine your required bracket rating. For commercial applications, use a factor of 2.0. Additionally, derate capacity by 25% for each of the following conditions: mounting on drywall without direct stud attachment, exposure to moisture, or installation in high-traffic areas where accidental impact is possible.
Material Matters: Choosing the Right Construction
The material composition of your brackets directly impacts performance, longevity, and suitability for specific environments. Each option presents distinct trade-offs between strength, weight, and corrosion resistance.
Steel and Stainless Steel Options
Mild steel brackets with powder coating offer the best strength-to-cost ratio for dry indoor environments. For garages, warehouses, or outdoor applications, stainless steel (specifically 304 or 316 grades) provides superior corrosion resistance. Note that stainless steel has approximately 15% lower tensile strength than equivalent carbon steel, so you may need to step up in gauge thickness to maintain the same load rating.
Aluminum Alloys
6061-T6 aluminum brackets combine light weight with respectable strength, making them ideal for applications where total assembly weight is a concern—such as ceiling-mounted systems or installations on partition walls with limited load-bearing capacity. Aluminum naturally forms a protective oxide layer, but in salty or highly acidic environments, anodized finishes provide essential additional protection.
Heavy-Duty Plastics and Composites
Advanced polymer brackets serve niche applications where metal is unsuitable—around pool chemicals, in clean rooms, or where electrical insulation is critical. While their load capacity doesn’t match metal options, premium glass-reinforced nylon can support surprising weight while offering complete immunity to rust and corrosion.
Finish and Corrosion Resistance
The finish is your first line of defense against environmental degradation. Powder coating provides a durable, uniform barrier but can chip under impact. Zinc plating (galvanization) offers sacrificial protection where the zinc corrodes before the underlying steel. For maximum protection in marine or chemical environments, consider brackets with dual-layer protection: hot-dip galvanizing plus powder coating.
Design Variations and Configuration Options
Not all stackable brackets follow the same design philosophy. Understanding the variations helps you select a system that aligns with your technical capabilities and aesthetic preferences.
Fixed vs. Adjustable Stacking
Fixed-stack systems require brackets to mate in predetermined positions, typically at 6- or 12-inch intervals. This design maximizes load transfer efficiency but limits fine-tuning. Adjustable systems incorporate slots or multiple connection points, allowing you to customize vertical spacing at the expense of some structural efficiency. For shelving, adjustable systems are generally preferred; for equipment mounting, fixed-stack often provides superior rigidity.
Interlocking Mechanisms
The connection method varies significantly between manufacturers. Some use simple tab-and-slot designs that rely on gravity and friction, while others employ positive-locking mechanisms with spring-loaded pins or bolt-through connections. For critical loads or seismic zones, insist on positive-locking systems that cannot disengage without deliberate action.
Modular Component Systems
Premium stackable bracket lines often include complementary components: cross-braces for lateral stability, joiner plates for creating corner configurations, and adapter pieces for transitioning between different bracket sizes. These modular ecosystems enable complex installations that would be impossible with standalone brackets, but they lock you into a single manufacturer’s product line.
Custom vs. Off-the-Shelf Solutions
For unique applications—such as supporting unusually deep shelves or integrating with existing structural steel—custom-fabricated brackets may be necessary. Most manufacturers offer engineering services to create bespoke solutions that maintain compatibility with their standard stackable lines, though lead times and minimum order quantities apply.
Mounting Surface Considerations
Your brackets are only as strong as what they’re attached to. A premium bracket bolted to inadequate substrate is a failure waiting to happen.
Stud Finding and Wall Types
For wood-framed walls, brackets must anchor directly into studs—never rely on drywall anchors for stacked systems. Use a high-quality stud finder and verify findings with a finish nail. For metal stud walls, you need specialized self-tapping screws or through-bolts with backing plates, as conventional wood screws will strip out. In concrete or block walls, expansion anchors or chemical adhesives provide reliable hold.
Concrete and Masonry Applications
Masonry requires different fasteners and techniques. Wedge anchors work well for static loads in solid concrete, but for dynamic loads or cracked concrete, consider sleeve anchors or epoxy-set threaded rods. Always drill pilot holes with a hammer drill and carbide-tipped bit; standard drills won’t create the proper hole geometry and will result in weak anchor engagement.
Ceiling Mount vs. Wall Mount
Ceiling-mounted stackable systems place brackets in tension rather than compression, fundamentally changing the load path. This configuration demands brackets specifically engineered for tensile loads and requires redundancy—never rely on a single connection point. Wall-mounted systems are inherently more stable and should be your default choice unless floor space is absolutely non-negotiable.
Reinforcement Requirements
When stacking beyond three units high, consider adding a continuous vertical backer board (3/4-inch plywood) between the brackets and the wall. This distributes localized forces across multiple studs and prevents the top brackets from levering away from the wall under load. For commercial installations, consult a structural engineer whenever total stacked height exceeds 8 feet.
Essential Features to Look For
Beyond basic load capacity, several features separate professional-grade brackets from consumer-grade alternatives. These details often determine long-term satisfaction and safety.
Locking Mechanisms and Safety Pins
The best systems include redundant locking features: primary interlocks for load transfer and secondary safety pins that prevent accidental disengagement. Look for brackets with captive pins that can’t be lost and visual indicators (often colored tabs) that confirm proper engagement at a glance.
Leveling Adjustments
Even perfectly plumb walls have minor imperfections. Brackets with built-in leveling adjustments—typically slotted mounting holes or adjustable feet—compensate for these variations without requiring shims. This feature becomes critical when stacking four or more units, as small angle errors compound dramatically over height.
Cable Management Integration
Modern installations rarely involve just shelves. Power tools, equipment, and display lighting all require wiring. Premium brackets incorporate channels or clip points for routing cables neatly along the bracket profile, keeping them protected and organized rather than dangling hazards.
Expansion Compatibility
Consider whether the bracket system allows horizontal expansion as well as vertical stacking. Some designs include side-connection points that let you create continuous runs of shelving without gaps, while others are strictly standalone units. For warehouse or retail applications, this horizontal continuity is often essential.
Installation Best Practices
Proper installation is non-negotiable for safety and performance. Follow these professional protocols to ensure your stackable bracket system performs as engineered.
Tools and Preparation
Beyond basic drills and levels, invest in a laser level for aligning multiple bracket columns, a torque wrench for ensuring fasteners are properly tensioned (over-tightening can strip threads or crush substrate), and a digital angle finder to verify bracket orientation. Prepare the area by mapping all stud locations and marking bracket positions with painter’s tape before drilling a single hole.
Step-by-Step Mounting Process
Start by mounting the bottom bracket, verifying it’s level and at the correct height. Install the next bracket without engaging the stack mechanism, using it as a template to drill mounting holes for the upper position. Only after all brackets are individually secured should you engage the stacking connections, working from bottom to top. This sequence prevents alignment issues that occur when trying to mount and stack simultaneously.
Alignment and Leveling Techniques
For multi-column installations, stretch a string line between the outermost brackets at each level to ensure all intermediate brackets align perfectly. Use a story pole—a long, straight board marked with bracket positions—to transfer measurements accurately across wide spans. Check level in both directions: along the bracket arm and across the mounting plate.
Securing Stacked Components
After engaging stacking mechanisms, always install any provided safety pins or set screws. Apply a witness mark (a small line of paint or permanent marker) across the joint between stacked brackets. During future inspections, if this mark has separated, you know the joint has loosened and requires immediate attention.
Safety Standards and Building Codes
Ignoring regulatory requirements can result in failed inspections, insurance claim denials, or worse—catastrophic failure causing injury. Understand the standards that apply to your installation.
Industry Certifications to Know
Look for brackets tested to ANSI MH16.1 (for industrial steel shelving) or ISO 9001 manufacturing standards. For residential garage systems, certification from the International Association of Plumbing and Mechanical Officials (IAPMO) indicates the product has been evaluated for structural integrity. CE marking is essential for European applications.
Load Testing Requirements
Commercial installations often require documented proof of load testing. This involves progressively loading the installed system to 150% of its rated capacity and measuring deflection. Keep all manufacturer test reports and consider hiring a third-party testing firm for critical applications. Residential users should at minimum perform a static load test by gradually adding weight over several days while monitoring for any signs of stress.
OSHA Considerations for Commercial Use
OSHA Standard 1910.176 covers material storage in workplaces. It requires that storage systems be designed to support their intended loads and be maintained in safe condition. Stackable bracket installations in commercial settings must be inspected annually by a competent person, with documentation retained for five years. Failure to comply can result in substantial fines.
Insurance Implications
Your property insurance policy may have specific requirements for self-installed storage systems. Some policies require professional installation for coverage of contents stored above a certain height (often 6 feet) or weight threshold. Contact your insurance agent before installing heavy-duty stackable systems to avoid coverage gaps.
Common Mistakes to Avoid
Even experienced installers can fall prey to these pitfalls. Awareness and proactive prevention save time, money, and potential disaster.
Overloading Beyond Capacity
The most frequent error is cumulative overloading. A single bracket rated for 100 pounds might support that weight perfectly, but when you stack four brackets and place 100 pounds on each shelf, the bottom bracket experiences the sum of all loads above it plus its own shelf load. Always calculate cumulative loads for the entire stack, not just individual shelves.
Ignoring Wall Structure Limitations
Mounting into a single stud at each bracket location is the absolute minimum. For heavy stacks, span across two studs using a horizontal backer board. Never assume drywall can provide any meaningful support—the brackets will pull through under surprisingly light loads. Similarly, plaster walls require special toggle bolts and have lower overall capacity than modern drywall-over-stud construction.
Improper Spacing Between Brackets
Bracket spacing isn’t arbitrary—it correlates with shelf deflection. Spacing brackets too far apart (beyond 32 inches for standard shelving) allows shelves to sag even when total load is within capacity. Conversely, spacing them too close reduces system efficiency and increases cost. Follow the 2:1 rule: shelf depth to bracket spacing ratio should not exceed 2:1 (e.g., 24-inch deep shelves need brackets every 12 inches maximum).
Using Incorrect Fasteners
The fastener is as critical as the bracket. Using drywall screws in wood studs is a common mistake—they lack the shear strength of proper lag bolts or structural screws. For a 100-pound rated bracket, use minimum 1/4-inch diameter lag bolts penetrating at least 1.5 inches into solid wood. In metal studs, #14 self-tapping screws with washer heads are the minimum acceptable fastener.
Maintenance and Longevity Tips
Stackable bracket systems require minimal maintenance, but neglecting basic upkeep dramatically reduces service life and safety margins.
Regular Inspection Schedules
Implement a quarterly visual inspection protocol. Check for rust, cracks, or deformation in the brackets; verify all fasteners remain tight; confirm safety pins are engaged; and look for any separation at stacking joints. In commercial settings, document each inspection with photos and notes. Residential users should perform this check at season changes—it’s easy to remember when swapping out holiday decorations.
Cleaning and Corrosion Prevention
In damp environments like garages, wipe down brackets annually with a rust-inhibiting oil or silicone spray. Avoid harsh cleaners that can damage protective finishes. For coastal installations, increase frequency to bi-annual and consider applying a marine-grade corrosion inhibitor. Never paint brackets without consulting the manufacturer—some coatings contain chemicals that accelerate corrosion underneath.
Tightening and Adjustment Protocols
Fasteners loosen over time due to vibration and thermal cycling. Use a torque wrench to check fastener tightness annually, retightening to the manufacturer’s specified torque value. If you find loose fasteners, remove them completely and inspect the threads and mounting holes for damage before reinstalling with fresh fasteners if needed.
When to Replace Components
Replace any bracket showing visible cracks, bends, or more than 10% surface rust. If stacking mechanisms become loose or fail to engage positively, replace the entire stack—don’t mix old and new brackets, as wear patterns may differ. After any seismic event or significant impact, have a professional evaluate the system even if no damage is visible, as metal fatigue can be microscopic.
Cost Considerations and Budget Planning
Budgeting for stackable bracket systems requires looking beyond the sticker price to understand total cost of ownership and potential hidden expenses.
Initial Investment vs. Long-Term Value
Entry-level stackable brackets might cost $15-25 per unit, while professional-grade systems run $40-60. However, the professional option often includes features like integrated leveling, safety pins, and verified load ratings that prevent costly failures. Calculate cost per pound of supported weight rather than cost per bracket to make meaningful comparisons.
Hidden Costs to Anticipate
Factor in the cost of proper fasteners (often not included), backer boards for heavy installations, professional installation if required by insurance, and potential engineering reviews for commercial projects. Also consider the cost of the shelving material itself—some bracket systems require specific shelf thicknesses or reinforcement channels that add expense.
Bulk Purchasing Advantages
For large installations, purchasing brackets by the case (typically 10-20 units) can reduce per-unit cost by 15-25%. Many manufacturers offer tiered pricing at 50, 100, and 500 unit thresholds. Coordinate with neighbors or colleagues to reach these breakpoints if your project is smaller. However, avoid over-purchasing—bracket designs can be discontinued, making future additions incompatible.
DIY vs. Professional Installation
DIY installation saves labor costs but risks improper mounting. Professional installation typically runs $50-100 per bracket including labor and materials, but often includes a warranty and insurance coverage. For residential projects under 10 brackets, DIY is reasonable if you have solid wall structure and follow manufacturer instructions precisely. For commercial projects or installations exceeding 8 feet in height, professional installation is strongly recommended and often required by code.
Environmental Factors and Special Conditions
Standard brackets may fail prematurely when exposed to conditions beyond typical indoor environments. Assess your specific situation before selecting materials and designs.
Temperature Extremes
In unconditioned spaces subject to temperature swings (garages, attics), thermal expansion and contraction can cause fasteners to loosen and stacking joints to separate. Choose brackets with slotted mounting holes that accommodate movement. For extreme cold (below -20°F), verify the material’s ductile-to-brittle transition temperature—some steels become brittle and prone to fracture in severe cold.
Moisture and Humidity Considerations
Relative humidity above 60% accelerates corrosion even without direct water contact. In basements or coastal garages, specify stainless steel or aluminum with marine-grade finishes. Consider adding desiccant packs to enclosed shelf areas to reduce condensation. Never install brackets directly against damp walls; maintain at least 1/2-inch air space for ventilation.
Chemical Exposure Risks
Agricultural settings, pool equipment rooms, and industrial facilities often expose brackets to corrosive chemicals. Standard powder coating fails quickly in these environments. Specify brackets with chemical-resistant finishes like PVDF (polyvinylidene fluoride) or consider plastic brackets for light loads. Always review chemical compatibility charts before selecting materials.
Seismic and Vibration Concerns
In earthquake-prone regions, brackets must be rated for seismic loads, which are significantly higher than static loads due to lateral forces. Look for brackets with seismic certification and always install cross-bracing to prevent racking. For machinery-mounted brackets, specify vibration-dampening gaskets between the bracket and mounting surface to prevent fatigue failure.
Future-Proofing Your Installation
The best installations anticipate tomorrow’s needs, not just today’s requirements. Strategic planning during initial setup saves massive rework later.
Planning for Expansion
Install your initial brackets with future expansion in mind. Leave extra vertical space above the top bracket—at least one additional unit height—to accommodate future growth. When drilling mounting holes, consider pre-drilling positions for potential additional brackets and fill them with plastic plugs for now. This prevents having to relocate existing brackets later.
Compatibility with Future Systems
Bracket designs evolve, and manufacturers discontinue lines. Purchase 10-20% extra brackets during initial installation to ensure matching components for future additions. Store them in a dry location with the original packaging and hardware. Document the exact model number and purchase date in a safe place—digital photos of the product label are invaluable when sourcing replacement parts years later.
Documenting Your Setup
Create a simple as-built drawing showing bracket positions, stud locations, and load ratings. Note the torque values used for fasteners and any special installation details. This documentation proves invaluable for inspections, insurance claims, or when selling the property. For commercial installations, this is a regulatory requirement.
Upgrading Components
As your needs grow, you may need to upgrade from light-duty to heavy-duty brackets within the same system. Some manufacturers offer adapter plates that allow mixing load capacities within a stack, placing heavier brackets at the bottom where loads are greatest. This hybrid approach can be cost-effective for expanding systems without complete replacement.
Frequently Asked Questions
How much weight can stackable installation brackets actually hold?
The weight capacity depends on multiple factors: bracket material and gauge, mounting surface strength, fastener type, and whether the load is static or dynamic. Most residential-grade stackable brackets support 75-150 pounds per unit when properly mounted into wood studs. Commercial heavy-duty versions can handle 300-500 pounds per bracket. However, you must calculate cumulative loads for stacked configurations—the bottom bracket in a four-unit stack supporting 100 pounds per shelf actually bears 400 pounds plus the weight of three brackets above it. Always check the manufacturer’s specifications for both individual and cumulative load ratings, and apply a 1.5x safety margin for residential use or 2x for commercial applications.
Can I install stackable brackets on drywall without finding studs?
Absolutely not. Drywall alone has virtually no tensile strength and will fail under even minimal loads. Stackable brackets concentrate significant forces at their mounting points, requiring solid anchoring into structural members. You must locate and mount directly into wood or metal studs, or use appropriate masonry anchors for concrete/block walls. The only exception is if you’re installing a continuous plywood backer board first, securing that board to studs every 12 inches, and then mounting brackets to the board. Even then, the backer board must be at least 3/4-inch thick and the brackets must use through-bolts, not wood screws.
What’s the maximum safe height for stacking brackets?
Most manufacturers recommend limiting stacks to four units (typically 32-48 inches total height) for standard residential brackets without additional reinforcement. Commercial systems engineered for stacking can safely reach 8-10 feet when properly installed with cross-bracing and continuous backer boards. The limiting factor is usually lateral stability—tall narrow stacks can rack and fail under side loads. For any installation exceeding 6 feet in height, you must install diagonal bracing or anchor the assembly to adjacent walls or ceiling structures. Always consult the manufacturer’s engineering data and local building codes, as seismic requirements may further limit height in earthquake zones.
Do stackable brackets work with any type of shelving material?
While stackable brackets are versatile, they require shelving that matches their load capacity and connection method. Solid wood shelves should be at least 3/4-inch thick for spans up to 24 inches, and 1-inch thick for longer spans. Plywood must be cabinet-grade with no voids, as voids create weak points that can cause sudden failure. For metal shelving, the gauge must be sufficient to prevent deflection—typically 16-gauge steel minimum. Some bracket systems require specific shelf profiles, such as integrated lips or reinforcement channels. Always verify compatibility with your chosen shelving material and consider using shelf retention clips to prevent shelves from sliding off bracket arms under load or during seismic events.
How do I prevent stacked brackets from wobbling or separating?
Wobbling indicates improper installation or inadequate fastening. First, verify each bracket is individually level and plumb before engaging stacking mechanisms. Use a torque wrench to ensure all mounting fasteners are tightened to specification—loose fasteners allow microscopic movement that compounds into visible wobble. Install all provided safety pins or set screws; these are not optional. For tall stacks, add diagonal cross-bracing between bracket columns using angle iron or threaded rod. Consider applying a small amount of thread-locking compound to stacking connection points (check manufacturer approval first). If separation occurs at joints, immediately unload the system and inspect for wear or damage—never continue using separated brackets.
Are stackable brackets suitable for outdoor use?
Standard powder-coated steel brackets will rust quickly outdoors, even in covered areas. For outdoor applications, specify stainless steel (304 grade for general use, 316 for coastal areas) or aluminum with a durable anodized finish. All fasteners must match the bracket material to prevent galvanic corrosion—never mix stainless steel brackets with zinc-plated steel bolts. Ensure the design includes drainage holes to prevent water from pooling in crevices, and plan for more frequent inspection and maintenance schedules. Direct sunlight can degrade some plastic components, so verify UV resistance ratings for any non-metal parts.
Can I mix different brands of stackable brackets together?
Mixing brands is strongly discouraged and often dangerous. Different manufacturers use proprietary connection geometries, material specifications, and load ratings that are not cross-compatible. Even if brackets appear similar, slight differences in dimensions can create stress concentrations or incomplete engagement that leads to failure. The stacking mechanism’s safety factor is engineered as a complete system; mixing components voids all warranties and certifications. If you must expand an existing installation and the original brand is discontinued, replace the entire stack with a new integrated system rather than risking hybrid configurations. The exception is using adapter plates specifically engineered and certified by the manufacturer for mixing product lines within their own catalog.
How often should I inspect my stackable bracket installation?
Residential installations need visual inspection quarterly and a more thorough check annually. Look for rust, cracks, loose fasteners, and any deformation. Commercial installations require documented inspections every six months by a competent person, with load testing every three years or after any seismic event. High-vibration environments (near machinery) or areas with temperature extremes need monthly checks. Always inspect after any incident where brackets may have been struck by vehicles or heavy objects. Create a simple checklist and keep records of all inspections; this documentation is invaluable for warranty claims and insurance purposes.
What’s the difference between adjustable and fixed stackable brackets?
Fixed-stack brackets have predetermined connection points at set intervals, typically 6 or 12 inches apart. This design maximizes structural rigidity and load transfer efficiency, making it ideal for heavy-duty applications where shelf positions rarely change. Adjustable stackable brackets feature multiple slots or a continuous channel, allowing you to customize vertical spacing in 1- or 2-inch increments. While less rigid than fixed systems, adjustable brackets offer superior flexibility for evolving storage needs. For most residential garage applications, adjustable systems provide the best balance of strength and versatility. For commercial warehouse racking or permanent equipment mounting, fixed-stack systems often deliver better long-term performance.
Is professional installation worth the cost for residential projects?
For small installations (under 10 brackets) on standard wood-stud walls, DIY installation is reasonable if you have solid DIY skills and proper tools. However, professional installation becomes cost-effective when: mounting on concrete or block walls (requires specialized tools and anchors), stacking beyond three units high, installing in a rental property where you need liability protection, or when the total value of items being stored exceeds $5,000. Professional installers carry insurance that covers both installation errors and subsequent failure, protecting your investment. They also have the experience to identify structural issues (like fire blocks or plumbing in walls) that could derail a DIY project. Many offer warranties on their work, providing peace of mind that justifies the 30-50% cost premium over DIY.