Every year, thousands of homeowners face a preventable disaster that starts in the most innocent of places: their laundry room. That fluffy accumulation of lint—seemingly harmless and almost whimsical—harbors a dark secret. It’s highly combustible, insidiously pervasive, and responsible for over 15,000 structure fires annually in North America alone. While cleaning the lint screen after each load is a good start, it’s merely scratching the surface of a much deeper problem. The real danger lurks in places you can’t see: trapped within the trap housing, coating the interior cabinet, and clogging the exhaust vent system with a highly flammable blanket of debris.
Understanding which lint and debris removal tools can effectively combat this hidden hazard isn’t just about appliance maintenance—it’s about protecting your family, your home, and your peace of mind. This comprehensive guide cuts through the marketing noise to deliver expert-level insights into the tools, techniques, and timetables that truly slash dryer fire risk. Whether you’re a diligent homeowner looking to upgrade your maintenance routine or someone who’s never ventured beyond the lint screen, you’ll discover how professional-grade cleaning strategies can be adapted for safe, effective DIY use.
Top 10 Lint Removal Tools for Dryer Fire Risk
Detailed Product Reviews
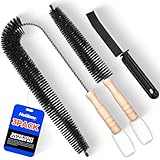
1. Dryer Lint Brush Vent Cleaner Lint Trap Cleaning Tool Dryer Vent Brush Long Flexible with Wood Handle 27.95Inches Medium Size for Dryer Vent Cleaning DIY Enthusiasts Homeowners (1, PCS)

Overview: This basic dryer lint brush offers a simple, manual approach to vent maintenance. Measuring 27.95 inches with a flexible body and traditional wood handle, it’s designed for DIY homeowners tackling routine lint trap cleaning. The tool navigates gentle bends to access visible buildup in dryer vents and can double as a refrigerator coil cleaner, making it a versatile addition to basic home maintenance kits.
What Makes It Stand Out: The wood handle provides a classic, sturdy grip missing from all-plastic competitors. Its medium flexibility allows navigation of moderate vent curves without being too flimsy. The multi-purpose design extends utility beyond dryers to appliances like refrigerators, offering surprising versatility for such a specialized tool. At under $5, it’s an accessible entry point for renters and homeowners new to vent maintenance.
Value for Money: At $4.59, this is the most budget-friendly option available. While professional cleaning costs $150+, this tool enables weekly lint trap maintenance that prevents major buildup. However, its 28-inch reach only addresses surface-level cleaning, making it a supplement rather than replacement for deep vent cleaning services.
Strengths and Weaknesses: Pros: Extremely affordable; simple, intuitive design; flexible enough for trap cleaning; wood handle durability; multi-appliance utility. Cons: Limited 28-inch reach cannot clean entire vent systems; manual operation only; too short for second-floor vents; may not handle severe clogs.
Bottom Line: Ideal for routine lint trap maintenance and light vent cleaning, this tool excels as a preventive measure. Purchase it as a weekly maintenance supplement, but invest in a longer kit for annual deep cleaning. Perfect for renters and budget-conscious homeowners.
2. Holikme 35Feet Dryer Vent Cleaner Kit - Lint Remover,Fireplace Chimney Brushes,Replacement Parts,Duct Cleaning,Flexible Lint Brush with Drill Attachment×2,Use with or Without a Power Drill

Overview: The Holikme kit revolutionizes DIY vent cleaning with its impressive 35-foot reach and drill compatibility. This comprehensive system includes flexible nylon rods, multiple brush heads, a lint trap brush, drill connector, and safety gloves. Designed for whole-house vent systems, it tackles everything from ground-floor dryers to second-floor installations and even fireplace chimneys, making it a true multi-purpose cleaning solution.
What Makes It Stand Out: The drill attachment transforms manual scrubbing into powerful rotary cleaning, dislodging stubborn lint in seconds. The 35-foot length exceeds most residential needs, while the dual-purpose fireplace brush head adds unexpected versatility. The inclusion of non-slip gloves demonstrates thoughtful safety consideration. This kit essentially professionalizes the DIY approach to vent maintenance.
Value for Money: At $19.99, this kit delivers exceptional value. A single professional cleaning costs $150+, meaning this pays for itself after one use. The durable nylon rods and replaceable brush heads ensure years of service, making it a smart long-term investment for homeowners with multiple dryers or complex vent runs.
Strengths and Weaknesses: Pros: Unmatched 35-foot reach; drill-powered efficiency; comprehensive accessory set; fireplace chimney capability; significant cost savings; fire prevention focus. Cons: Requires drill for optimal performance; rods may separate if not tightened properly; brush head size limits use in ducts smaller than 4 inches; storage can be cumbersome.
Bottom Line: This is the best value for comprehensive vent cleaning. Highly recommended for homeowners with long vent runs, multiple properties, or those prioritizing fire safety. The drill attachment makes tough jobs effortless, justifying every penny.
3. Dryer Vent Cleaner Kit Vacuum Attachment and Dryer Vent Brush. This Dryer Lint Brush Vent Trap Cleaner Tool Can Reduce Your Risk of A House Fire! The Lint Eraser Dryer Duct Cleaning Kit

Overview: This innovative kit combines a traditional vent brush with a vacuum attachment system for superior lint removal. The package includes a flexible cleaning brush and a vacuum hose adapter with three universal fittings (excluding Dyson). This dual-action approach agitates lint with the brush then immediately extracts it via vacuum suction, preventing dislodged debris from spreading through your laundry area.
What Makes It Stand Out: The vacuum integration creates a closed-loop cleaning system that captures lint at the source. Three adapter options ensure compatibility with most household vacuums, while the flexible hose reaches under appliances and into tight spaces beyond dryer vents. The “Lint Eraser” branding emphasizes its fire-prevention mission, making safety tangible.
Value for Money: Priced at $29.99, this mid-tier kit costs more than basic brushes but less than professional services. The vacuum attachment adds significant value for those owning compatible vacuums, effectively creating a powered extraction system. However, the Dyson exclusion and vacuum dependency may limit its appeal for some users.
Strengths and Weaknesses: Pros: Superior lint capture via vacuum; versatile under-appliance use; flexible hose access; fire safety emphasis; multiple vacuum adapters. Cons: Does not fit Dyson vacuums; requires vacuum ownership; higher price point; brush may be less robust than drill-powered alternatives; limited reach compared to rod systems.
Bottom Line: Perfect for vacuum owners seeking mess-free cleaning. The suction feature prevents lint dispersal, making it ideal for indoor laundry rooms. Skip if you own a Dyson or lack a suitable vacuum; otherwise, it’s a smart fire-safety investment.
4. 4 Pieces Dryer Vent Cleaner Kit with Lint Brush – Professional Dryer Vent Brush, Flexible Cleaning Tools for Lint Trap, Appliance Brush & Dryer Filter

Overview: This four-piece kit provides specialized tools for every aspect of dryer maintenance. The set includes a flexible vent brush, lint trap brush, appliance brush, and dryer filter cleaner—each designed for specific tasks. This comprehensive approach addresses not just vent ducts but also lint traps, filters, and adjacent appliances, creating a complete maintenance solution in one package.
What Makes It Stand Out: The specialized tool variety eliminates the compromise of using one brush for all tasks. Each component serves a distinct purpose, from deep vent navigation to delicate filter cleaning. The professional-grade labeling suggests durable construction, while the flexible design adapts to various dryer configurations. This kit treats dryer maintenance as a system, not a single task.
Value for Money: At $12.99, the kit offers four specialized tools for the price of one premium brush. This represents solid value for homeowners wanting comprehensive maintenance without professional costs. While individual tools may not match the reach of premium kits, the collective utility covers 90% of routine maintenance needs.
Strengths and Weaknesses: Pros: Four specialized tools; comprehensive coverage; flexible designs; fire hazard prevention; improved dryer performance; excellent tool variety. Cons: Limited reach for deep vent cleaning; quality may vary across four pieces; no drill or vacuum enhancement; storage for multiple tools required.
Bottom Line: An excellent starter kit for systematic dryer maintenance. The tool variety ensures every component gets proper attention. Ideal for regular upkeep but supplement with a long-reach kit for annual deep cleaning. Great value for thorough homeowners.
5. Everbilt Dryer Lint Removal Kit

Overview: The Everbilt Dryer Lint Removal Kit represents hardware store reliability in a simple, effective package. While specific details are limited, Everbilt’s reputation for practical home improvement tools suggests a straightforward vent cleaning solution. Typically retailing at home centers, this kit likely includes a flexible brush and basic accessories designed for routine maintenance by average homeowners.
What Makes It Stand Out: Everbilt’s brand recognition ensures quality consistency and easy retail availability. The kit probably features a no-frills design focusing on essential functionality rather than gimmicks. As a store-brand equivalent, it likely offers reliable performance at a moderate price point, with the backing of a major retailer’s warranty and return policy.
Value for Money: At $14.51, this kit sits in the sweet spot between bargain brushes and premium systems. Everbilt typically prices products competitively while maintaining decent quality. The value lies in trusted brand reliability and the likelihood of included instructions suited for DIY beginners, making it a safe, middle-ground investment.
Strengths and Weaknesses: Pros: Trusted brand name; retail availability; likely includes clear instructions; moderate price; reasonable quality; warranty support. Cons: Limited product details available; probably basic reach and features; may lack drill/vacuum enhancements; not specialized for complex vent systems.
Bottom Line: A solid, no-surprise choice for cautious buyers who prefer established brands. Perfect for homeowners wanting reliable performance without researching obscure products. While not the most advanced, Everbilt delivers dependable results for standard dryer configurations. Purchase with confidence for routine maintenance.
6. Holikme 32 Feet Dryer Vent Cleaner Kit, Lint Remover,Fireplace Chimney Brushes, Extends Up to 32 Feet, Synthetic Brush Head, Use with or Without a Power Drill

Overview: The Holikme 32 Feet Dryer Vent Cleaner Kit is a comprehensive solution for homeowners serious about dryer maintenance and fire prevention. This extensive system extends up to 32 feet with interlocking nylon connecting rods, making it ideal for reaching vents in large homes, multi-story buildings, or complex ductwork configurations that turn and bend through walls. The synthetic brush head attaches securely to the rods, and the included drill bit connector transforms manual cleaning into a powerful, efficient operation that blasts through stubborn lint accumulations.
What Makes It Stand Out: The exceptional 32-foot reach distinguishes this kit from standard 10-foot options, accommodating virtually any residential setup imaginable. The dual-mode operation—manual or power drill—provides flexibility based on your comfort level and cleaning intensity. The kit’s completeness, including a dedicated lint trap brush and protective non-slip gloves, eliminates the need for separate purchases and ensures you’re fully equipped for a professional-grade cleaning session.
Value for Money: At $24.95, this kit pays for itself after avoiding just one professional cleaning service ($150). For homeowners with long vent runs, it’s an economical long-term investment that enables quarterly maintenance without recurring costs, potentially saving hundreds annually while reducing fire hazards and improving dryer efficiency.
Strengths and Weaknesses: Pros include unparalleled reach, drill compatibility, comprehensive accessory package, and significant cost savings over professional services. The synthetic brush head is gentle enough for 4-inch ducts while effective at debris removal. Cons involve the potential for duct damage if rotated counterclockwise or pushed too aggressively around bends, and it may be excessive for apartments or short vent systems where a simpler tool would suffice.
Bottom Line: For homeowners with extensive ductwork, this kit is indispensable. It delivers professional-grade results at a fraction of the cost, making it a smart purchase for safety-conscious DIYers willing to follow instructions carefully.
7. Holikme 3 Pieces Dryer Vent Cleaner Kit - Lint Removal Cleaning Tool, Dryer Vent Trap Vacuum Brush, Long Flexible Refrigerator Coil Brush,Crevice Gap Cleaning Tool Brush
Overview: The Holikme 3 Pieces Dryer Vent Cleaner Kit offers a budget-friendly entry point into dryer maintenance, providing specialized tools for routine lint removal without the complexity of powered systems. This straightforward set includes three distinct brushes designed to tackle various cleaning challenges around your home, from dryer vents to refrigerator coils and window tracks, making it a versatile addition to your cleaning arsenal.
What Makes It Stand Out: Its multi-surface versatility is the primary advantage. The stainless steel bristles on a flexible core aggressively dislodge stubborn buildup without chemical cleaners. The interlocking rod system extends to 7.7 feet, sufficient for most standard dryer-to-wall vent runs, while the dedicated crevice tool reaches narrow gaps other kits ignore, expanding its utility beyond just dryer maintenance.
Value for Money: At $9.99, this kit is remarkably affordable, costing less than a single professional cleaning service. The three-tool approach maximizes utility across multiple appliances, effectively providing several specialized brushes for the price of one, which represents exceptional value for apartment dwellers and homeowners with straightforward vent systems who need basic maintenance tools.
Strengths and Weaknesses: Pros include an unbeatable price point, durable stainless steel construction, genuine multi-appliance functionality, and simple manual operation requiring no power tools. The ergonomic wood handle provides comfortable grip during extended cleaning sessions. Cons include limited 7.7-foot reach that may not suffice for longer ductwork, and the stiff metal bristles could potentially scratch delicate surfaces if used carelessly or on flexible foil ducts.
Bottom Line: This kit is perfect for budget-conscious users needing basic maintenance across multiple appliances. While not suited for complex vent systems, it delivers impressive versatility and value for routine cleaning tasks and general home maintenance.
8. Rejarr Full-Bristle Dryer Vent Cleaner Brush, Dryer Lint Brush and Lint Removal Tool for Trap and Duct, 27.95 Inches, Flexible for Deep Cleaning to Remove Pet Hair & Lint and Improve Efficiency

Overview: The Rejarr Full-Bristle Dryer Vent Cleaner Brush positions itself as a premium manual option for homeowners prioritizing thorough cleaning and surface protection. At nearly 28 inches, this single-tool solution features a fully wrapped bristle head with denser fibers that capture embedded debris more effectively than standard partial-bristle designs, while the reinforced core maintains flexibility through curved ducts and tight spaces without risk of breakage.
What Makes It Stand Out: The complete bristle coverage ensures 360-degree contact with duct walls, leaving fewer missed spots during cleaning. The protective rubber tip prevents scratches on dryer drums and vent interiors—a thoughtful detail missing from many competitors. Its bendable yet unbreakable construction confidently navigates tight turns, making it particularly valuable for older homes with non-standard ductwork or multiple bends.
Value for Money: Priced at $18.99, this brush sits in the mid-range, offering specialized features that justify the cost over basic options. For pet owners, it doubles as an effective furniture hair remover, adding utility beyond dryer maintenance and effectively providing two tools in one, which enhances its overall value proposition for multi-purpose household cleaning needs.
Strengths and Weaknesses: Pros include superior bristle density for comprehensive cleaning, scratch-free design with rubber tip protection, exceptional flexibility without fragility, and multi-purpose functionality for pet hair and general dusting. The 28-inch length is ideal for trap-to-duct transitions. Cons include being a single brush rather than a kit, requiring manual effort for entire vent runs, and potentially needing multiple passes for heavily clogged systems that power-assisted tools would clear faster.
Bottom Line: This is an excellent choice for pet owners and those wanting a gentle, thorough cleaning tool. Its quality construction and protective features make it worth the modest premium over basic brushes, especially for households with delicate appliance finishes.
9. Brushtech Dryer Vent Cleaning Brush - 10-Foot Flexible Duct Cleaning Tool with Non-Kinking Spring for Lint Removal, Improved Airflow, Safer Dryers - Made in The USA, House Maintenance Supplies

Overview: The Brushtech Dryer Vent Cleaning Brush offers a Made-in-USA alternative emphasizing durability and consistent performance. This 10-foot tool employs a high-tensile non-kinking spring design that maintains structural integrity while navigating ductwork, resisting the twisting and binding that can plague segmented rod systems during aggressive cleaning sessions, ensuring reliable operation through multiple uses.
What Makes It Stand Out: American manufacturing quality control ensures reliable construction from non-rusting spring material that withstands frequent use without corrosion. The continuous spring design provides smoother navigation through bends compared to jointed rods, while the ergonomic handle offers precise control for directing the brush head exactly where lint accumulates most heavily, improving cleaning effectiveness.
Value for Money: At $22.22, it commands a slight premium over import alternatives, but the domestic manufacturing and robust materials justify the cost for buyers prioritizing longevity. The tool’s durability means it should last for years of semi-annual use, making the per-cleaning cost negligible while supporting American jobs and quality standards.
Strengths and Weaknesses: Pros include superior build quality with non-kinking spring technology, corrosion-resistant materials, comfortable ergonomic handle, and proven effectiveness for standard 10-foot vent runs. The continuous design eliminates weak points found in segmented systems. Cons include the fixed 10-foot length that cannot be extended for longer runs, and the spring may be less flexible than nylon rod alternatives when encountering sharp 90-degree turns. The price point is higher than some comparable imports.
Bottom Line: For those valuing American-made quality and durable construction, this brush delivers reliable performance. It’s an excellent mid-priced option for homes with standard-length vents and moderate buildup, offering peace of mind through its robust design and domestic manufacturing.
10. OTAMCO Dryer Vent Cleaning Brush - Lint Removal Cleaner Tool, LongFlexible with Wood Handle (28.7Inches)

Overview: The OTAMCO Dryer Vent Cleaning Brush represents the minimalist approach to dryer maintenance, offering a straightforward 28.7-inch flexible brush with a traditional wood handle. This no-frills tool focuses on essential lint removal from traps and accessible duct portions without the complexity or cost of extended-reach kits or power drill attachments, appealing to users who prefer simplicity.
What Makes It Stand Out: Its simplicity is its defining characteristic. The tool does exactly what it promises without unnecessary features, making it ideal for users intimidated by more complex systems. The wood handle provides a classic, comfortable grip that won’t slip during use, while the flexible construction easily navigates the curve from lint trap into the initial duct section where most dangerous buildup occurs.
Value for Money: At $9.49, this is among the most affordable options available, making it accessible to any budget. While it won’t clean entire vent systems, it effectively handles the most critical area—the lint trap transition—where the majority of dangerous buildup occurs, providing solid value for basic maintenance needs and routine safety checks.
Strengths and Weaknesses: Pros include an extremely low price point, adequate length for lint trap cleaning, simple operation requiring no instructions, and durable construction that should last years with occasional use. The flexible design handles trap-to-duct bends effectively. Cons include limited 28-inch reach that cannot access deep ductwork, lack of extension capability, absence of accessories like drill attachments or crevice tools, and manual-only operation that requires physical effort for thorough cleaning.
Bottom Line: This is a practical choice for apartment dwellers or those wanting a simple tool for regular lint trap maintenance. While limited in scope, it performs its intended function reliably at an unbeatable price, making it a sensible entry-level option for basic dryer safety.
Why Lint Buildup is a Hidden Fire Hazard in Your Home
The Science Behind Lint Combustion
Lint isn’t just fabric fibers—it’s a concentrated fuel source with an enormous surface area-to-mass ratio that makes it extraordinarily flammable. When exposed to the high temperatures generated by your dryer (which can exceed 300°F in the heating element area), lint can ignite at temperatures as low as 200°F under certain conditions. The real danger lies in the combination of heat, oxygen, and fuel that creates a perfect storm within your dryer’s enclosed spaces. Unlike a single piece of fabric, lint’s fluffy structure allows oxygen to circulate freely through it, accelerating combustion dramatically once ignition occurs.
Shocking Statistics Every Homeowner Should Know
The National Fire Protection Association reports that failure to clean dryers is the leading cause of home clothes dryer fires, accounting for nearly one-third of all incidents. What makes these statistics particularly alarming is that these aren’t ancient appliances causing the problem—the majority of dryer fires occur in machines less than five years old. The common denominator? Inadequate lint removal from areas beyond the visible trap. A single load of laundry can produce enough lint to line a six-foot vent with a thin, dangerous film. Multiply that by hundreds of loads per year, and you have a cumulative fire hazard that grows silently while you fold towels.
Understanding Your Dryer’s Lint Trap System
How Standard Lint Screens Work
Your dryer’s lint screen is the first line of defense, but it’s designed as a coarse filter, not a comprehensive containment system. Most screens capture only 60-70% of the lint generated during a cycle, with the remainder being small enough to pass through the mesh or bypass the screen entirely through gaps around its edges. The screen’s primary function is to protect the blower motor and heating element from large lint clumps, but it does nothing to prevent fine particles from accumulating in the trap housing, transition duct, or vent line.
The Gap Between Trap and True Cleanliness
The space beneath your lint screen—the trap housing—is where the real accumulation begins. This area is designed to channel air but becomes a lint graveyard over time. Moisture from the drying process causes lint particles to stick to the housing walls, building up in layers that can reduce airflow by up to 75% before you even notice a performance issue. This restricted airflow forces your dryer to work harder, generating more heat and creating the dangerous cycle that leads to overheating and potential ignition.
Types of Lint and Debris Removal Tools
Manual Brushes and Rods
Manual cleaning systems consist of flexible rods that screw together, allowing you to reach deep into vent lines and trap housings. Look for rods made from fiberglass or durable nylon rather than metal, which can damage flexible vinyl or aluminum ducts. The brush heads should feature flagged bristles—split tips that grab lint without scratching surfaces. Quality systems offer brush diameters ranging from 2 to 4 inches to match different vent sizes, with the ability to navigate 90-degree bends without separating.
Vacuum Attachments and Kits
Specialized vacuum attachments transform your shop vac or household vacuum into a powerful lint extraction system. The most effective kits include a crevice tool with a small diameter (1.5 inches or less) to fit into trap housings, plus flexible hoses that can reach behind the dryer drum. Premium attachments feature brush tips that agitate lint while suctioning, preventing the compacted clumps that can occur with suction alone. Avoid kits with rigid plastic wands that can’t navigate the curves in your dryer’s interior.
Rotary Cleaning Systems
Rotary systems use a power drill to spin a flexible cable with a brush head, providing mechanical agitation that manual brushing can’t match. These systems excel at dislodging compacted lint from long vent runs but require careful operation. The key is variable speed control—high RPMs can damage ducts or cause the cable to whip dangerously. Professional-grade systems include torque limiters that prevent the cable from binding and breaking inside your vent, a feature worth seeking in consumer models.
Compressed Air Tools
Air-powered lint blowers use reverse-blowing nozzles that shoot compressed air into the vent line, forcing lint back toward the dryer rather than pushing it deeper into the system. These tools require significant air volume (CFM) rather than just high pressure (PSI), making them more suitable for homeowners with large air compressors. The nozzle design is critical—look for models with multiple rear-facing jets that create a vortex effect, lifting lint from duct walls without simply packing it tighter.
Flexible Crevice Tools
The unsung heroes of dryer maintenance, flexible crevice tools are typically 18 to 24 inches long with a small-diameter head that can access the gap between the drum and the dryer cabinet. The best versions feature a semi-rigid core that holds its shape when bent, allowing you to navigate around obstacles. Some advanced models include LED lights at the tip, illuminating the dark interior spaces where lint congregates around heating elements and thermostats.
Magnetic Retrieval Tools
While not primarily for lint removal, magnetic retrieval tools are essential for dryer maintenance. Screws, coins, and other metal objects that fall through the drum gaps can create sparks when contacting the heating element. A flexible magnetic pickup tool with a diameter under 0.5 inches can retrieve these hazards from the cabinet base without requiring full disassembly. Choose models with a strong neodymium magnet and a protective sleeve to prevent scratching.
Inspection Cameras for Deep Cleaning
Wireless inspection cameras have become game-changers for dryer maintenance, allowing you to see inside vent lines and trap housings without guesswork. Look for cameras with a 0.33-inch diameter probe that can fit through most vent openings, featuring adjustable LED brightness and at least 720p resolution. The most useful models include a hook attachment that can grab lint clumps for extraction, turning a diagnostic tool into an active cleaning device.
Key Features to Look for in Lint Removal Tools
Reach and Flexibility
The effectiveness of any lint removal tool is directly proportional to its ability to access problem areas. For vent cleaning, you need tools that can reach at least 12 feet to handle standard installations. Flexibility is measured in bend radius—the smallest curve the tool can navigate without kinking. Professional-grade tools can handle 2-inch radius bends, while consumer models typically manage 4-inch curves. Consider your specific vent configuration: rigid metal ducting requires less flexibility but more aggressive cleaning heads, while flexible foil ducts need softer bristles and greater bend capability.
Bristle Material and Stiffness
Bristle selection impacts both cleaning effectiveness and safety. Natural bristles (boar’s hair) are gentlest but wear quickly and can retain moisture, leading to mold. Nylon bristles offer the best balance—stiff enough to dislodge compacted lint yet soft enough to prevent duct damage. The stiffness rating, often measured in shore hardness, should be between 60A and 80A for dryer applications. Bristle length matters too: shorter (1.5-inch) bristles provide more aggressive cleaning but less reach, while longer (2.5-inch) bristles navigate bends better but may lack scrubbing power.
Compatibility with Your Dryer Model
Dryer designs vary significantly between manufacturers. Samsung and LG models often have deeper trap housings requiring longer tools, while Whirlpool and Maytag units typically feature more accessible designs. Front-load dryers present different challenges than top-load models, with lint accumulation patterns varying accordingly. Check your dryer’s technical specifications for vent outlet size (typically 4 inches) and trap housing depth before purchasing tools. Some high-efficiency models have secondary lint filters that require specialized access tools.
Durability and Build Quality
Professional tools use solid rod connections with brass fittings that won’t cross-thread, while budget options often rely on plastic connections that fail after a few uses. For vacuum attachments, look for ABS plastic construction rather than PVC, which becomes brittle with age. Rotary cables should have a minimum 0.25-inch diameter solid core; hollow cables can kink permanently and become useless. The best tools offer replaceable brush heads, allowing you to refresh the cleaning surface without replacing the entire system.
Ease of Use and Ergonomics
A tool that requires three hands to operate will end up unused in your garage. Look for features like comfortable grips on manual rods, quick-connect fittings that attach with a quarter-turn, and storage solutions that keep components organized. Weight matters—a 12-foot fiberglass rod assembly should weigh under 3 pounds to prevent fatigue during use. For vacuum kits, consider the hose length and whether it includes adapters for your specific vacuum model.
How to Choose the Right Tool for Your Dryer Setup
For Standard Vented Dryers
If you have a straightforward vent run (under 6 feet with minimal bends), a quality manual brush system paired with vacuum attachments will suffice. Focus on tools that can clean the trap housing thoroughly—a 3-foot flexible brush with a 2.5-inch head is ideal. For the vent itself, a 6-foot rod with a 4-inch brush will handle most installations. The key is consistency; these simpler tools work well when used monthly, preventing the heavy buildup that requires more aggressive equipment.
For Ventless and Condenser Dryers
Ventless dryers present unique challenges. While they don’t have exhaust vents, lint accumulates in the condenser unit and heat exchanger, requiring specialized narrow brushes that can fit through small access ports. Look for tools with 1-inch diameter brush heads and 24-inch flexible shafts. These dryers also need their internal ducting cleaned, which often requires manufacturer-specific tools that can navigate tight internal passages. Never use compressed air on condenser dryers, as this can force lint into sealed electronic compartments.
For Stackable and Tight-Space Configurations
When your dryer is stacked or wedged into a closet, accessing the rear vent connection becomes nearly impossible without moving the unit. In these situations, focus on tools that clean from the outside in. A rotary system with a reverse-blowing compressed air attachment allows you to clean from the exterior vent hood backward toward the dryer. For the lint trap housing, flexible crevice tools with 90-degree angled heads let you clean effectively even when you can’t stand directly in front of the machine.
Professional-Grade vs. DIY Tools: Making the Smart Choice
When to Invest in Professional Equipment
Professional-grade tools make sense if you have a complex vent system (multiple bends, long runs, or vertical installations), clean multiple dryers, or want to perform annual deep cleans that rival professional service. The investment threshold is typically around $150—above this price point, tools feature better construction, longer warranties, and capabilities that justify the cost. Consider professional equipment if your vent run exceeds 15 feet or includes more than three 90-degree bends, as consumer tools often lack the reach and durability for these challenging configurations.
Cost-Benefit Analysis for Homeowners
A quality DIY tool kit costing $50-$75 can reduce your professional cleaning frequency from annually to every 2-3 years, paying for itself after the first skipped service call. However, there’s a hidden cost: your time. A professional can clean a standard vent system in 45 minutes; your first attempt might take 3 hours. Factor in the learning curve and the risk of improper technique potentially damaging your vent. The sweet spot for most homeowners is a mid-tier tool set ($75-$125) used for quarterly maintenance, supplemented by professional cleaning every 18-24 months.
The Proper Technique for Deep Lint Removal
Step-by-Step Guide to Cleaning the Lint Trap Housing
Begin by removing the lint screen and using a flashlight to inspect the housing. Insert a flexible crevice tool attached to your vacuum and extract loose lint from the bottom of the housing. Next, use a 2-inch diameter brush with a 3-foot flexible rod, rotating it clockwise as you insert it to catch lint on the bristles. Work the brush up and down several times, then remove it slowly while continuing to rotate. Follow with another vacuum pass. For stubborn buildup, lightly dampen a microfiber cloth with water (never use cleaning chemicals) and wrap it around the brush head for a final pass.
Cleaning the Dryer Drum and Interior Cabinet
Unplug the dryer and remove the front panel or lower access panel (consult your manual). Use a flexible magnetic tool to retrieve any metal objects from the cabinet base. With a shop vac, clean the blower housing area, being careful not to disturb wiring. Use a 1-inch brush to clean around the heating element, but never touch the element itself—its fragile coils break easily. The drum seals can be cleaned with a dry toothbrush to remove lint that affects proper sealing. Always photograph wire connections before disconnecting anything for cleaning.
Tackling the Exhaust Vent System
Start at the dryer connection, disconnecting the transition duct. Clean this short piece separately with a hand brush. Insert your cleaning tool from the dryer end first, working it through the entire vent run. If using a rotary system, operate at low speed (under 300 RPM) and pull back slightly every few feet to prevent packing lint tighter. When you encounter resistance, stop and reverse direction—forcing the tool can puncture flexible ducts. Clean from the exterior vent hood backward as a final step, ensuring the damper moves freely after cleaning.
How Often Should You Clean? Creating a Maintenance Schedule
Daily and Weekly Habits
Make lint screen cleaning after every load non-negotiable. Once weekly, use a flashlight to inspect the trap housing for visible accumulation. Run your fingers along the screen’s edges to check for lint bypass. If you can grab any lint from the housing with your fingers, it’s time for a deeper clean. Weekly, also check that your exterior vent hood opens freely when the dryer runs and that no debris blocks the opening.
Monthly Deep Cleaning Tasks
Every month, perform a thorough cleaning of the lint trap housing using a brush and vacuum system. For households doing more than 8 loads weekly, increase this to bi-weekly. Monthly, also clean behind the dryer, removing any lint that has escaped the cabinet. Check the transition duct for kinks or damage, and ensure all connections are secure. This is also the time to inspect the vent hood for bird nests or insect activity that could restrict airflow.
Seasonal Professional Inspections
Schedule a professional inspection and cleaning every 12-18 months, ideally in spring before heavy summer laundry loads begin. Professionals have tools to measure airflow velocity and can identify issues like internal duct collapse or improper installation that DIY tools can’t detect. If you dry a lot of fleece, towels, or pet bedding, consider professional service every 9-12 months, as these materials produce significantly more lint than standard cotton loads.
Warning Signs Your Dryer Needs Immediate Attention
Performance Red Flags
If your dryer requires more than one cycle to dry a standard load, airflow is restricted by at least 50%. A dryer that feels excessively hot to the touch or heats your laundry room more than usual is working too hard, generating dangerous internal temperatures. Listen for the blower motor straining—a high-pitched whine indicates it’s fighting against a blockage. These performance issues precede fire risk by weeks or months, making them critical early warning signs.
Visual and Olfactory Clues
Lint accumulating on the dryer’s exterior, particularly around the door seal or control panel, indicates internal pressure forcing lint through gaps. Any burning smell, even faint, demands immediate shutdown and inspection. This odor comes from lint scorching on the heating element. If your laundry smells musty after drying, moisture is trapped in the vent system due to restricted airflow—a precursor to mold growth and a sign of severe lint blockage. Visible lint around the exterior vent hood when the dryer isn’t running means the damper isn’t sealing, allowing lint to escape and potentially blow back into the system.
Beyond the Lint Trap: Hidden Areas Where Debris Accumulates
Behind the Dryer Drum
The gap between the drum and the rear bulkhead is a major lint collection point. As the drum rotates, it acts like a pump, drawing lint through the felt seals. This area can accumulate several inches of packed lint that contacts the heating element or burner assembly directly. Access requires removing the front or rear panel, depending on your model. Use a flexible crevice tool to extract lint from this space, working carefully around the drum support rollers and belt.
The Blower Housing and Motor Area
The blower wheel, which pulls air through the drum and pushes it out the vent, becomes coated with lint that reduces its efficiency. This lint can work its way into the motor bearings, causing premature failure and potential overheating. Cleaning this area typically requires removing the front panel and possibly the drum itself. Use a small, stiff brush to clean the blower blades, being careful not to bend them. Vacuum the motor housing but avoid direct contact with electrical components.
Transition Ducts and Wall Vents
The short duct connecting your dryer to the wall vent is the most critical piece of the system. This should be rigid or semi-rigid metal, never plastic or foil. Even with proper material, lint packs into the ridges of flexible ducts or accumulates at connection points. Wall vents, especially those with screens to prevent animal entry, clog rapidly. The vent hood’s flapper door should be checked monthly for proper operation, and the entire vent run should be inspected annually with a camera if possible.
Safety Precautions When Cleaning Your Dryer
Electrical Safety First
Always unplug the dryer before removing panels or reaching into the cabinet. If you must test components during cleaning, use a non-contact voltage tester to verify power is off. For gas dryers, shut off the gas supply valve before beginning work. Never bypass safety switches or thermal fuses during cleaning—these are critical safety devices. If you encounter damaged wiring or melted connectors, stop immediately and call a professional, as these indicate existing overheating issues.
Protecting Your Dryer Components
The heating element in electric dryers is extremely fragile—one touch with a hard tool can cause a coil to break, requiring expensive replacement. Drum seals are easily torn if you pull too hard with a tool. When cleaning around thermostats and thermal fuses, use a soft brush only; these components can be knocked loose or have their calibration affected by aggressive cleaning. Never spray water or cleaners inside the dryer cabinet, as moisture can damage the control board or motor.
Personal Protective Equipment
Lint is a respiratory irritant and can contain allergens, detergents, and fabric softener chemicals. Always wear an N95 mask or respirator when cleaning dryer interiors. Safety glasses prevent dislodged lint from entering your eyes, especially when working overhead on vent systems. Use work gloves to protect against sharp metal edges inside the cabinet and to improve your grip on tools. If you have allergies or asthma, consider running an air purifier in the laundry room during and after cleaning.
The Connection Between Lint Removal and Dryer Efficiency
Energy Savings Through Proper Maintenance
A dryer with a partially blocked vent can use 30% more energy per load. For the average household doing 300 loads annually, this adds up to $50-$100 in wasted electricity. More significantly, the extended run times mean your dryer is operating longer at high temperatures, accelerating wear on all components. Proper lint removal restores designed airflow rates, allowing clothes to dry in the specified time using the intended heat cycles. This efficiency gain is immediate and measurable on your utility bill.
Extending Your Appliance’s Lifespan
The number one cause of premature dryer failure is overheating due to restricted airflow. Motors, belts, and bearings all suffer when the dryer runs hotter and longer than designed. The heating element itself cycles more frequently, leading to earlier burnout. Regular lint removal can extend a dryer’s operational life from 10-13 years to 15-18 years, delaying a $800-$1,500 replacement purchase. This preventive maintenance also preserves your clothing, as excessive heat breaks down fabric fibers faster than proper drying temperatures.
Common Mistakes That Increase Fire Risk
Using the Wrong Tools for the Job
Household items like wire coat hangers or duct tape wrapped around a stick might seem clever but they do more harm than good. Metal wires can puncture flexible ducts, creating leaks that vent moist air into wall cavities. Rigid tools can dislodge connections, leaving gaps where lint escapes into your home. Perhaps most dangerously, improper tools can push lint deeper into the vent system, creating a dense blockage that’s more flammable than a gradual accumulation. Always use tools specifically designed for dryer vent cleaning.
Neglecting the Exterior Vent Hood
The exterior vent hood is your system’s exit point and a common failure location. Homeowners often clean the interior system thoroughly but ignore the flapper door that’s stuck shut with paint or debris. A stuck flapper not only restricts airflow but can also cause lint to accumulate at the vent termination, creating a fire hazard right where heat exits your home. The vent hood should be checked monthly and cleaned with a simple brush and water spray. Ensure the flapper moves freely and the seal is intact when closed.
Overlooking the Importance of Reassembly
Improper reassembly after cleaning creates new hazards. Loose vent connections leak lint into wall spaces and reduce system efficiency. Forgetting to reconnect the moisture sensor wire (common when removing the front panel) causes the dryer to run indefinitely, overheating clothes. Overtightening screws on the front panel can crack mounting points, leading to gaps that allow lint to escape the cabinet. Always photograph your disassembly process and refer to the service manual for torque specifications.
When to Call a Professional: Knowing Your Limits
Complex Vent Configurations
If your vent run includes multiple vertical sections, runs through a roof rather than a side wall, or exceeds 20 feet in length, professional cleaning is not just recommended—it’s essential. These configurations require specialized blowers and cameras to clean effectively. Roof vents are particularly dangerous for homeowners to access and often require disassembly of vent sections that DIY tools can’t handle. Professionals also have airflow meters that can verify the system is restored to manufacturer specifications, something you can’t eyeball.
Signs of Existing Fire Damage
If you discover scorched lint, melted plastic components, or discolored metal inside your dryer, stop immediately. These signs indicate your dryer has already experienced temperatures high enough to cause combustion. Continuing to use or clean a damaged dryer is extremely dangerous. A professional can assess whether the unit is salvageable and what repairs are needed to make it safe. They can also inspect surrounding wall cavities for lint ignition that may have occurred without your knowledge, a surprisingly common scenario that creates ongoing fire risk.
Frequently Asked Questions
How do I know if my dryer vent is clogged even if I clean the lint trap regularly? Look for extended drying times, excessive heat in the laundry room, lint accumulating around the dryer door, and a flapper on the exterior vent hood that doesn’t open fully when the dryer runs. You can also perform a simple airflow test: turn on the dryer and hold a piece of lightweight fabric near the exterior vent. It should be pulled firmly against the hood opening. Weak airflow indicates a blockage somewhere in the system.
Can I use my regular vacuum cleaner to remove lint from my dryer? Standard household vacuums lack the suction power and specialized attachments needed for effective lint removal. Their hoses are too large to fit into trap housings, and they can easily overheat when vacuuming large amounts of lint. A shop vac with at least 3 horsepower and a HEPA filter is the minimum requirement. Even better are vacuum systems specifically designed for dryer cleaning, which include lint-catching bags that prevent clogs in the vacuum itself.
What’s the difference between a rotary cleaning system and a manual brush? Rotary systems use a power drill to spin a cleaning brush, providing mechanical agitation that removes compacted lint more effectively than manual scrubbing. They’re ideal for long vent runs with heavy buildup but require careful operation to avoid damaging ducts. Manual brushes offer more control and are safer for short, simple vent systems or for cleaning the trap housing where precision is needed. Many homeowners benefit from owning both: manual tools for monthly maintenance and a rotary system for annual deep cleaning.
Are there any types of dryer vents that shouldn’t be cleaned with brushes? Yes. Flexible foil or plastic transition ducts should not be cleaned with aggressive brushes, as they can tear easily. These should be replaced with rigid or semi-rigid metal ducting. For existing foil ducts, use only vacuum attachments and compressed air tools. Additionally, some high-efficiency dryers have internal ducting made from delicate materials; consult your manual before using any mechanical cleaning tools inside the cabinet.
How often should I replace my lint removal tools? With proper care, quality manual brushes and rods can last 5-7 years. Replace them when bristles become permanently bent or fall out, or when rod connections become loose. Vacuum attachments should be replaced if cracked or if suction decreases due to internal clogs. Rotary cables should be inspected before each use and replaced immediately if you notice kinks, fraying, or separation at connection points. Brush heads on rotary systems typically need replacement every 2-3 years with regular use.
Can cleaning my dryer vent really prevent fires, or is that just marketing hype? The connection between vent cleaning and fire prevention is well-documented by fire safety organizations, not just manufacturers. The NFPA specifically identifies failure to clean dryers as the leading cause of dryer fires. By removing the fuel source (lint) and restoring proper airflow (which prevents overheating), you directly address the two primary factors in dryer fires. It’s one of the few maintenance tasks with proven, statistically significant risk reduction.
What’s the safest way to clean a gas dryer versus an electric dryer? Gas dryers require additional safety steps. Always shut off the gas supply valve before removing any panels. Use only battery-powered tools near gas connections to avoid spark risk. Be extremely careful not to disturb gas line fittings when moving the dryer. For electric dryers, the primary concern is avoiding damage to the fragile heating element. In both cases, ensure the appliance is unplugged before beginning work. Gas dryers should be checked for leaks after reassembly using a soapy water solution on all connections.
Why does my dryer produce more lint sometimes, and does this affect how often I should clean? Lint production varies dramatically by fabric type. New towels and fleece items shed heavily for the first few washes. Pet bedding and blankets generate massive amounts of lint. Mixing heavy lint producers with regular loads can actually increase overall lint production as fibers intermingle. During periods of washing these items, increase your cleaning frequency to bi-weekly for the lint trap housing and monthly for the vent system. Consider drying high-lint items separately when possible.
Is it worth installing a dryer vent alarm or monitoring system? Vent monitoring systems that measure airflow or pressure changes can provide early warning of blockages before they become severe fire hazards. The most effective models alert you when airflow drops below 80% of normal, giving you time to clean before performance suffers. However, they should supplement, not replace, regular cleaning. Some smart dryers now include built-in airflow sensors that display warnings on the control panel. These systems are particularly valuable for households that can’t commit to strict cleaning schedules.
What should I do if I find a bird’s nest or animal debris in my vent? Do not attempt to clean this yourself. Animal nests can contain parasites, bacteria, and flammable materials like dried grass and twigs. More importantly, there may be live animals present. Contact a professional wildlife removal service that can safely extract the nest and install a proper vent cover with an animal guard. After removal, the entire vent system must be professionally cleaned and sanitized. Simply clearing the nest without addressing the contamination and potential duct damage leaves you with ongoing health and fire risks.