There’s nothing quite like the freedom of hitting the open road in your RV, but let’s be honest—managing laundry at laundromats or packing weeks’ worth of clothes quickly loses its charm. Installing a dedicated laundry center in your RV transforms your traveling experience, giving you back time, money, and precious storage space. However, the harsh reality of RV life—constant vibration, limited space, and weight constraints—means that simply placing a washer or dryer in a closet simply won’t cut it. The secret to a reliable, safe, and long-lasting RV laundry setup lies entirely in the mounting and bracketing hardware that secures your appliances to your home-on-wheels.
This comprehensive guide dives deep into everything you need to know about selecting, installing, and maintaining the right mounting systems for your RV laundry center. Whether you’re a full-time RVer or a weekend warrior, understanding these critical components will prevent costly damage, reduce noise, and ensure your appliances survive thousands of miles of bumps and turns. We’ll walk you through the technical considerations, installation strategies, and common pitfalls that even experienced DIYers often overlook.
Top 10 RV Laundry Center Mounting Hardware
Detailed Product Reviews
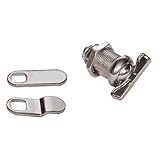
1. Shoppingsoon 3314067.004B Bottom Bracket Assembly Wall Mount Bracket for RV Camper Trailer White (3314067.004B (1 PCS))

Overview: The Shoppingsoon 3314067.004B bracket is a specialized replacement part designed for RV awning arm mounting systems. This white wall-mount bracket serves as a direct OEM replacement for worn or damaged components on various camper trailer models, including specific Baraket, A&E Systems, and Sunchaser awnings from multiple manufacturers.
What Makes It Stand Out: Precision engineering defines this bracket, featuring a 3-1/2" x 2" base with exact 2-9/16" (65mm) center-to-center hole spacing. Its model-specific design ensures proper fitment for 2007 Crossroads Sunset Trail, 2012 Puma toy transporter, and 2007 Travel Lite fifth wheel units, eliminating guesswork during repairs. The product addresses a common failure point in RV awning systems.
Value for Money: At $14.00 for a single unit, this bracket offers significant savings compared to dealership parts departments that often charge 2-3 times more for equivalent components. While sold individually rather than in pairs, the price reflects specialized RV hardware manufacturing and prevents unnecessary replacement of undamaged opposite-side brackets.
Strengths and Weaknesses: Strengths include precise OEM specifications, targeted compatibility list, and cost-effective dealer alternative. The durable construction withstands outdoor exposure and mechanical stress. Weaknesses involve the single-unit sale format, which may confuse buyers expecting pairs, and limited documentation regarding material composition. Compatibility requires careful measurement verification.
Bottom Line: For RV owners battling a broken awning mount, this bracket delivers exact-fit replacement at a fair price. Verify your existing bracket measurements against the 65mm hole spacing before ordering, and purchase two if both sides require replacement.
2. RV Drawer Slides Brackets Replace for RV Designer H307, 3/4” Drawer Slide Socket, RV Drawer Hardware Including Left and Right (1-1/8” Total), Fits in Most RV Drawers

Overview: These RV Designer H307 replacement brackets provide a complete solution for repairing damaged drawer slide sockets in recreational vehicles. The kit includes both left and right brackets, addressing a common failure point that prevents smooth drawer operation in campers, motorhomes, and travel trailers.
What Makes It Stand Out: The universal design fits most RV drawer systems, making it a versatile addition to any maintenance kit. Installation requires only a screwdriver, enabling quick roadside repairs without specialized tools. The 3/4" slide socket with 1-1/8" total width matches standard RV drawer specifications, ensuring proper alignment and eliminating wobbling.
Value for Money: At $9.36 for a complete left-right set, this product delivers exceptional value. Purchasing individual components or dealer-sourced replacements could cost $15-20 or more. The included pair ensures matching hardware and saves time searching for separate parts, making it a smart choice for proactive RV maintenance.
Strengths and Weaknesses: Strengths include the complete bracket set, broad compatibility, tool-simple installation, and responsive after-sales support. The design reduces drawer misalignment issues common in mobile environments. Weaknesses involve potential material limitations—likely plastic that may not match OEM durability—and the possibility of slight variations requiring minor modifications in some RV models.
Bottom Line: This affordable drawer bracket set belongs in every RV owner’s toolkit. For under $10, you get a reliable, easy-to-install solution that restores drawer functionality quickly. Keep a set on hand for emergency repairs during travel.
3. RV Designer L447, Non-Locking Thumb Turn Econo Cam, 7/8 inch, Compartment Hardware
Overview: The RV Designer L447 Non-Locking Thumb Turn Econo Cam provides simple, reliable compartment closure for RV storage areas. This compact hardware solution includes both straight and offset cam options, accommodating various latch configurations in camper doors, basement storage, and exterior compartments.
What Makes It Stand Out: The versatile dual-cam design eliminates the need to purchase separate components for different door thicknesses or latch positions. The 7/8-inch thumb turn offers ergonomic operation without requiring keys, making it ideal for frequently accessed storage areas. The non-locking design prioritizes convenience while providing secure closure during travel.
Value for Money: Priced at $13.29, this cam assembly sits in the mid-range for RV compartment hardware. The inclusion of two cam styles adds value, effectively providing two products in one package. Compared to purchasing individual cams or complete latch assemblies, this represents a cost-effective repair solution for aging RV storage systems.
Strengths and Weaknesses: Strengths include the dual cam versatility, reputable RV Designer branding, simple installation, and lightweight design. The thumb-turn operation is intuitive for all users. Weaknesses center on the non-locking limitation for security-sensitive compartments, minimal product specifications, and Chinese manufacturing that may concern buyers seeking domestic parts. Package dimensions suggest compact but potentially fragile construction.
Bottom Line: This econo cam excels for interior and low-security exterior compartments where convenience trumps locking security. Verify your existing latch dimensions before purchasing, and consider locking alternatives for valuable storage areas.
4. Closet Rods for Hanging Clothes, 17-84 Inch No-Cut Stepless Adjustable Closet Rod, 1.3 Inch Heavy Duty Metal Closet Hanging Rod with Brackets, Black Closet Bar for Closet, Laundry Room, RV, Wardrobes

Overview: This adjustable closet rod transforms RV storage with its innovative stepless telescoping design, extending from 17 to 84 inches without cutting. The heavy-duty 1.3-inch diameter metal rod supports up to 66 pounds, making it ideal for wardrobes, laundry rooms, and mobile applications where space efficiency matters.
What Makes It Stand Out: True tool-free continuous adjustment sets this apart from traditional closet rods. The zero-gap design ensures perfect sizing for any space, while industrial-grade U-shaped brackets with integrated locking screws prevent slippage—a critical feature in moving RVs. The textured matte finish prevents hangers from sliding during transit.
Value for Money: At $17.48, this rod delivers exceptional versatility. Equivalent adjustable rods cost $25-40, and custom-cut solutions lack flexibility. The multi-functional design serves as a closet rod, curtain rail, room divider, or RV storage bar, effectively replacing several single-purpose products at a fraction of the cost.
Strengths and Weaknesses: Strengths include stepless adjustability, high weight capacity, sturdy metal brackets, comprehensive hardware kit for various surfaces, and matte black aesthetic. The multi-use design maximizes value. Weaknesses involve the single end cap limitation, potentially excessive features for simple installations, and black color that may not suit all decors.
Bottom Line: This adjustable rod is a must-have for RV owners seeking flexible storage solutions. The ability to resize without tools and adapt to multiple uses justifies every penny. Perfect for maximizing limited mobile living space.
5. JOY DECOR Cabinet Handles, Black Cabinet Pulls, 2 Pack Kitchen Closet Handles 5 Inch, Square Drawer Pulls Stainless Steel Drawer Hardware, 128mm Hole Centers

Overview: JOY DECOR’s black cabinet pulls offer a modern hardware upgrade for kitchen, bathroom, and bedroom cabinetry. This two-pack features 5-inch hole centers (128mm) with a sleek square stainless steel design measuring 5-1/2 inches overall length, delivering contemporary style at an accessible price point.
What Makes It Stand Out: The square profile provides a distinctive modern aesthetic that differentiates from ubiquitous round bar pulls. Premium stainless steel construction with deep threading ensures durability and prevents loosening—common issues with budget hardware. The 1/2-inch width and 1-2/5-inch height create substantial grip clearance for comfortable use.
Value for Money: At $6.99 for two handles ($3.50 each), this set significantly undercuts competitors charging $5-8 per handle for similar quality. The stainless steel material and robust threading provide long-term reliability that surpasses aluminum or zinc alternatives at this price point, making it ideal for budget-conscious renovations.
Strengths and Weaknesses: Strengths include sturdy stainless steel construction, comfortable matte finish, precise hole spacing, easy installation, and versatile contemporary design. The two-pack offers immediate project completion for small updates. Weaknesses involve the limited quantity—larger kitchens require multiple packs—and restricted size options. The square design may clash with traditional decor.
Bottom Line: These handles deliver premium quality and style at a bargain price. Perfect for modernizing a few cabinets or drawers without breaking the budget. Measure carefully and purchase multiple packs for larger projects.
6. JOY DECOR Cabinet Handles, Black Cabinet Pulls, 2 Pack Kitchen Closet Handles 6-1/4 Inch, Square Drawer Pulls Stainless Steel Drawer Hardware, 160mm Hole Centers
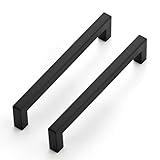
Overview: The JOY DECOR 2-Pack Black Cabinet Handles offer a sleek hardware solution for modernizing cabinets and drawers. Measuring 6-1/4 inches between hole centers with an overall length of 6-3/4 inches, these square-profile pulls are crafted from premium stainless steel with a matte black finish. Designed for kitchen cabinets, bathroom vanities, or closet drawers, they provide a contemporary aesthetic upgrade.
What Makes It Stand Out: These pulls distinguish themselves through their thoughtful engineering. The deep-threaded design ensures secure, long-lasting attachment without loosening over time, while the smooth matte finish offers a comfortable grip that prevents hand slippage. The 1/2-inch width and 1-2/5-inch height create an optimal gripping distance, making it easy to open heavily-loaded drawers. Their minimalist square design complements various décor styles from modern to transitional.
Value for Money: At $7.99 for two ($4.00 per handle), these represent solid mid-range value. Comparable hardware store options often cost $5-8 per piece for similar stainless steel construction. While not the cheapest option available, the durability and premium feel justify the modest investment, especially for small-scale projects or replacing damaged hardware.
Strengths and Weaknesses: Strengths include robust stainless steel construction, comfortable ergonomic design, secure installation mechanism, and versatile contemporary styling. The matte finish resists fingerprints and smudges effectively. Weaknesses are the limited quantity—only two per pack—which may inconvenience larger renovation projects. Additionally, the single size option requires careful pre-purchase measurement, and installation demands drilling precision.
Bottom Line: These JOY DECOR handles excel for targeted updates or small installations. Their quality construction and modern aesthetic make them ideal for DIYers refreshing a bathroom vanity or replacing a few kitchen cabinet pulls. For larger projects, consider the 10-pack variant for better value.
7. Closet Rods for Hanging Clothes, 17-39 Inch No-Cut Stepless Adjustable Closet Rod, 1.3 Inch Heavy Duty Metal Closet Hanging Rod with Brackets, Black Closet Bar for Closet, Laundry Room, RV, Wardrobes
Overview: This 17-39 inch adjustable closet rod delivers a versatile storage solution for spaces requiring flexible hanging options. The telescoping design eliminates cutting, while the 1.3-inch heavy-duty metal construction supports up to 66 pounds. Complete with industrial-grade U-shaped brackets and a matte black finish, it suits closets, laundry rooms, RVs, and wardrobes.
What Makes It Stand Out: The stepless adjustment mechanism allows precise customization without tools, adapting seamlessly to any width between 17-39 inches. Unlike fixed-length rods, this zero-gap design ensures perfect fits every time. The textured matte finish prevents clothes from slipping, while the integrated locking screw in the brackets eliminates rod slippage. Its multi-functional design extends beyond closets to serve as room dividers, curtain rails, or RV storage bars.
Value for Money: Priced at $14.99, this rod offers exceptional value compared to custom-cut alternatives or multiple fixed-length rods. The heavy-duty construction and included mounting hardware for various surfaces (wood, tile, cement) eliminate additional purchases. For renters or those who reconfigure spaces frequently, the adjustability alone justifies the price.
Strengths and Weaknesses: Strengths include tool-free stepless adjustment, robust weight capacity, easy installation, rust-resistant coating, and multi-purpose functionality. The industrial brackets outperform plastic alternatives significantly. The only notable weakness is that only one end cap is included, which seems inconsistent. Some users may find the 39-inch maximum limiting for larger closets.
Bottom Line: This adjustable rod is a game-changer for renters, DIY enthusiasts, and anyone needing flexible storage. Its robust construction and clever design make it superior to fixed alternatives. Highly recommended for spaces where adaptability is key.
8. Closet Rods for Hanging Clothes, 17-54 Inch No-Cut Stepless Adjustable Closet Rod, 1.3 Inch Heavy Duty Metal Closet Hanging Rod with Brackets, Black Closet Bar for Closet, Laundry Room, RV, Wardrobes
Overview: Extending the versatility of its shorter sibling, this 17-54 inch adjustable closet rod offers the same premium features with expanded reach. The telescoping heavy-duty metal construction maintains the 1.3-inch diameter and 66-pound weight capacity, while the stepless adjustment now accommodates wider spaces up to 54 inches. Matte black finish and industrial U-brackets complete the package.
What Makes It Stand Out: This rod shares all the innovations of the 39-inch version—tool-free stepless adjustment, zero-gap design, and multi-surface compatibility—but adds crucial extra length for walk-in closets and broader spaces. The extended range makes it uniquely suitable for larger wardrobe systems while maintaining the same robust construction and anti-slip textured finish that prevents garment slippage.
Value for Money: At $16.99, this represents outstanding value—only $2 more than the 39-inch model for 15 additional inches of adjustability. This marginal price increase delivers significantly more versatility, making it the smarter choice for most buyers. Comparable fixed-length rods of this quality would cost more and lack adaptability.
Strengths and Weaknesses: Strengths mirror the shorter version: heavy-duty construction, impressive weight capacity, easy tool-free installation, rust-resistant finish, and remarkable versatility. The extended length covers most residential closet sizes. Weaknesses include the same single end cap limitation and potential over-specification for very small spaces. The longer telescoping section may have slightly more flex at maximum extension.
Bottom Line: Unless you specifically need under 39 inches, this extended version offers superior value and future-proofing. Its robust design and expanded range make it the definitive choice for homeowners wanting maximum flexibility. Highly recommended for closet upgrades.
9. JOY DECOR 10 Pack Cabinet Handles, Black Cabinet Pulls, 5 Inch Kitchen Closet Handles Square Drawer Pulls Stainless Steel Drawer Hardware, 128mm Hole Centers
Overview: The JOY DECOR 10-Pack Black Cabinet Handles provides a cost-effective hardware solution for larger renovation projects. These 5-inch hole center pulls feature the same premium stainless steel construction and matte black finish as the 2-pack variant, but in a bulk quantity ideal for kitchens or multiple rooms. The square profile measures 5-1/2 inches overall with a comfortable 1/2-inch width.
What Makes It Stand Out: This bulk pack delivers exceptional consistency across all pieces—crucial for cohesive kitchen or bathroom designs. The deep-threaded attachment system ensures every handle installs securely and remains tight through years of use. The shorter 5-inch length suits standard cabinet drawers perfectly, while the same ergonomic design provides comfortable grip and easy operation of heavy drawers.
Value for Money: At $17.99 ($1.80 per handle), this 10-pack offers dramatic savings compared to the 2-pack version ($4.00 each) and most hardware store alternatives. The 55% per-unit price reduction makes this an outstanding value for anyone needing multiple handles. The quality remains identical to the smaller pack, making bulk purchasing a no-brainer for larger projects.
Strengths and Weaknesses: Strengths include unbeatable bulk pricing, consistent quality across all pieces, durable stainless steel construction, comfortable matte finish, and versatile modern design. The 5-inch size fits most standard cabinets perfectly. Weaknesses are the single size and finish option, requiring commitment to this specific aesthetic. Like the 2-pack, installation requires careful measurement and drilling.
Bottom Line: For kitchen remodels or multi-room updates, this 10-pack delivers professional-grade hardware at DIY prices. The combination of quality, style, and value is hard to beat. Highly recommended for anyone needing multiple cabinet pulls.
10. Kingston Brass Gourmetier GCLWS302019 30X20 Single Bowl Wall Mounted Sink, White

Overview: The Kingston Brass Gourmetier GCLWS302019 is a premium wall-mounted cast iron sink designed for serious home chefs and commercial-style kitchens. Measuring 30 by 20 inches with a spacious 26-1/16-inch single bowl, this heavy-duty fixture delivers professional durability and aesthetic. The white cast iron construction promises decades of service.
What Makes It Stand Out: This sink’s cast iron fabrication sets it apart from standard stainless steel models, offering superior heat retention, sound dampening, and resistance to chipping when properly maintained. The wall-mount design frees up cabinet space below while creating an authentic commercial kitchen aesthetic. The generous 7-5/16-inch bowl depth accommodates large pots and pans easily, and the precise faucet hole placement ensures compatibility with professional-style fixtures.
Value for Money: At $922.16, this is a significant investment. However, cast iron sinks of this caliber typically range from $800-1,200, placing this competitively priced. The longevity—often 50+ years—and timeless design justify the upfront cost for homeowners prioritizing quality over replacement cycles. Professional installation adds expense but ensures proper support for the substantial weight.
Strengths and Weaknesses: Strengths include exceptional durability, heat and sound insulation, spacious single-bowl design, professional aesthetic, and potential lifetime value. The wall-mount configuration offers layout flexibility. Weaknesses are the prohibitive cost for budget renovations, extreme weight requiring reinforced walls, potential for rust if enamel chips, and the need for professional installation. Limited color options may not suit all décors.
Bottom Line: This sink suits discerning homeowners building their dream kitchen or seeking authentic commercial quality. For casual cooks or budget projects, it’s overkill. If you value permanence and professional performance, this investment delivers. Otherwise, consider more affordable alternatives.
Why Proper Mounting Matters in an RV Environment
Your RV laundry center faces challenges that stationary home appliances never encounter. Every mile of highway introduces multi-directional forces—vertical bounce from potholes, lateral sway during turns, and longitudinal jolts from sudden stops. Without proper mounting, your washer or dryer becomes a 150+ pound projectile capable of tearing through cabinetry, damaging plumbing connections, and creating serious safety hazards. Beyond the immediate danger, improper installation leads to premature appliance failure, voided warranties, and structural damage to your RV’s frame. Quality mounting hardware does more than just hold your laundry center in place; it creates an integrated system that works with your RV’s movement rather than against it.
Understanding RV Laundry Center Configurations
Before selecting any hardware, you need to understand your specific laundry setup. The configuration you choose directly impacts the type of mounting system required and the complexity of your installation.
Combo Units vs. Stackable Systems
All-in-one washer-dryer combos have become increasingly popular in RV applications due to their space efficiency. These units typically require a single, robust platform mount or four-point corner bracket system. The mounting must account for the unit’s shifting center of gravity as the drum rotates through wash and dry cycles. Stackable separate units, while offering larger capacity, demand more sophisticated hardware—typically a vertical support system that secures both units independently while maintaining proper alignment. The upper dryer requires top-mounting brackets or a full enclosure frame to prevent tipping, while the washer needs a vibration-isolated base to handle the spin cycle’s intense forces.
Portable and Countertop Options
For smaller RVs or those wanting flexibility, portable washing machines and countertop dryers present unique mounting challenges. These lightweight alternatives still require securement during transit, often utilizing quick-release bracket systems or slide-out drawer mounts that lock into place. The hardware must be strong enough to prevent movement but allow for easy removal when you need the floor space. Many RVers install these units in shower stalls or under convertible dinette benches, requiring custom bracket solutions that work around existing fixtures.
Types of Mounting & Bracketing Hardware
The market offers several categories of mounting solutions, each engineered for specific applications and RV types. Understanding the differences helps you make an informed decision based on your rig’s construction and your laundry center’s specifications.
Fixed Mounting Brackets
Fixed brackets provide the most straightforward and robust connection between your appliance and RV structure. These heavy-duty steel or aluminum L-brackets bolt directly into wall studs or floor joists, creating a permanent installation. Look for brackets with multiple mounting holes that allow weight distribution across several fasteners. The best designs include gusseted corners and reinforced welds that resist shearing forces. Fixed systems work exceptionally well for stackable units where you need to create a rigid frame that prevents any movement whatsoever.
Vibration-Isolation Systems
These advanced mounting solutions incorporate rubber isolators, spring dampeners, or pneumatic shocks between the appliance and mounting surface. During travel, the isolation system compresses and absorbs road vibrations before they transfer to your laundry center. While in operation, the same technology prevents the appliance’s own vibrations from resonating through your RV’s structure. Premium isolation mounts feature adjustable tension settings, allowing you to fine-tune the dampening based on your appliance’s weight and your typical road conditions.
Slide-Out and Swivel Platforms
Space-conscious RVers increasingly turn to slide-out platforms that allow laundry centers to be tucked away during travel and extended for use. These systems use heavy-duty drawer slides rated for at least 250 pounds, combined with locking mechanisms that secure the platform when stowed. Swivel mounts take this concept further, letting you rotate the entire unit for access to rear connections or to create a temporary workspace. The hardware for these solutions must include positive locking systems that engage automatically and require deliberate action to release.
Overhead Suspension Systems
For unconventional installations or to maximize floor space, overhead suspension systems use ceiling-mounted tracks and support cables to literally hang your laundry center. This approach works particularly well in toy haulers or fifth-wheel garages where floor mounting isn’t practical. The hardware includes aircraft-grade cables, turnbuckles for leveling, and secondary safety chains. While complex to install, suspension systems provide superior vibration isolation and allow you to position the unit at a comfortable working height.
Weight Capacity: The Non-Negotiable Factor
Every component in your mounting system must be rated for significantly more than your appliance’s static weight. A 120-pound washer can exert over 400 pounds of dynamic force during a high-speed spin cycle on a bumpy road. Always calculate your total load by adding the appliance weight, water capacity (8.3 pounds per gallon), and a 50% safety margin for dynamic forces. Then select hardware rated for at least double that calculated load. Check the Working Load Limit (WLL) rating rather than the breaking strength—WLL represents the safe, continuous load capacity. For context, a stackable set with a full washer could approach 300 pounds static weight, requiring mounting hardware with a combined WLL of 600-800 pounds minimum.
Vibration Dampening Technology Explained
Understanding the science behind vibration control helps you evaluate hardware quality. True vibration dampening occurs through three mechanisms: isolation, absorption, and dissipation. Isolation physically separates the vibration source from the structure using elastic materials. Absorption converts vibrational energy into heat through material deformation. Dissipation spreads the energy across a broader area. Effective RV laundry mounts combine all three. Look for hardware featuring Sorbothane or similar viscoelastic polymers for absorption, coupled with spring or pneumatic isolation. The mounting system should also include mass damping—heavy steel plates that counteract vibration through inertia. Avoid simple rubber pads; they provide minimal isolation and deteriorate quickly under constant compression.
Space Optimization Strategies
RV square footage comes at a premium, and your laundry center installation must earn its keep by occupying minimal space while remaining fully functional.
Vertical Stacking Solutions
Maximizing vertical space requires more than just stacking your dryer on top of the washer. Quality stacking kits include a structural frame that distributes the upper unit’s weight to the floor, not just the washer below. The frame should feature adjustable feet to level both appliances independently and include anti-tip brackets that anchor to the wall. For travel, the stacking system must incorporate cross-bracing that prevents the units from shifting relative to each other. Some advanced systems even include a slide-out shelf between units for folding space that locks flush during transit.
Under-Counter Installations
Installing your laundry center beneath a countertop or in a cabinet requires low-profile mounting hardware that doesn’t interfere with door clearance. Recessed mounting plates that sit flush with the floor allow appliances to slide in completely. Side-mounting brackets that attach to cabinet walls rather than the floor provide excellent stability while preserving floor space. These installations demand precise measurements and often require custom-fabricated brackets to work around plumbing and electrical rough-ins.
Material Considerations for Durability
The harsh RV environment—temperature extremes, humidity, road salt, and constant vibration—demands corrosion-resistant materials. Marine-grade 316 stainless steel offers the best protection against rust but comes at a premium price. Galvanized steel with powder coating provides a cost-effective alternative for most applications. Avoid bare steel or zinc-plated hardware, which will rust within months. For vibration isolation components, inspect the rubber quality—automotive-grade EPDM rubber resists ozone and UV degradation far better than standard neoprene. Aluminum brackets work well for lightweight portable units but lack the strength for full-size appliances. All hardware should include Grade 8 or Class 10.9 fasteners; lower-grade bolts will stretch and loosen under dynamic loads.
Installation Surface Preparation
Your mounting hardware is only as strong as the surface it’s attached to. RV walls and floors aren’t built like residential construction, and assuming otherwise leads to catastrophic failures. Use a stud finder specifically calibrated for RV construction to locate aluminum or steel framing members—never mount heavy appliances to luan plywood or foam insulation alone. When attaching to the floor, remove the finish flooring and mount directly to the subfloor, which is typically 5/8" plywood over steel cross-members. For wall mounting, you must drill pilot holes and use self-tapping screws designed for metal framing, not wood screws. All mounting points need backing plates on the opposite side to prevent pull-through; these distribute the load across a larger area of the RV’s structure.
Essential Tools for DIY Installation
Attempting RV laundry mounting with basic household tools guarantees a subpar installation. You need a right-angle drill to work in tight cabinet spaces, cobalt drill bits for metal framing, and a torque wrench to ensure fasteners are tightened to specification without stripping threads. A digital angle finder ensures your mounting surfaces are perfectly level in both directions—critical for washer operation and vibration control. Invest in a hydraulic jack and load-leveling beams to temporarily support the appliance while you position mounting hardware. Don’t forget a vibration meter app for your smartphone; these tools use the phone’s accelerometer to measure actual vibration levels, helping you verify your installation’s effectiveness.
Step-by-Step Planning Process
Rushing into installation without meticulous planning creates rework and potential damage. Follow a systematic approach to ensure success.
Measuring Your Space Correctly
Begin by measuring your intended installation area at three points: floor width and depth at front, middle, and back. RV floors are rarely perfectly square, and even 1/4-inch variance can prevent appliance insertion. Measure vertical clearance accounting for slide-out mechanisms, door trims, and ceiling vents that might intrude into the space. Create a full-scale cardboard mockup of your laundry center’s footprint and test-fit it in the space, including simulating door swing and access to controls. Mark all plumbing and electrical rough-in locations on your mockup to verify they align with the appliance’s connections.
Locating Wall Studs and Support Beams
Use a combination of methods to map your RV’s structural supports. Start with a magnetic stud finder to locate steel framing screws, which indicate stud centers. Confirm with a small finish nail test in an inconspicuous area. Map the entire wall or floor grid, marking stud centers with painter’s tape. Take photos of your mapping for reference during installation. Pay special attention to corner studs and any headers above openings—these provide the strongest mounting points. Remember that vertical studs in RVs are typically spaced 16" or 24" on center, but horizontal blocking between studs may be irregular or absent.
Safety Standards and Code Compliance
RV appliances must comply with NFPA 1192 (Standard on Recreational Vehicles) regarding securement of appliances and weight distribution. Your mounting system should meet or exceed the appliance manufacturer’s specifications for mobile installation, which are often stricter than residential requirements. For gas dryers, installation must also comply with NFPA 54 (National Fuel Gas Code), requiring specific clearances and earthquake straps regardless of your mounting hardware. Document your installation with photos and torque specifications; this documentation proves compliance if warranty issues arise and is essential for insurance claims. Some states require RV modifications to be inspected and certified—check your local regulations before beginning work.
Common Installation Mistakes to Avoid
Even seasoned RVers make critical errors when mounting laundry centers. Never use lag bolts in RV framing—they’ll loosen within weeks due to the hollow nature of the walls. Avoid over-tightening fasteners, which crushes the wall structure and weakens the connection. Don’t skip the isolation pads between brackets and appliance feet; metal-on-metal contact amplifies vibration. Perhaps most importantly, never mount to slide-out floors without reinforcing the slide’s structure; the added weight can cause the slide mechanism to fail or become misaligned. Another frequent mistake is ignoring the appliance’s service clearance requirements—mounting too close to walls prevents access for repairs and maintenance.
Professional Installation vs. DIY: Making the Right Choice
While DIY installation saves money, certain scenarios demand professional expertise. If your installation requires modifying RV plumbing or electrical systems, involves structural reinforcement, or uses a suspension mounting system, hire a certified RV technician. Professionals carry insurance that covers damage to your RV and have the specialized tools for frame welding or fiberglass work. They also understand how to integrate your laundry center with the RV’s existing systems without compromising warranties. However, if you’re mounting a portable unit to a pre-built platform with accessible studs, DIY is perfectly reasonable. The deciding factor should be your comfort level with structural modifications and your ability to verify the installation meets safety standards.
Maintenance and Inspection Best Practices
Your mounting hardware requires regular inspection to maintain its integrity. Every 3,000 miles or before each major trip, check all fasteners with a torque wrench to ensure they haven’t loosened. Inspect vibration isolators for cracking, compression set, or chemical degradation—replace them at the first sign of wear. Look for stress cracks in brackets, particularly around weld points and mounting holes. After the first 500 miles post-installation, perform a detailed inspection as fasteners tend to settle and loosen initially. Keep a logbook of inspection dates, torque values, and any adjustments made. This documentation helps identify patterns and predicts when components need replacement before they fail catastrophically.
Frequently Asked Questions
How much weight can my RV floor actually support for a laundry center?
Most RV floors are designed for a distributed load of 40-50 pounds per square foot, but point loads from appliances require reinforcement. Check your RV’s cargo carrying capacity sticker and subtract your current load. For concentrated loads like laundry centers, you need to distribute weight across at least four floor joists using a mounting platform. When in doubt, consult your RV manufacturer or have a structural engineer evaluate your specific floor plan.
Will mounting a washer and dryer void my RV warranty?
It depends on your RV manufacturer’s policies and how the installation is performed. Most warranties remain valid if you use certified hardware installed according to the appliance manufacturer’s mobile installation guidelines. However, any damage caused by the modification—such as frame stress or water leaks—typically isn’t covered. Some manufacturers offer pre-approved installation kits that preserve warranty coverage. Always get written approval before drilling into structural components.
What’s the difference between RV-specific mounting hardware and residential earthquake straps?
Earthquake straps are designed for static seismic events, not continuous dynamic vibration. RV-specific hardware uses different isolation materials, has higher fatigue ratings, and accounts for multi-directional forces. Residential straps often mount to drywall anchors, which are useless in RV construction. RV hardware also includes features like locking mechanisms for travel and quick-release for service access that earthquake straps lack.
How do I reduce noise from my mounted RV laundry center during operation?
Noise reduction requires a multi-layered approach. Start with vibration-isolation mounts rated for your appliance’s weight. Add mass-loaded vinyl barriers between the appliance and surrounding cabinetry. Ensure all mounting points are properly torqued—loose hardware creates rattles. Install acoustic foam in adjacent compartments, and verify the appliance is perfectly level in both directions. Sometimes rotating the appliance 90 degrees changes the resonance frequency enough to significantly reduce perceived noise.
Can I install a full-size residential washer and dryer in my RV?
Full-size residential units are rarely feasible due to weight, power requirements, and space constraints. Most RVs cannot support the 200+ pound weight of a full-size washer, and the 240V power requirement for electric dryers exceeds standard RV electrical systems. Additionally, residential units aren’t designed for the vibration and movement of RV travel. If you have a large fifth-wheel or Class A diesel pusher with residential-style amenities, consult a professional about structural reinforcement and dedicated electrical circuits.
How often should I replace vibration isolation pads?
Quality isolation pads typically last 3-5 years under normal full-time RV use, but harsh conditions accelerate wear. Inspect pads every six months for cracking, permanent compression (more than 25% of original thickness), or hardening. Replace immediately if you notice increased vibration transfer or noise. Cheaper rubber pads may need annual replacement. Keep a spare set on hand for emergency replacement during travel.
Is it safe to mount a laundry center on a slide-out floor?
Slide-out floors can support laundry centers if properly reinforced, but this is an advanced installation. The slide mechanism must be rated for the additional weight, and you need to distribute the load across the slide’s structural members, not just the floor decking. Most slide floors are 3/4" plywood that flexes excessively under point loads. You’ll need to add a reinforced platform that ties into the slide’s steel frame and may need to upgrade the slide motor and gears to handle the weight.
What tools do I absolutely need that I probably don’t have?
Beyond basic hand tools, you’ll need a right-angle drill for tight spaces, a hydraulic jack with wood blocks for temporary support, and a torque wrench capable of measuring inch-pounds for small fasteners. A stud finder that works on metal framing is essential, as is a digital level with angle memory function. Many RVers also benefit from a borescope camera to inspect inside walls before drilling.
Can I reuse mounting hardware if I upgrade my appliances?
Never reuse mounting hardware when upgrading appliances. The previous installation has experienced metal fatigue, thread deformation, and stress cycling that weakens the components. Isolation pads have permanent compression set, and bolts may have stretched microscopically. The new appliance likely has different dimensions, weight distribution, and vibration characteristics requiring a fresh hardware specification. The cost of new hardware is negligible compared to the risk of appliance damage or safety hazards.
How do I know if my installation is failing before catastrophic damage occurs?
Early warning signs include new rattling sounds during travel, visible gaps forming between the appliance and mounting brackets, or doors that no longer align properly. Check for rust streaks around mounting points, which indicate fastener movement. Excessive vibration during the spin cycle that you didn’t experience previously suggests isolation pad failure. Perform the “push test”—firmly push the appliance from multiple directions; any movement beyond 1/8 inch indicates loose hardware. Address these signs immediately before they escalate.